Customizing Creativity Blog

Wedding Invitations and Stationery

invitation cards

Know everything about various formats and structures for your invitations!

Wedding Invitations

Hello everyone!

Thank you so much for all your never-ending love & support!
It means a lot to all of us here, at the Customizing Creativity family, to have you here week-by-week reading, loving & enjoying all our blog posts!

We sincerely thank you!

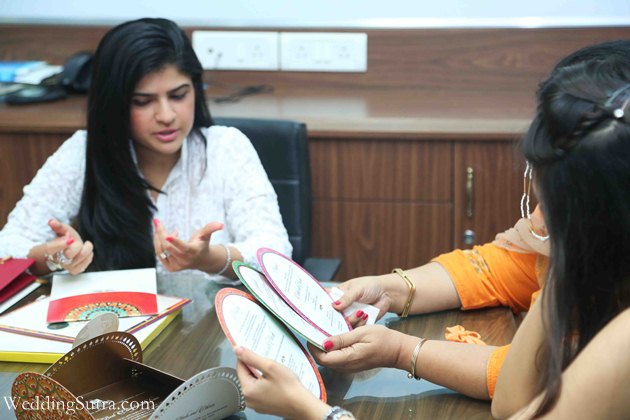
Today, what we are going to talk about are the various structures & formats for your wedding invitations – this totally is the first look of your card, & it is with this, that your guest will get the first glimpse of what is inside.

The format / structure of the invitation also determines how much paper & printing goes into the card, thus finally determining your final costs as well.

For all you lovely people, we have put together a handy guide on some of the most popular & loved formats that not only look great but also make every card unique.

We totally understand that this is not what you do daily!
But is what we do each & every day & with all our heart & passion!

Hence, to make this easy-peasy for you, we have collated below a glossary of some technical words you should know before you read on!

Main Envelope / Outer envelope :
This is the first look of your invitation, as it is the outer most cover of your card. This is where your guest name & address will be written.

Folder / Jacket :
This is normally the second layer in your card – this is what you are pulling out of the main envelope. This acts as a holder for your inserts.
Not all invite formats have the folder, you’ll see more details on this as you read on.
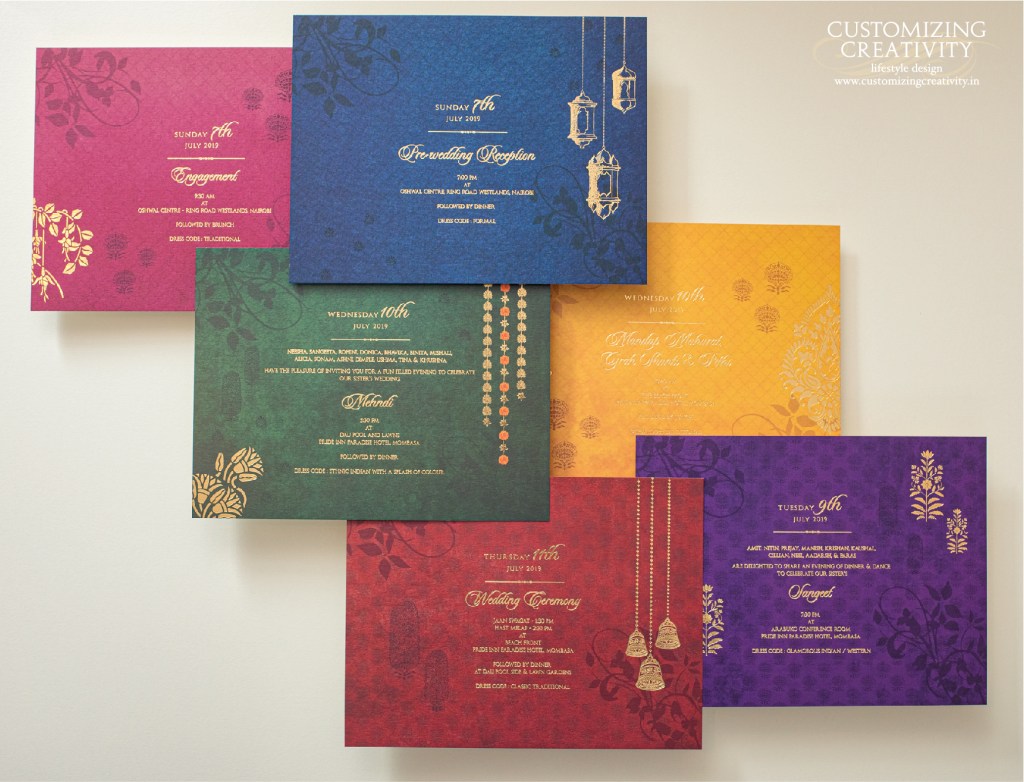
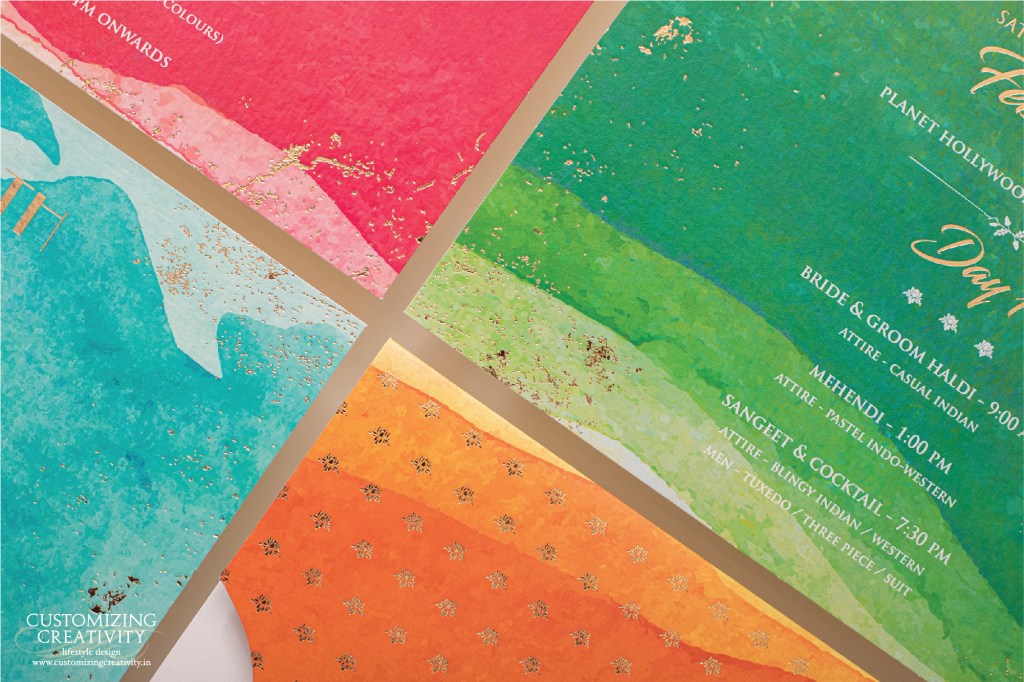
Inserts / Leaves :
Your inserts are the different inlets of printed paper, that give information like date, time, venues, dress codes & family names. For most Indian / South – Asian weddings where there are multiple functions, having inserts / leaves makes it easier for you to create combinations for different events

We hope this helps, to make the forthcoming data easier to understand 🙂

Lets dive straight in!

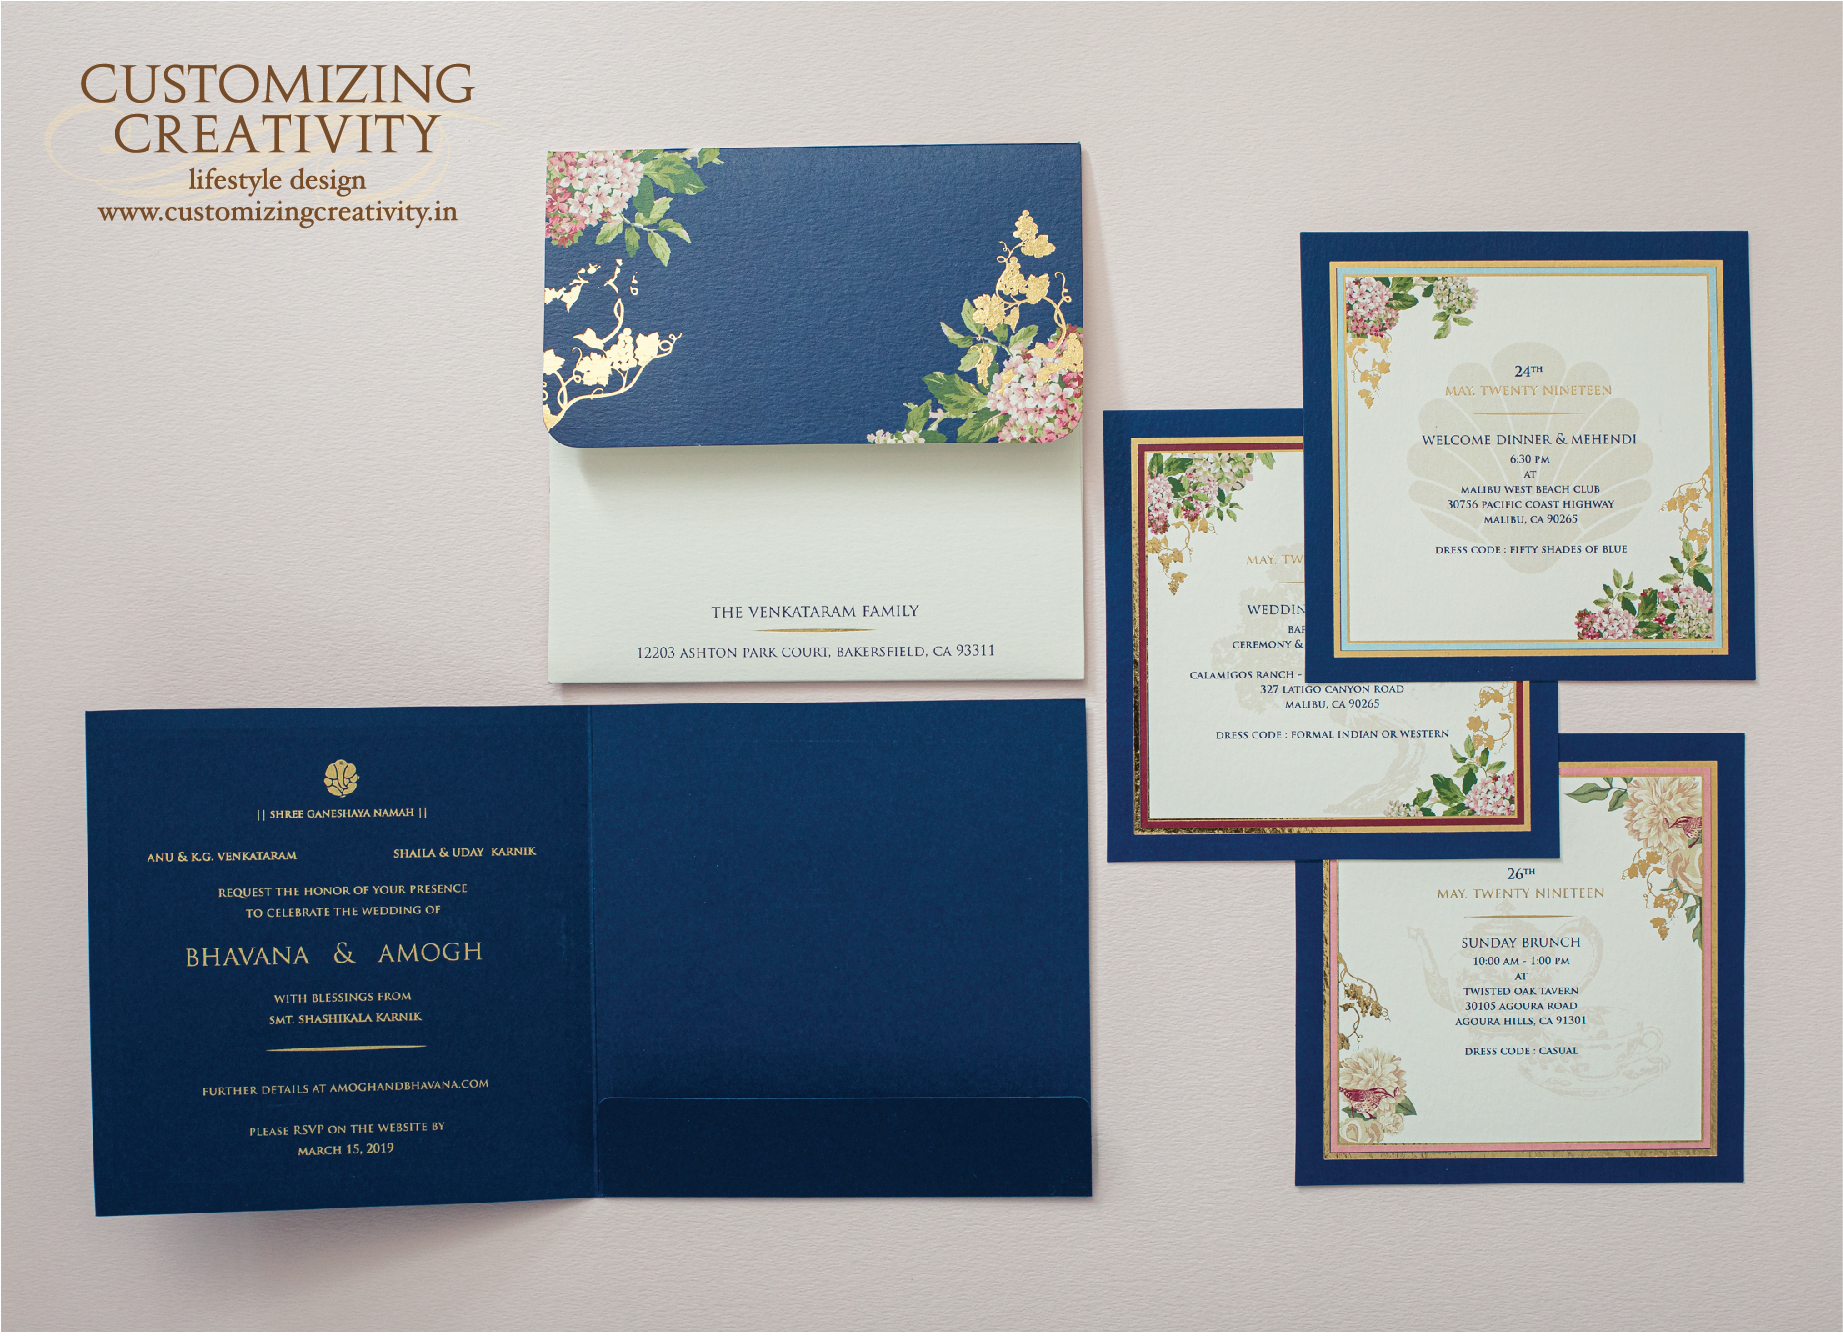
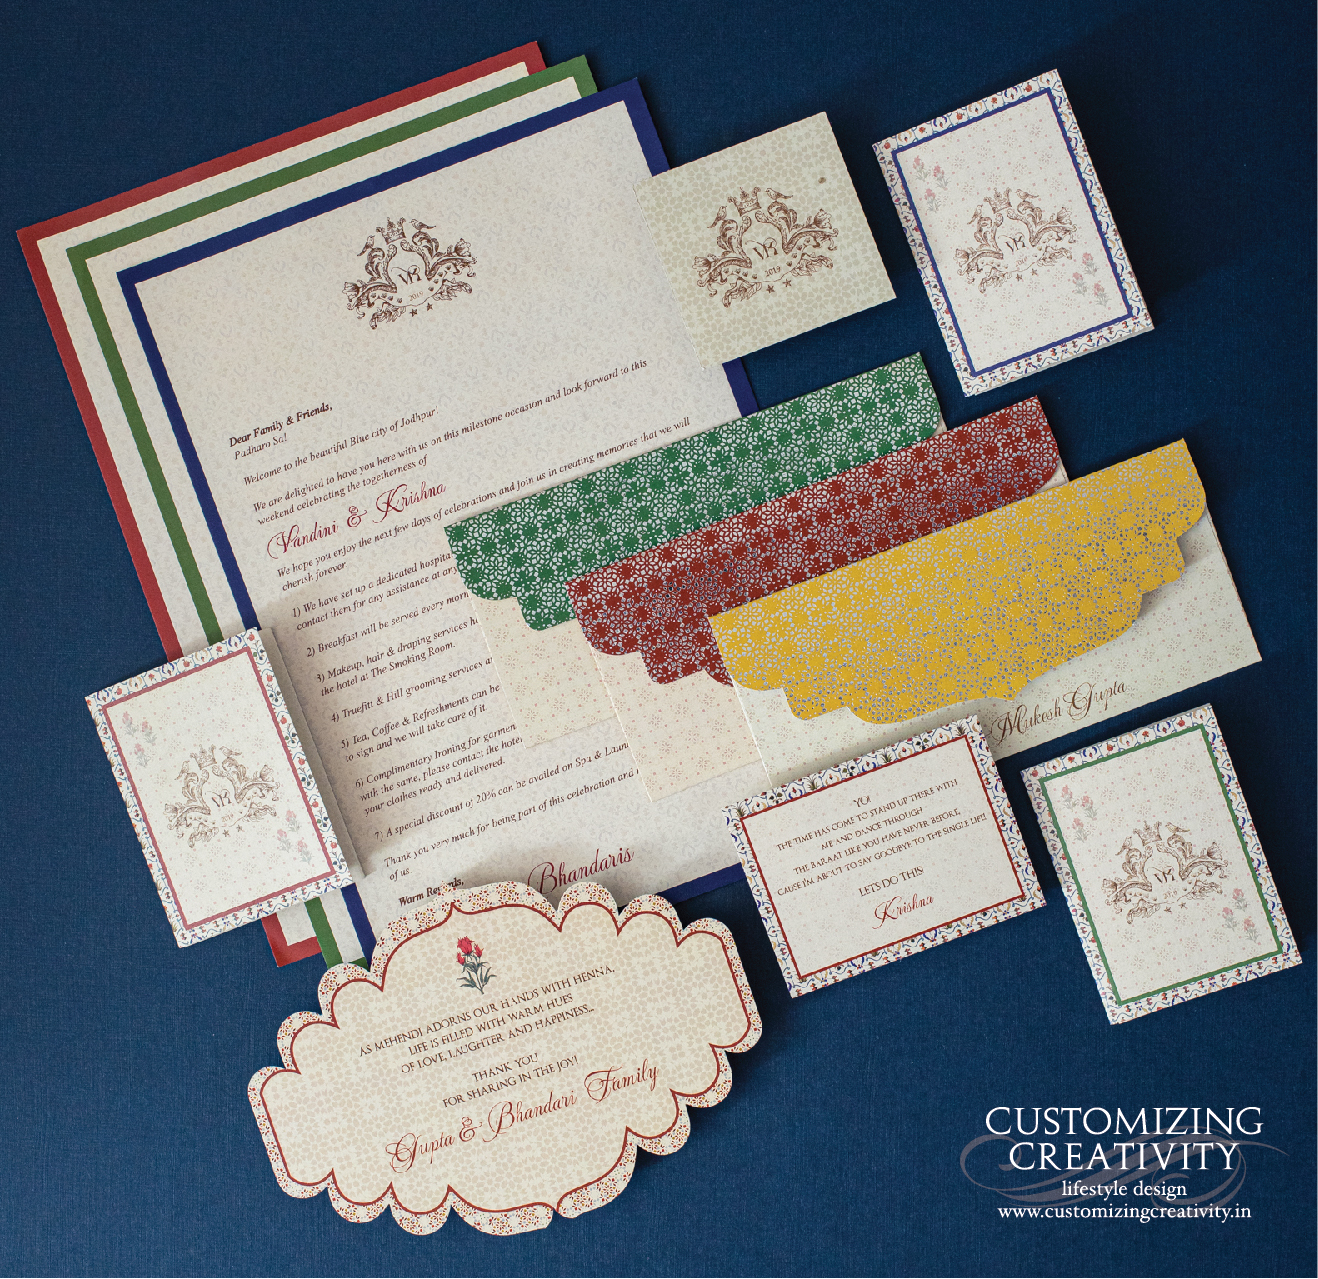
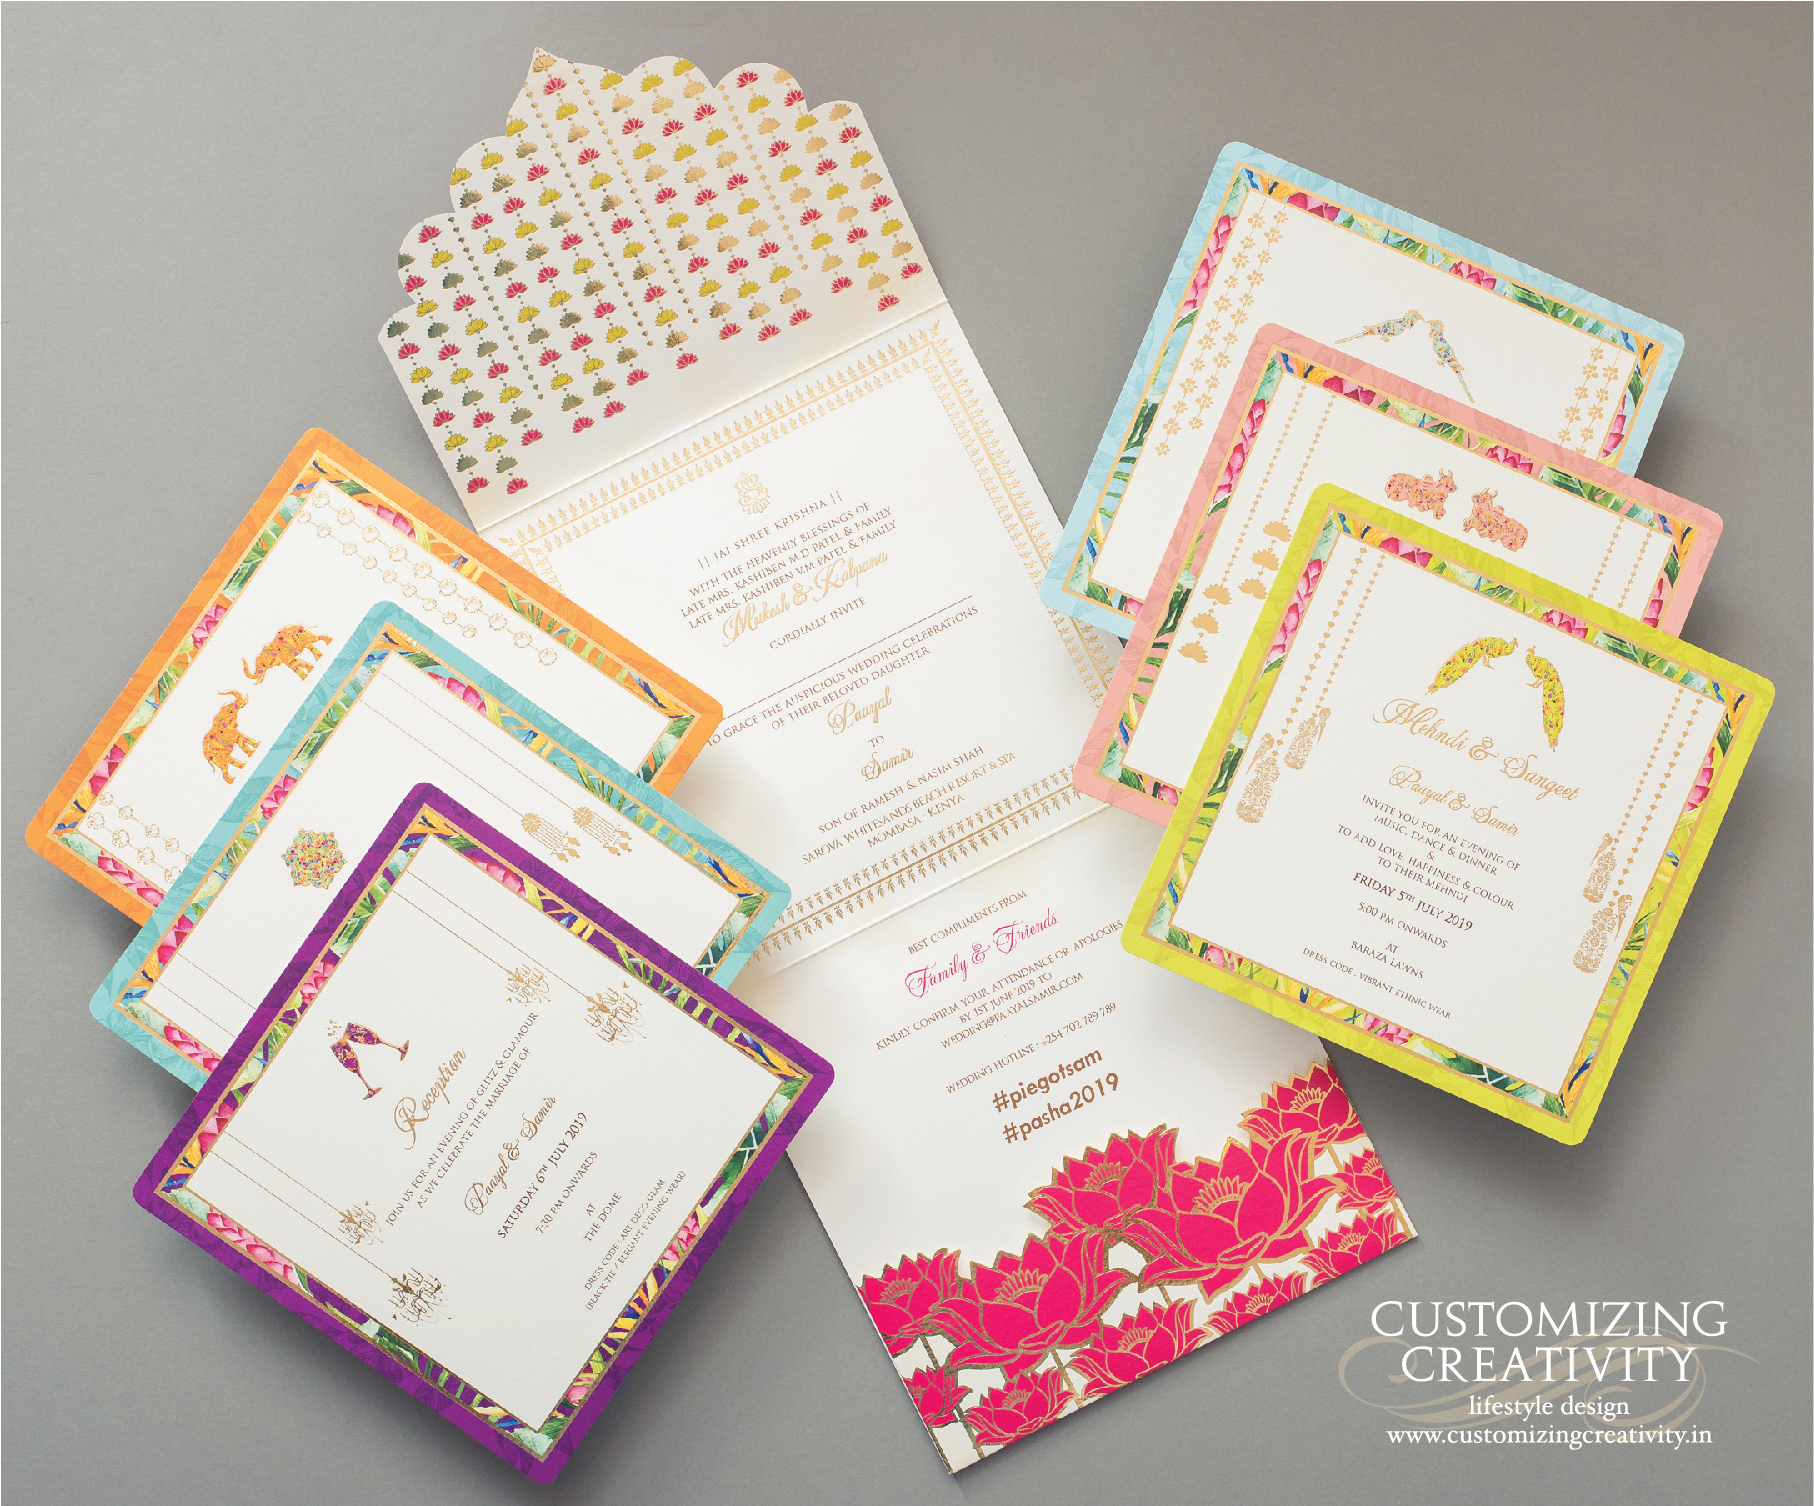
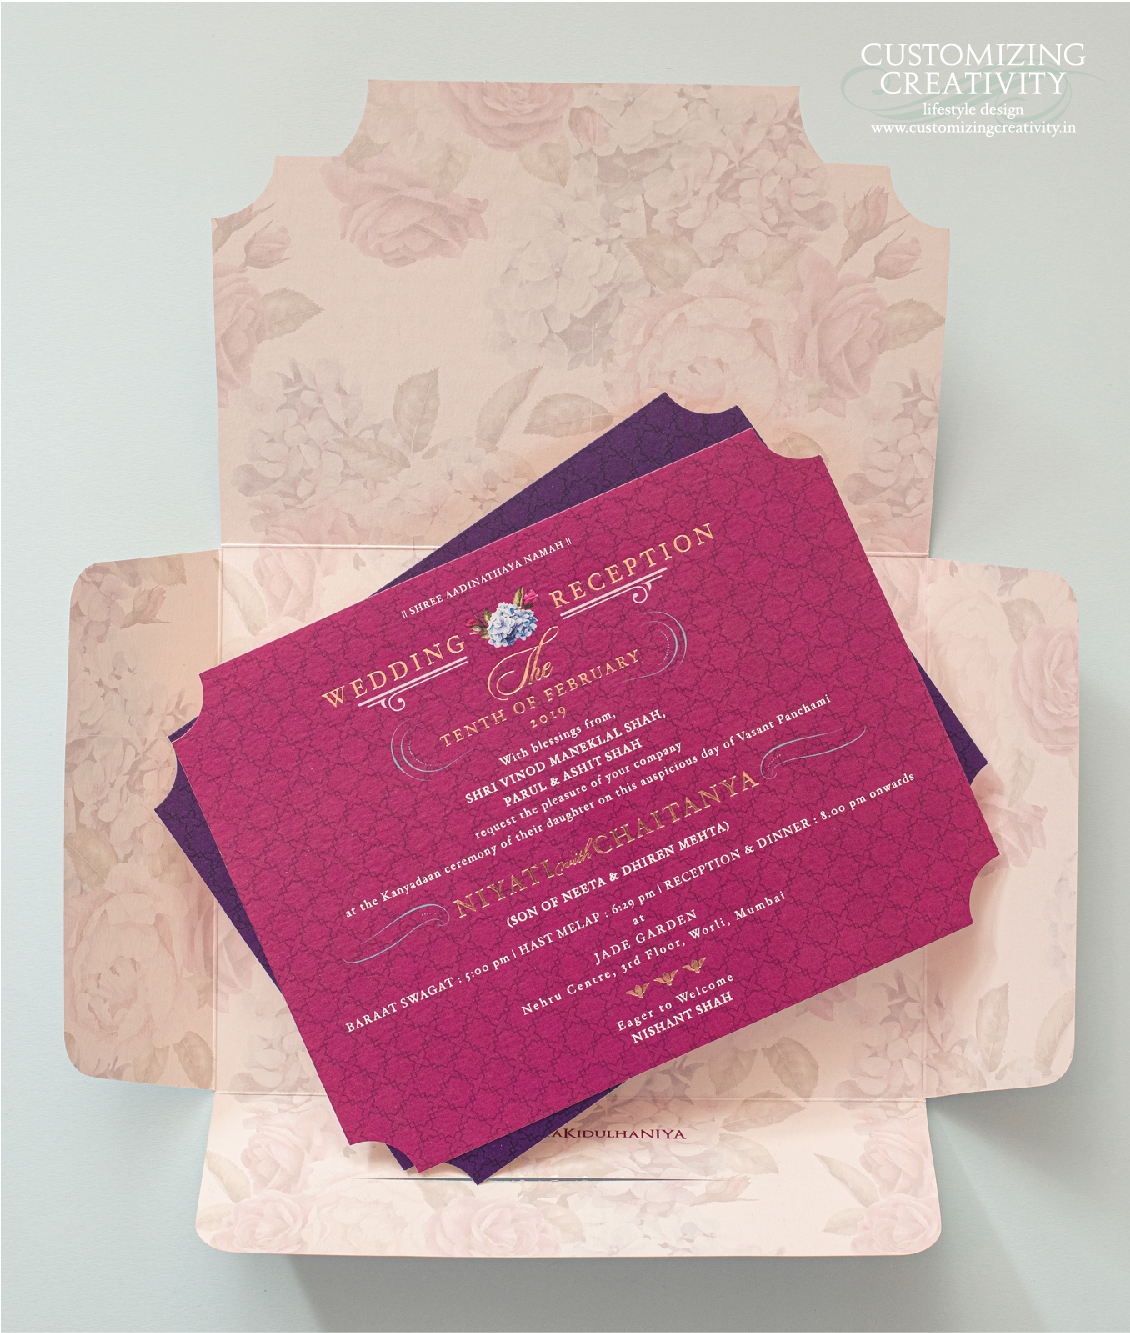
1) The main envelope + folder + inserts (conventional & classic)

What this essentially includes is an envelope, then what comes next is the folder (which normally opens from the left, like a greeting card, or from the top).

When you further open the folder, you will see a pocket / holder for all the inserts for the functions!

This structure is one that has been used over the years, making it one of the most popular formats. It works really well for weddings or events, where the information needs to be split up in various date wise functions, specifically more than five, as this type of a folder can hold the inserts very well.


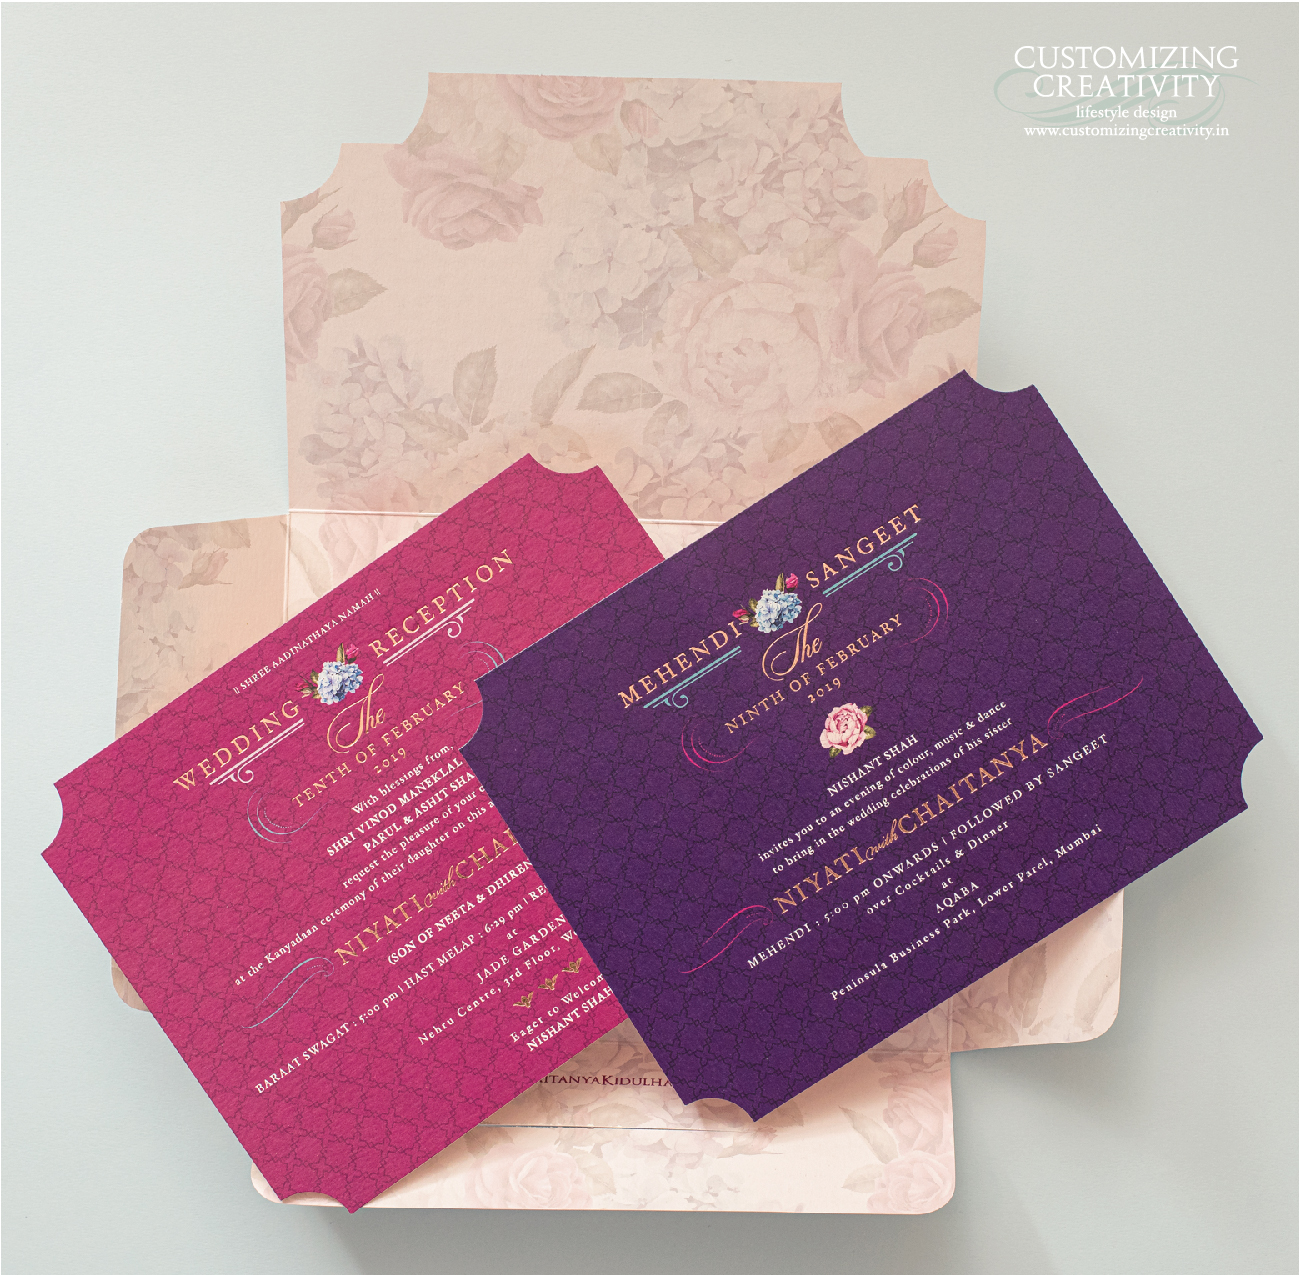
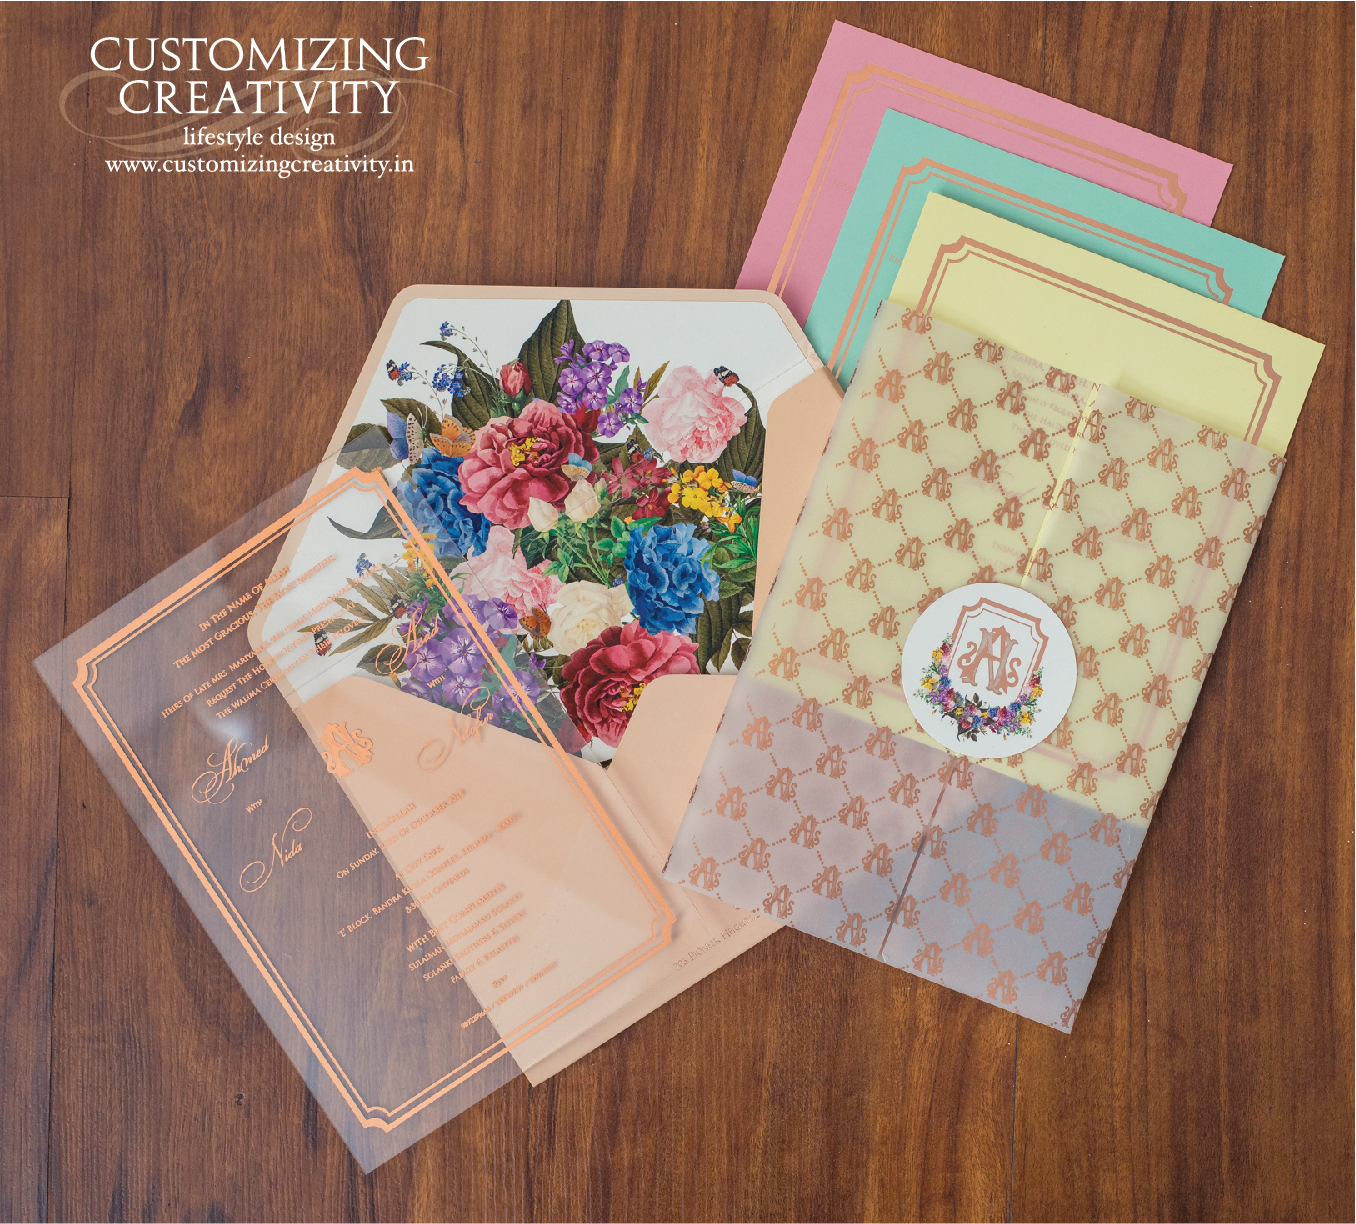
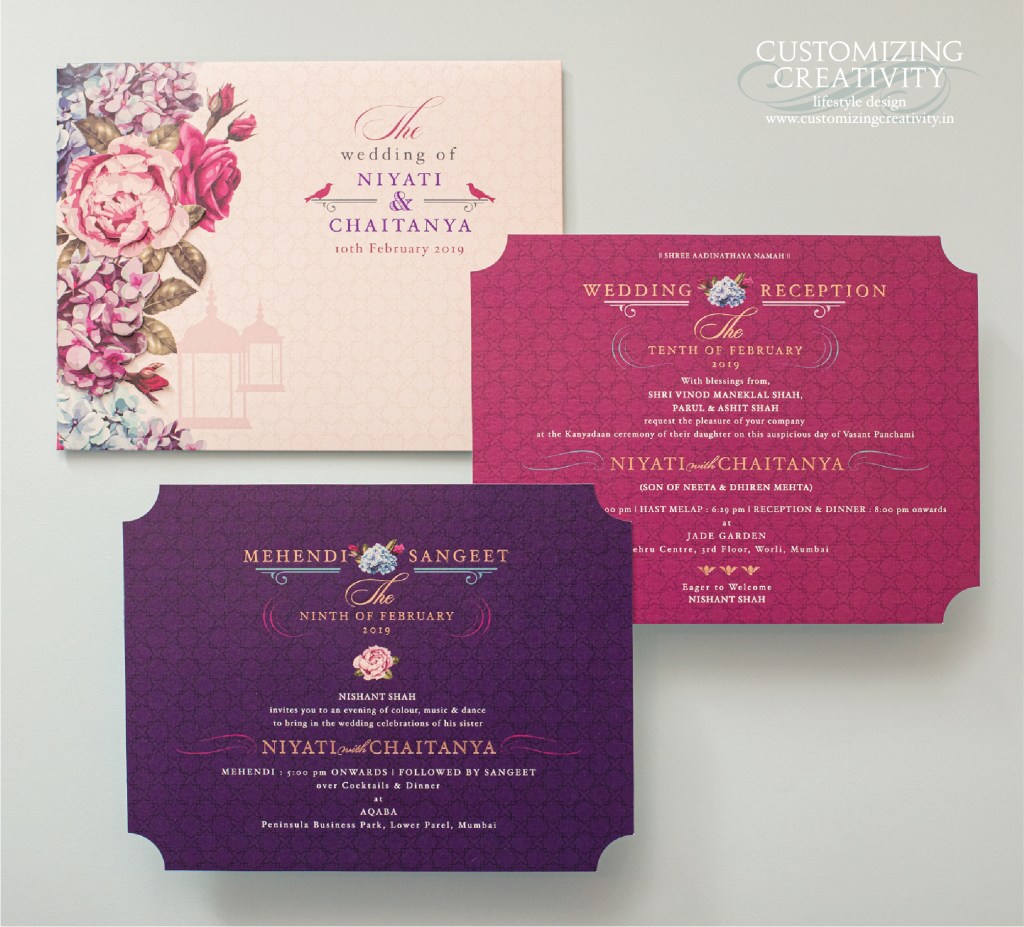
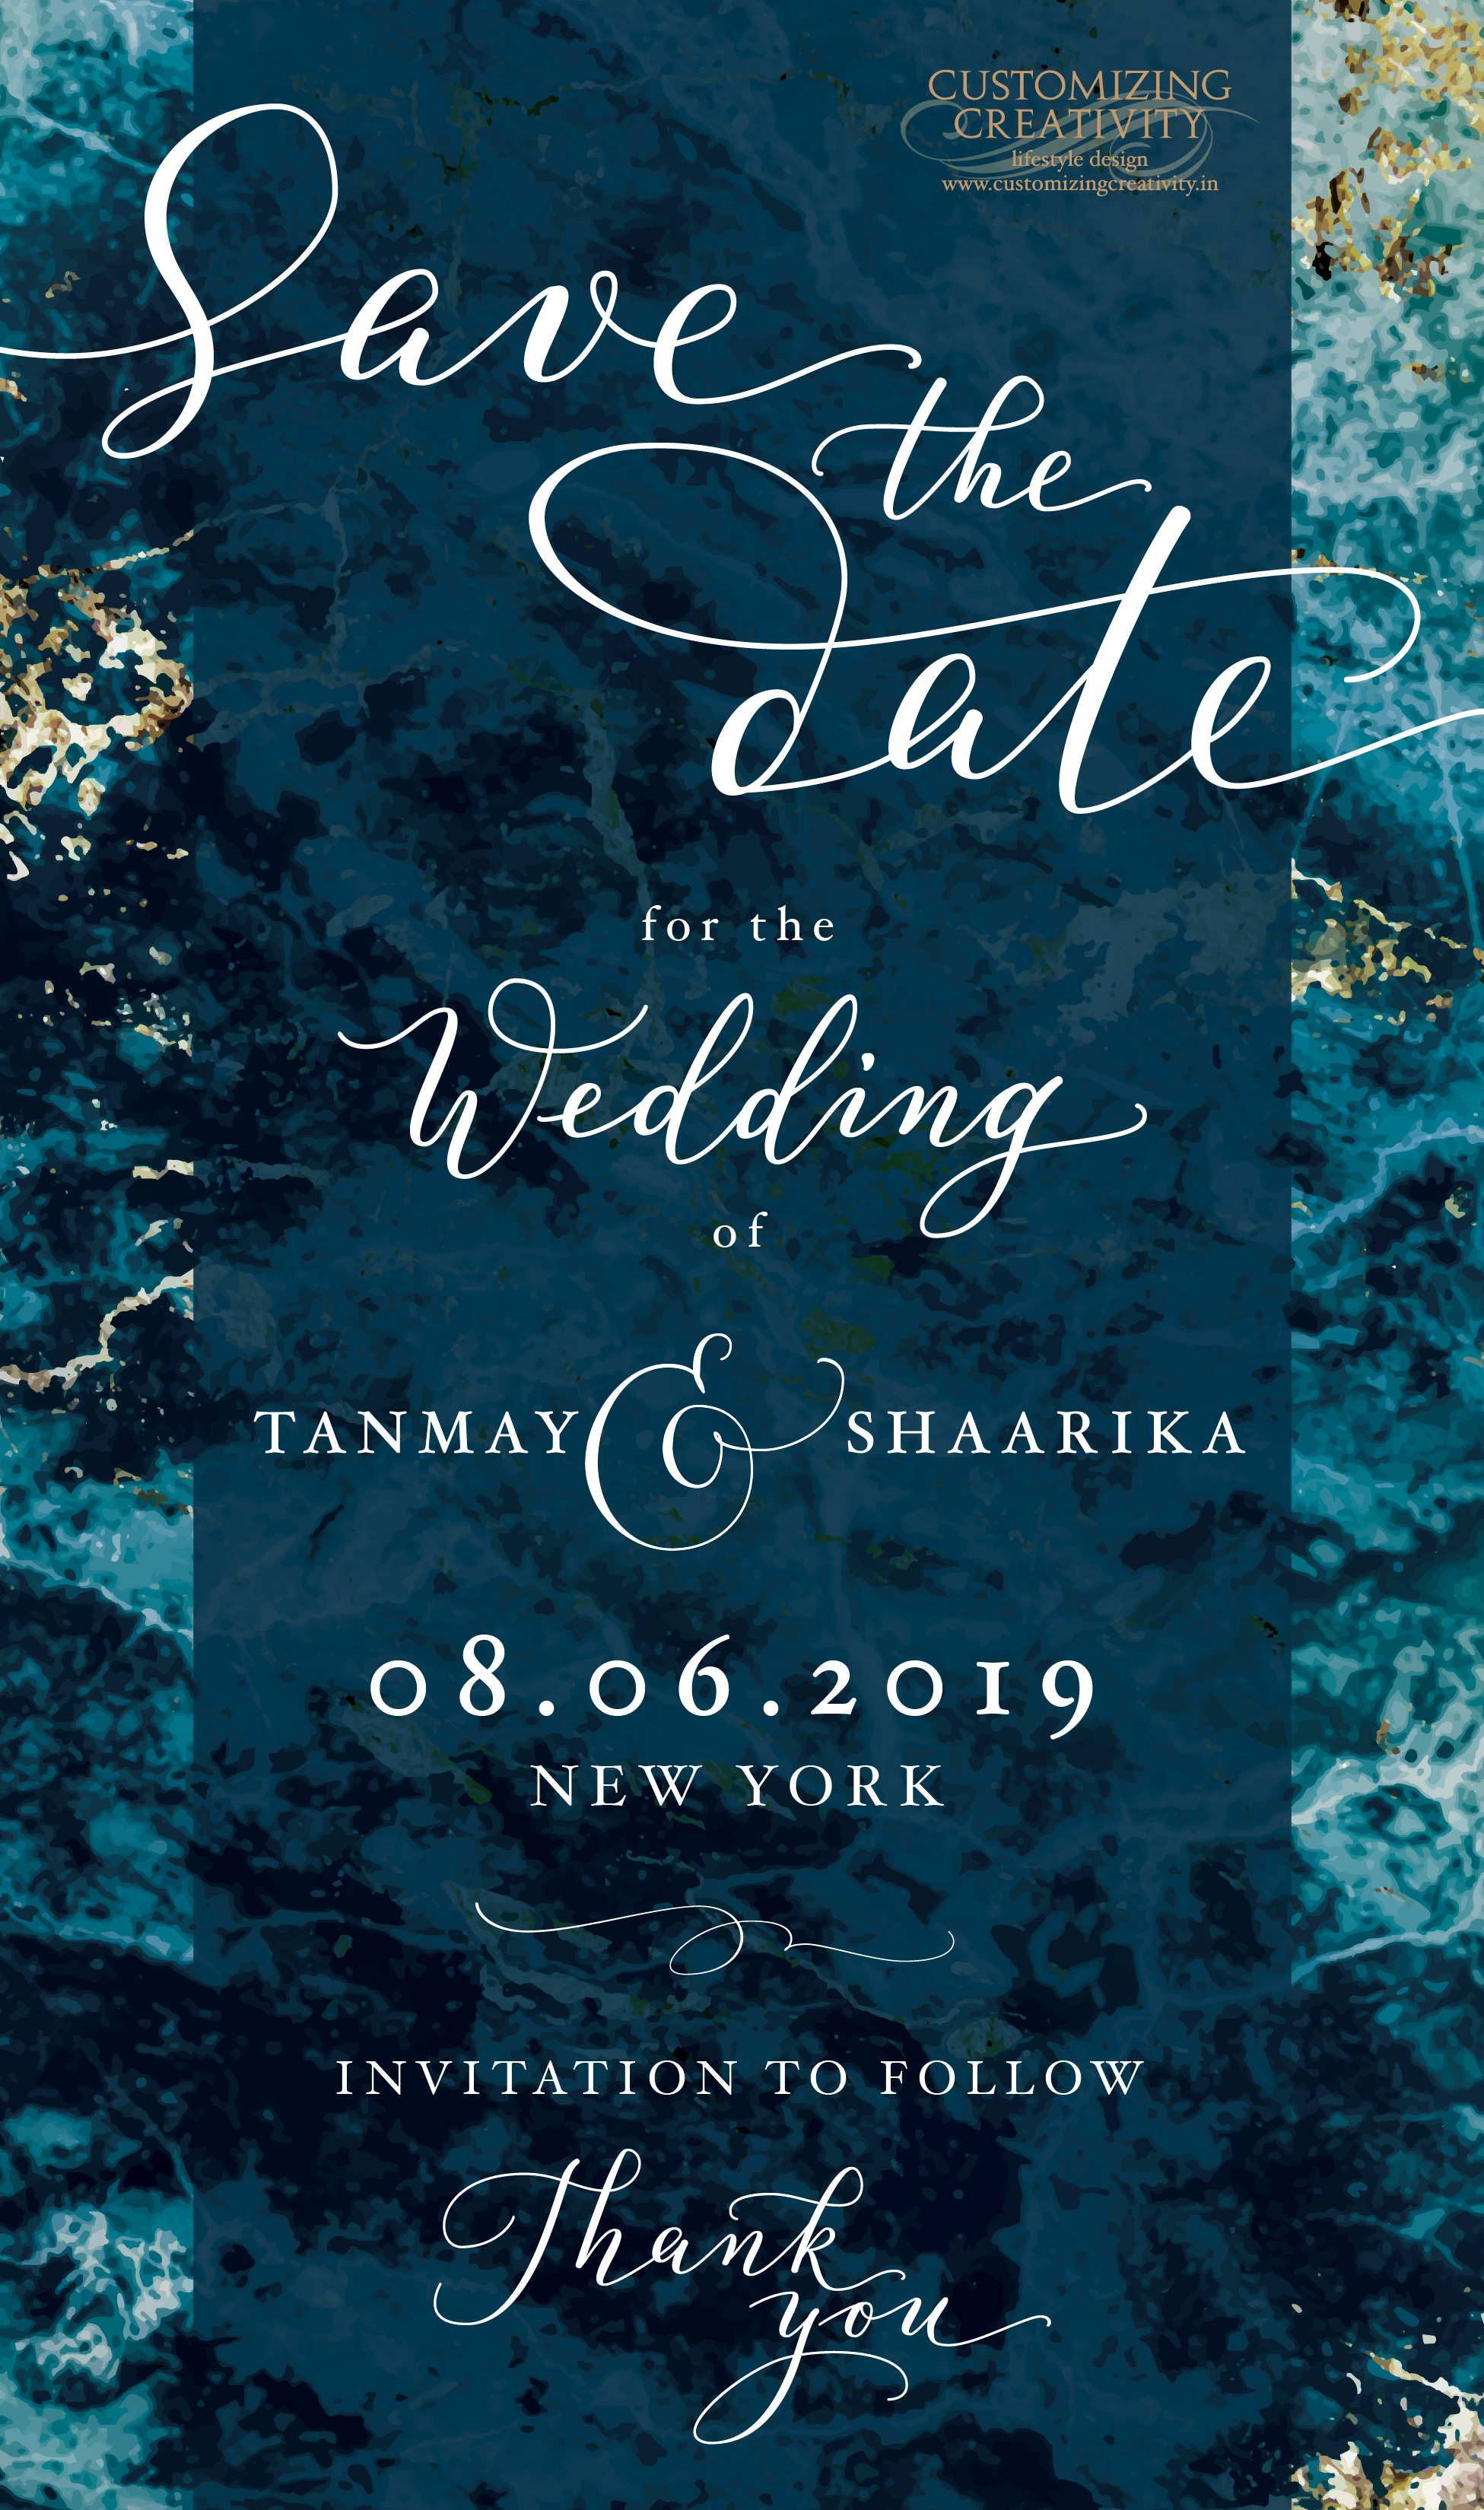
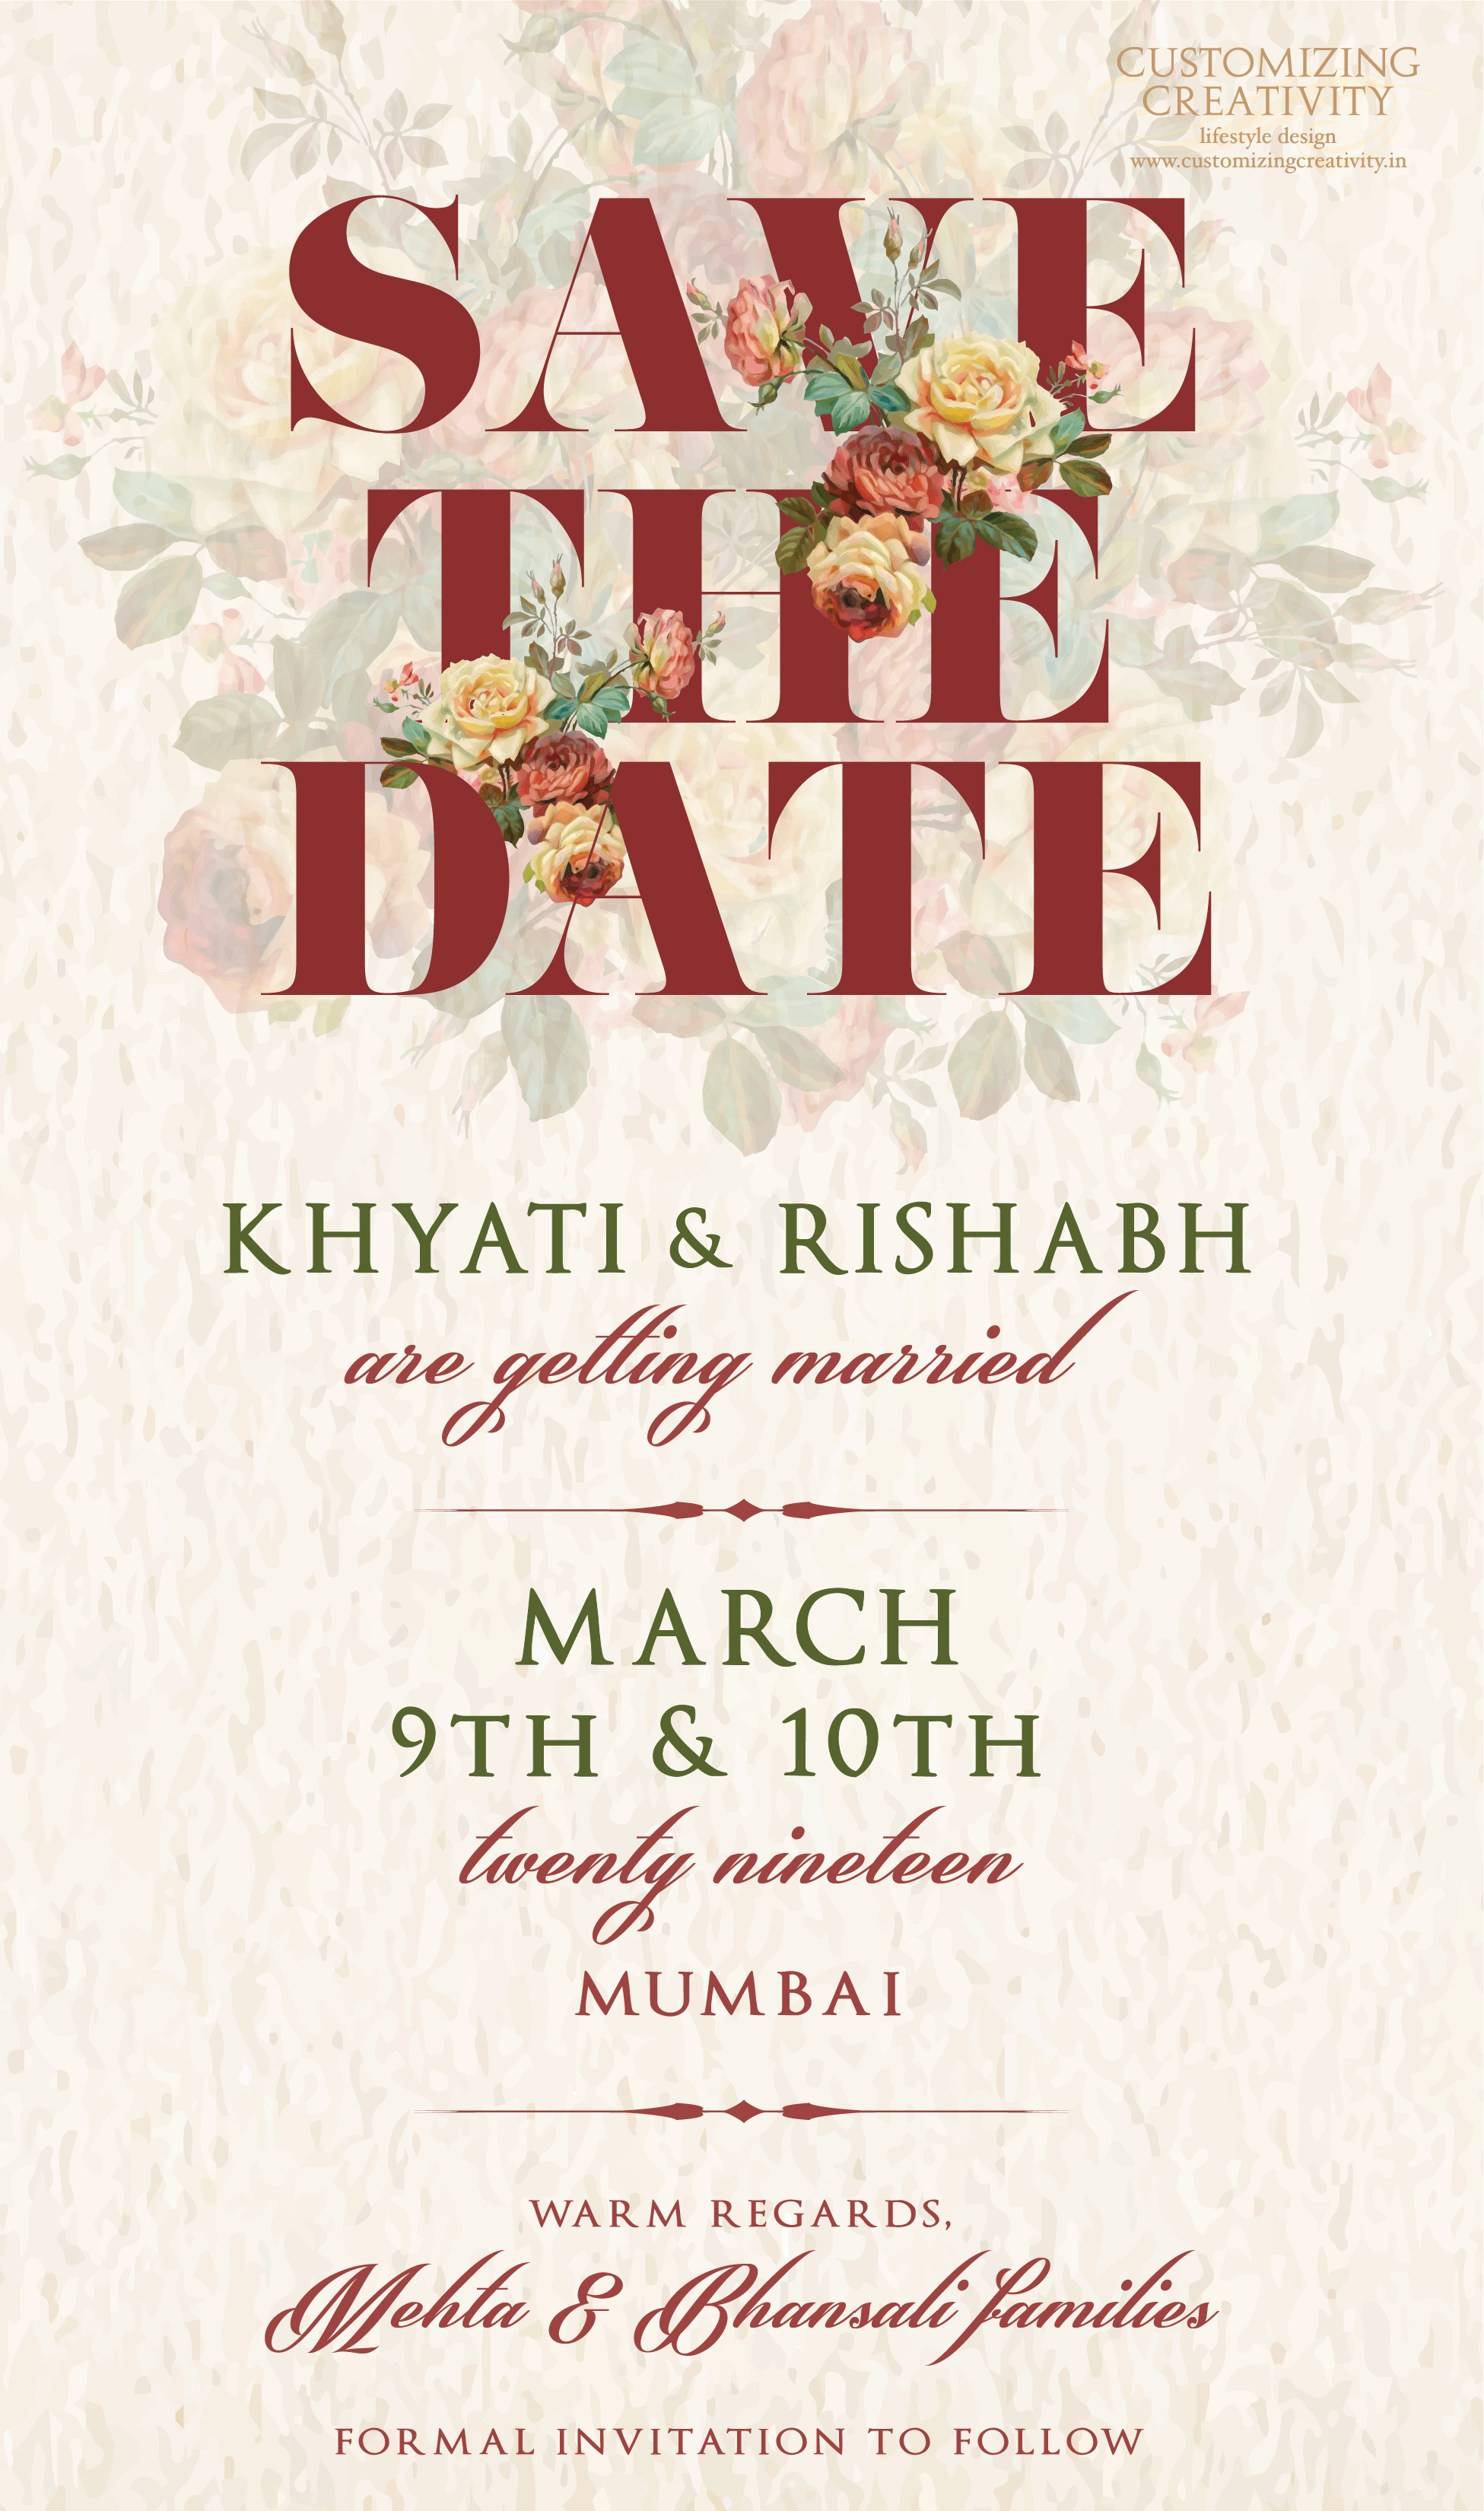
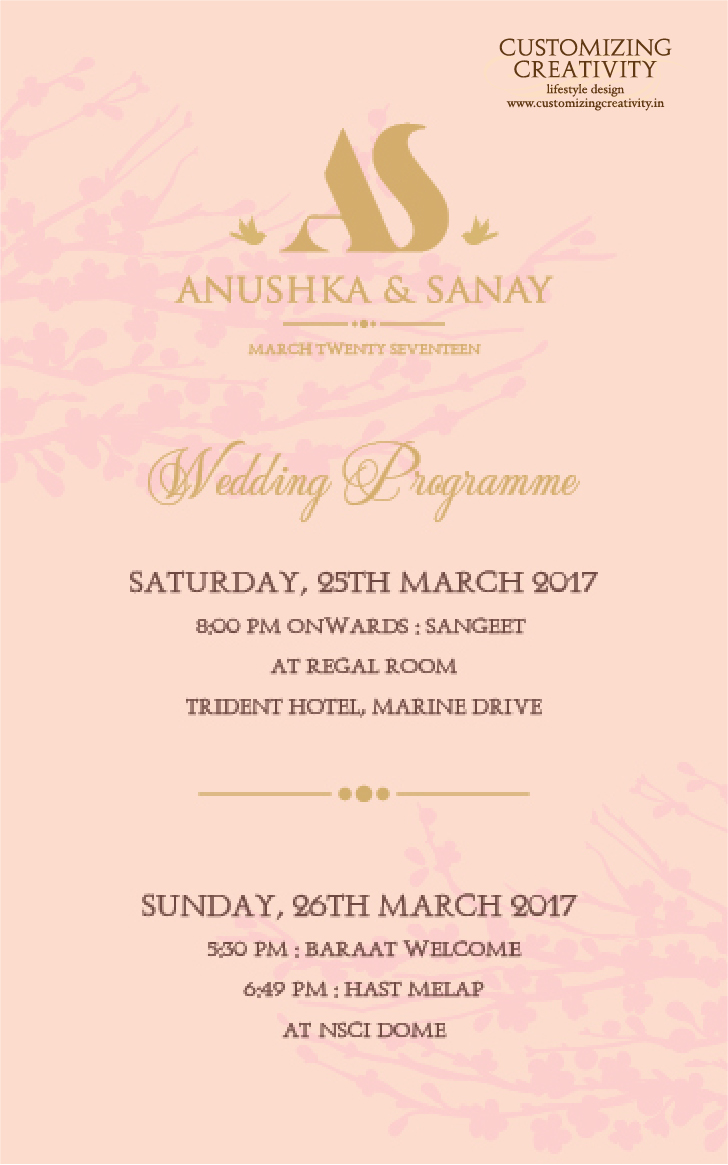
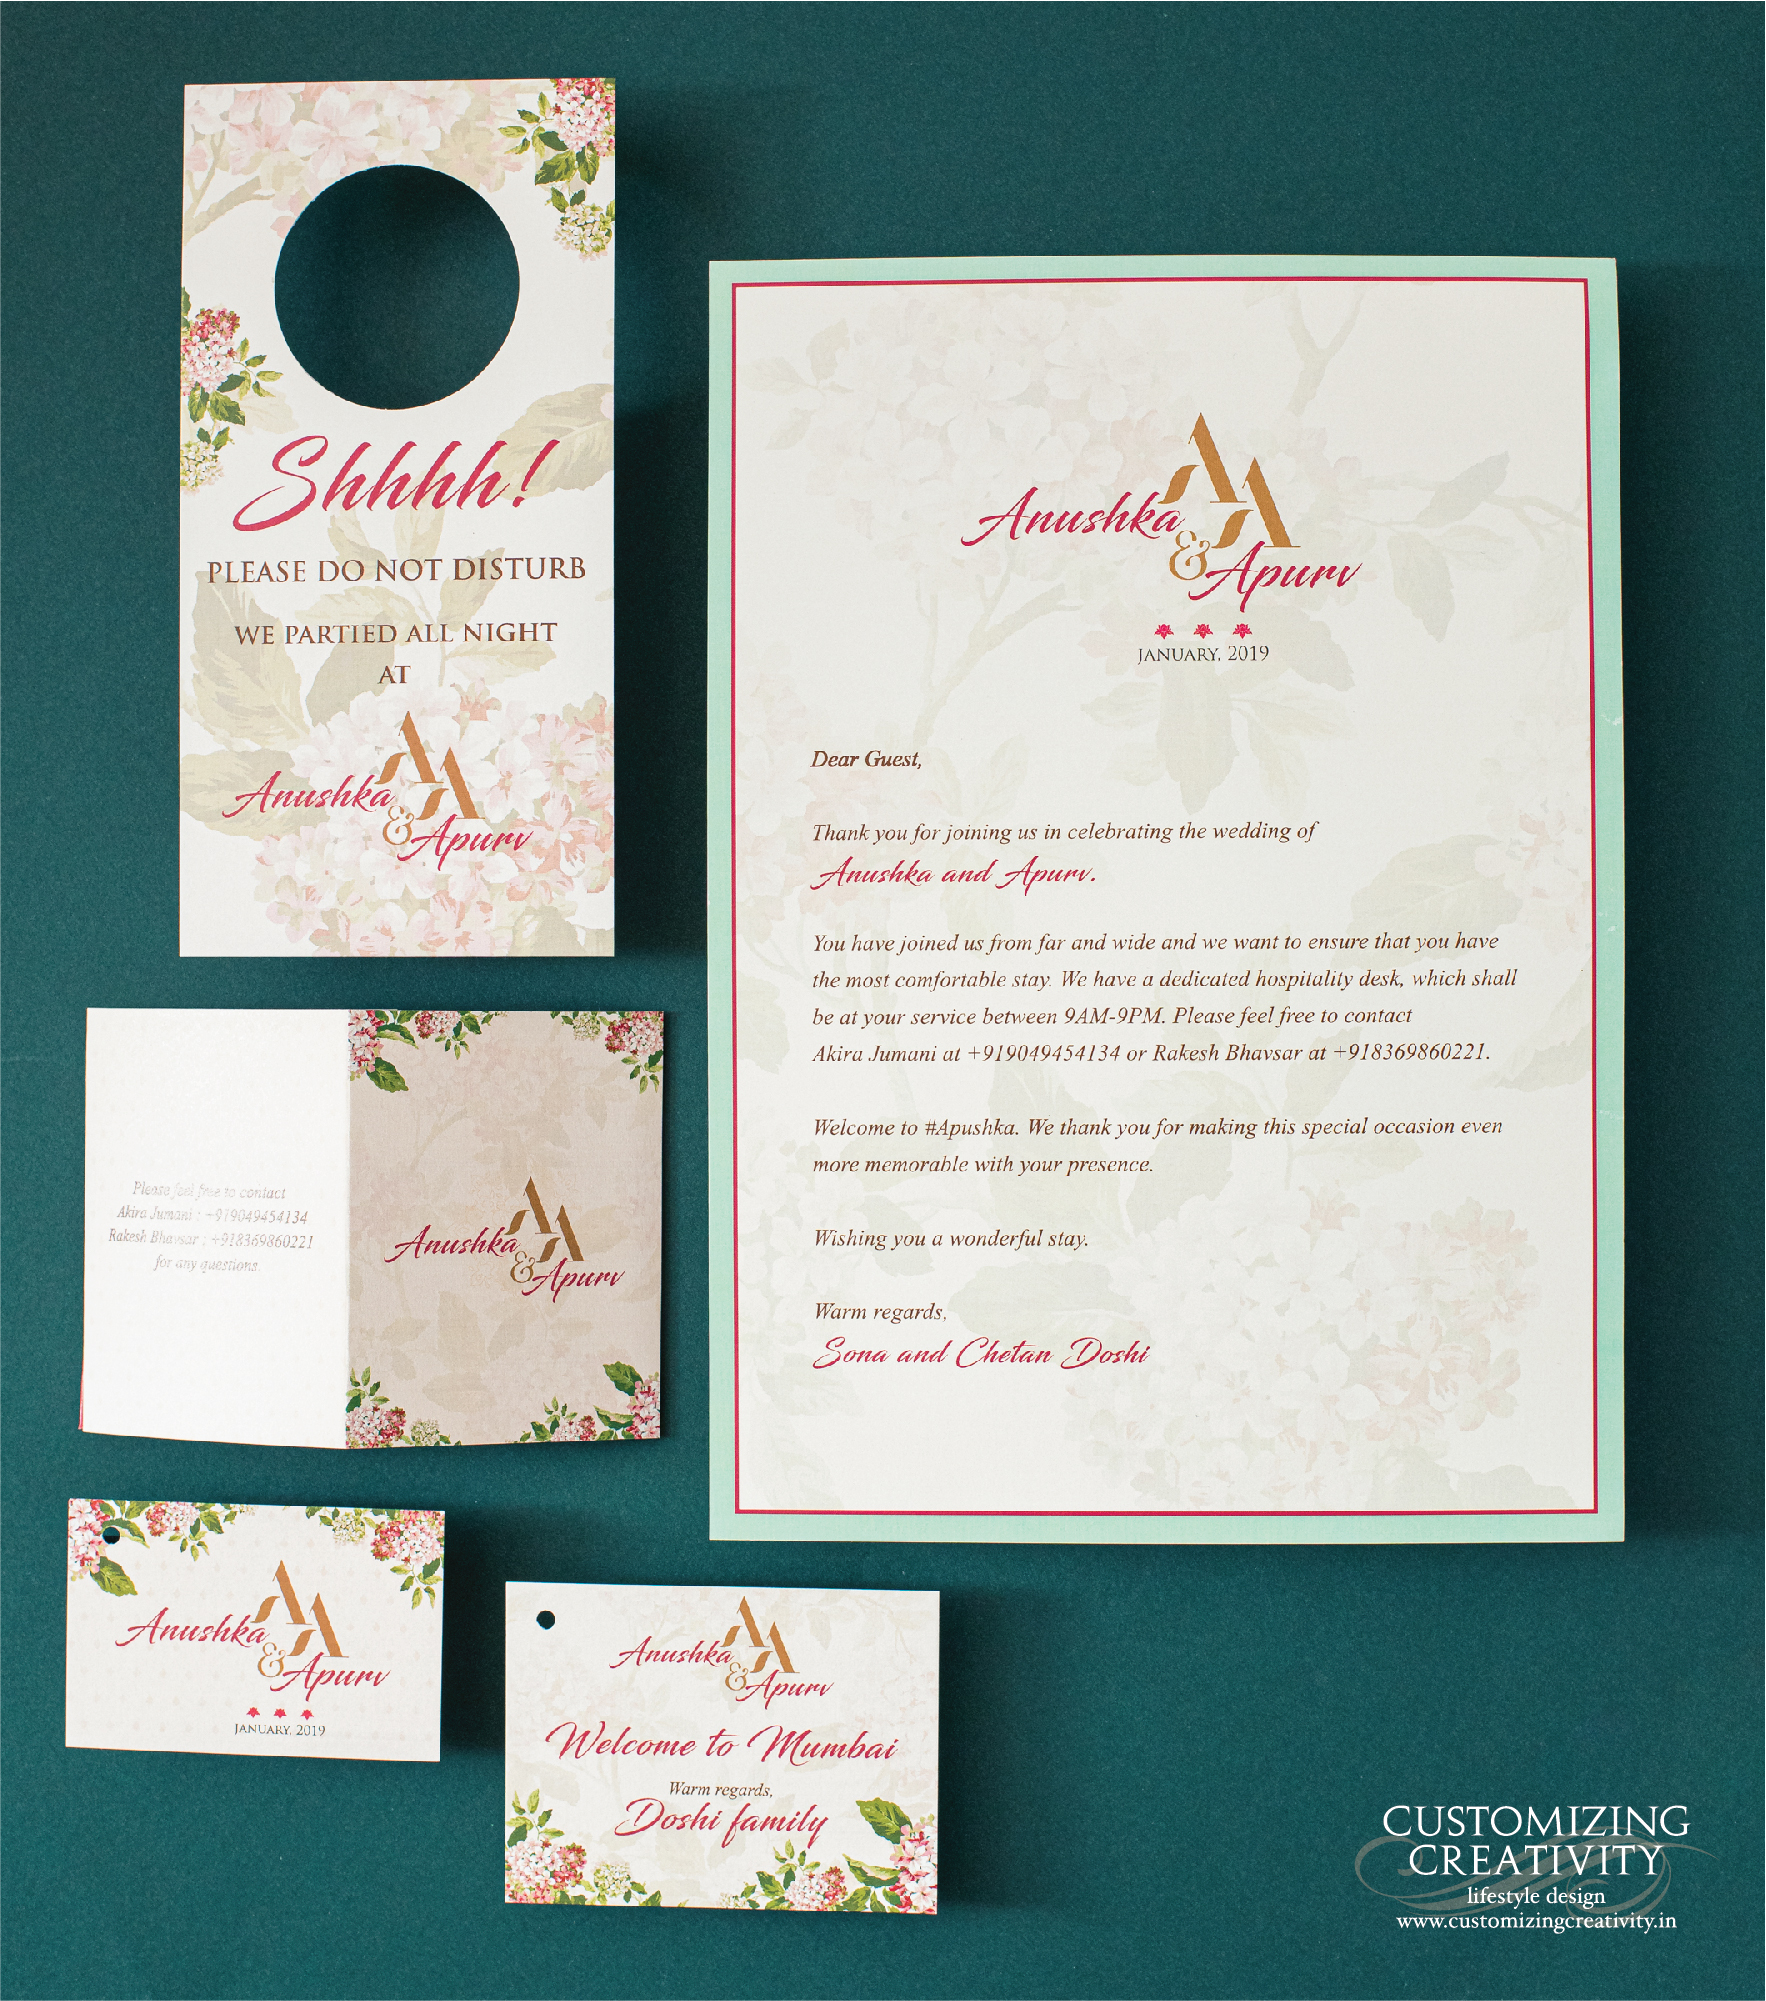
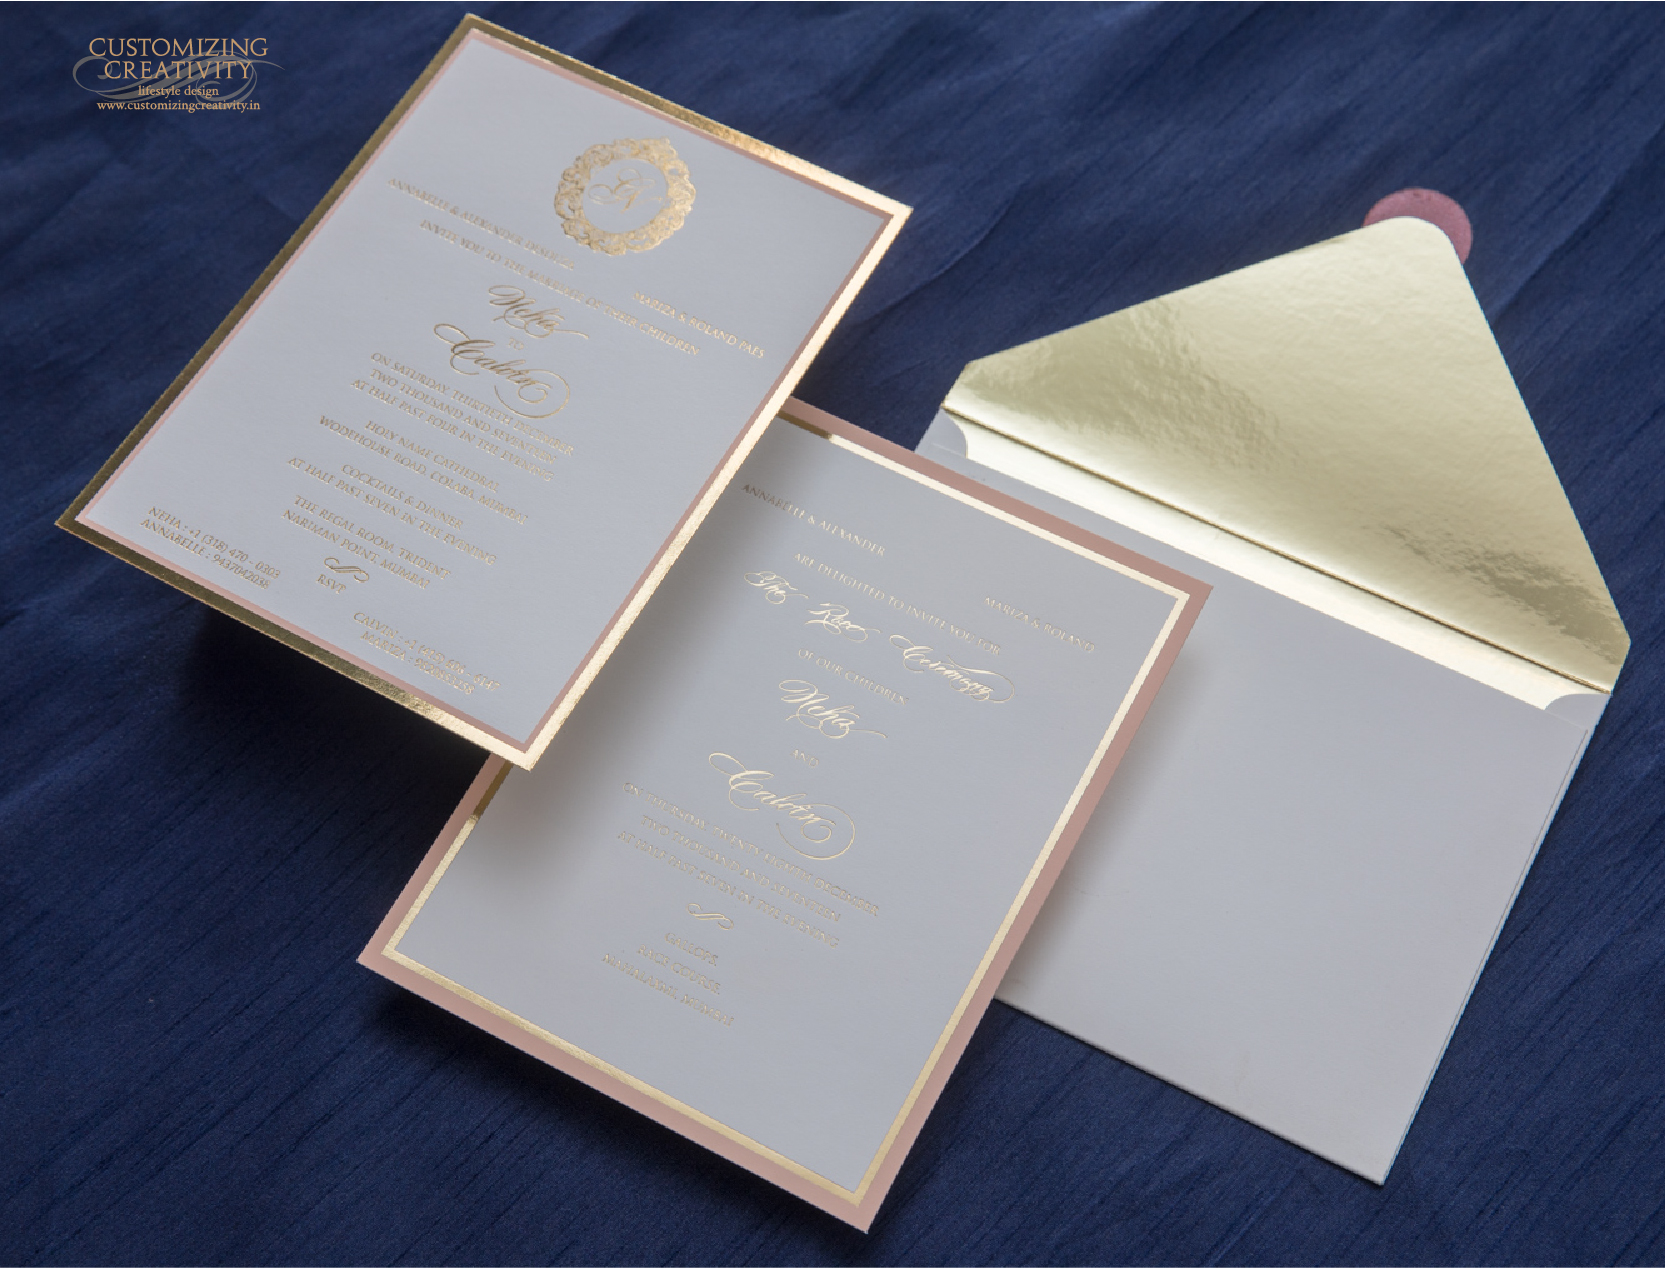
2) The Plain Jane (simple & timeless)

In this style, we have the envelope opening directly into the insert(s).
What this means is that, there is no separate folder / jacket for the inserts, thus reducing the amount of paper used & printing done.
Incase you’d like to cut costs or reduce usage of paper & printing, this proves to be a good alternative to the previous format.

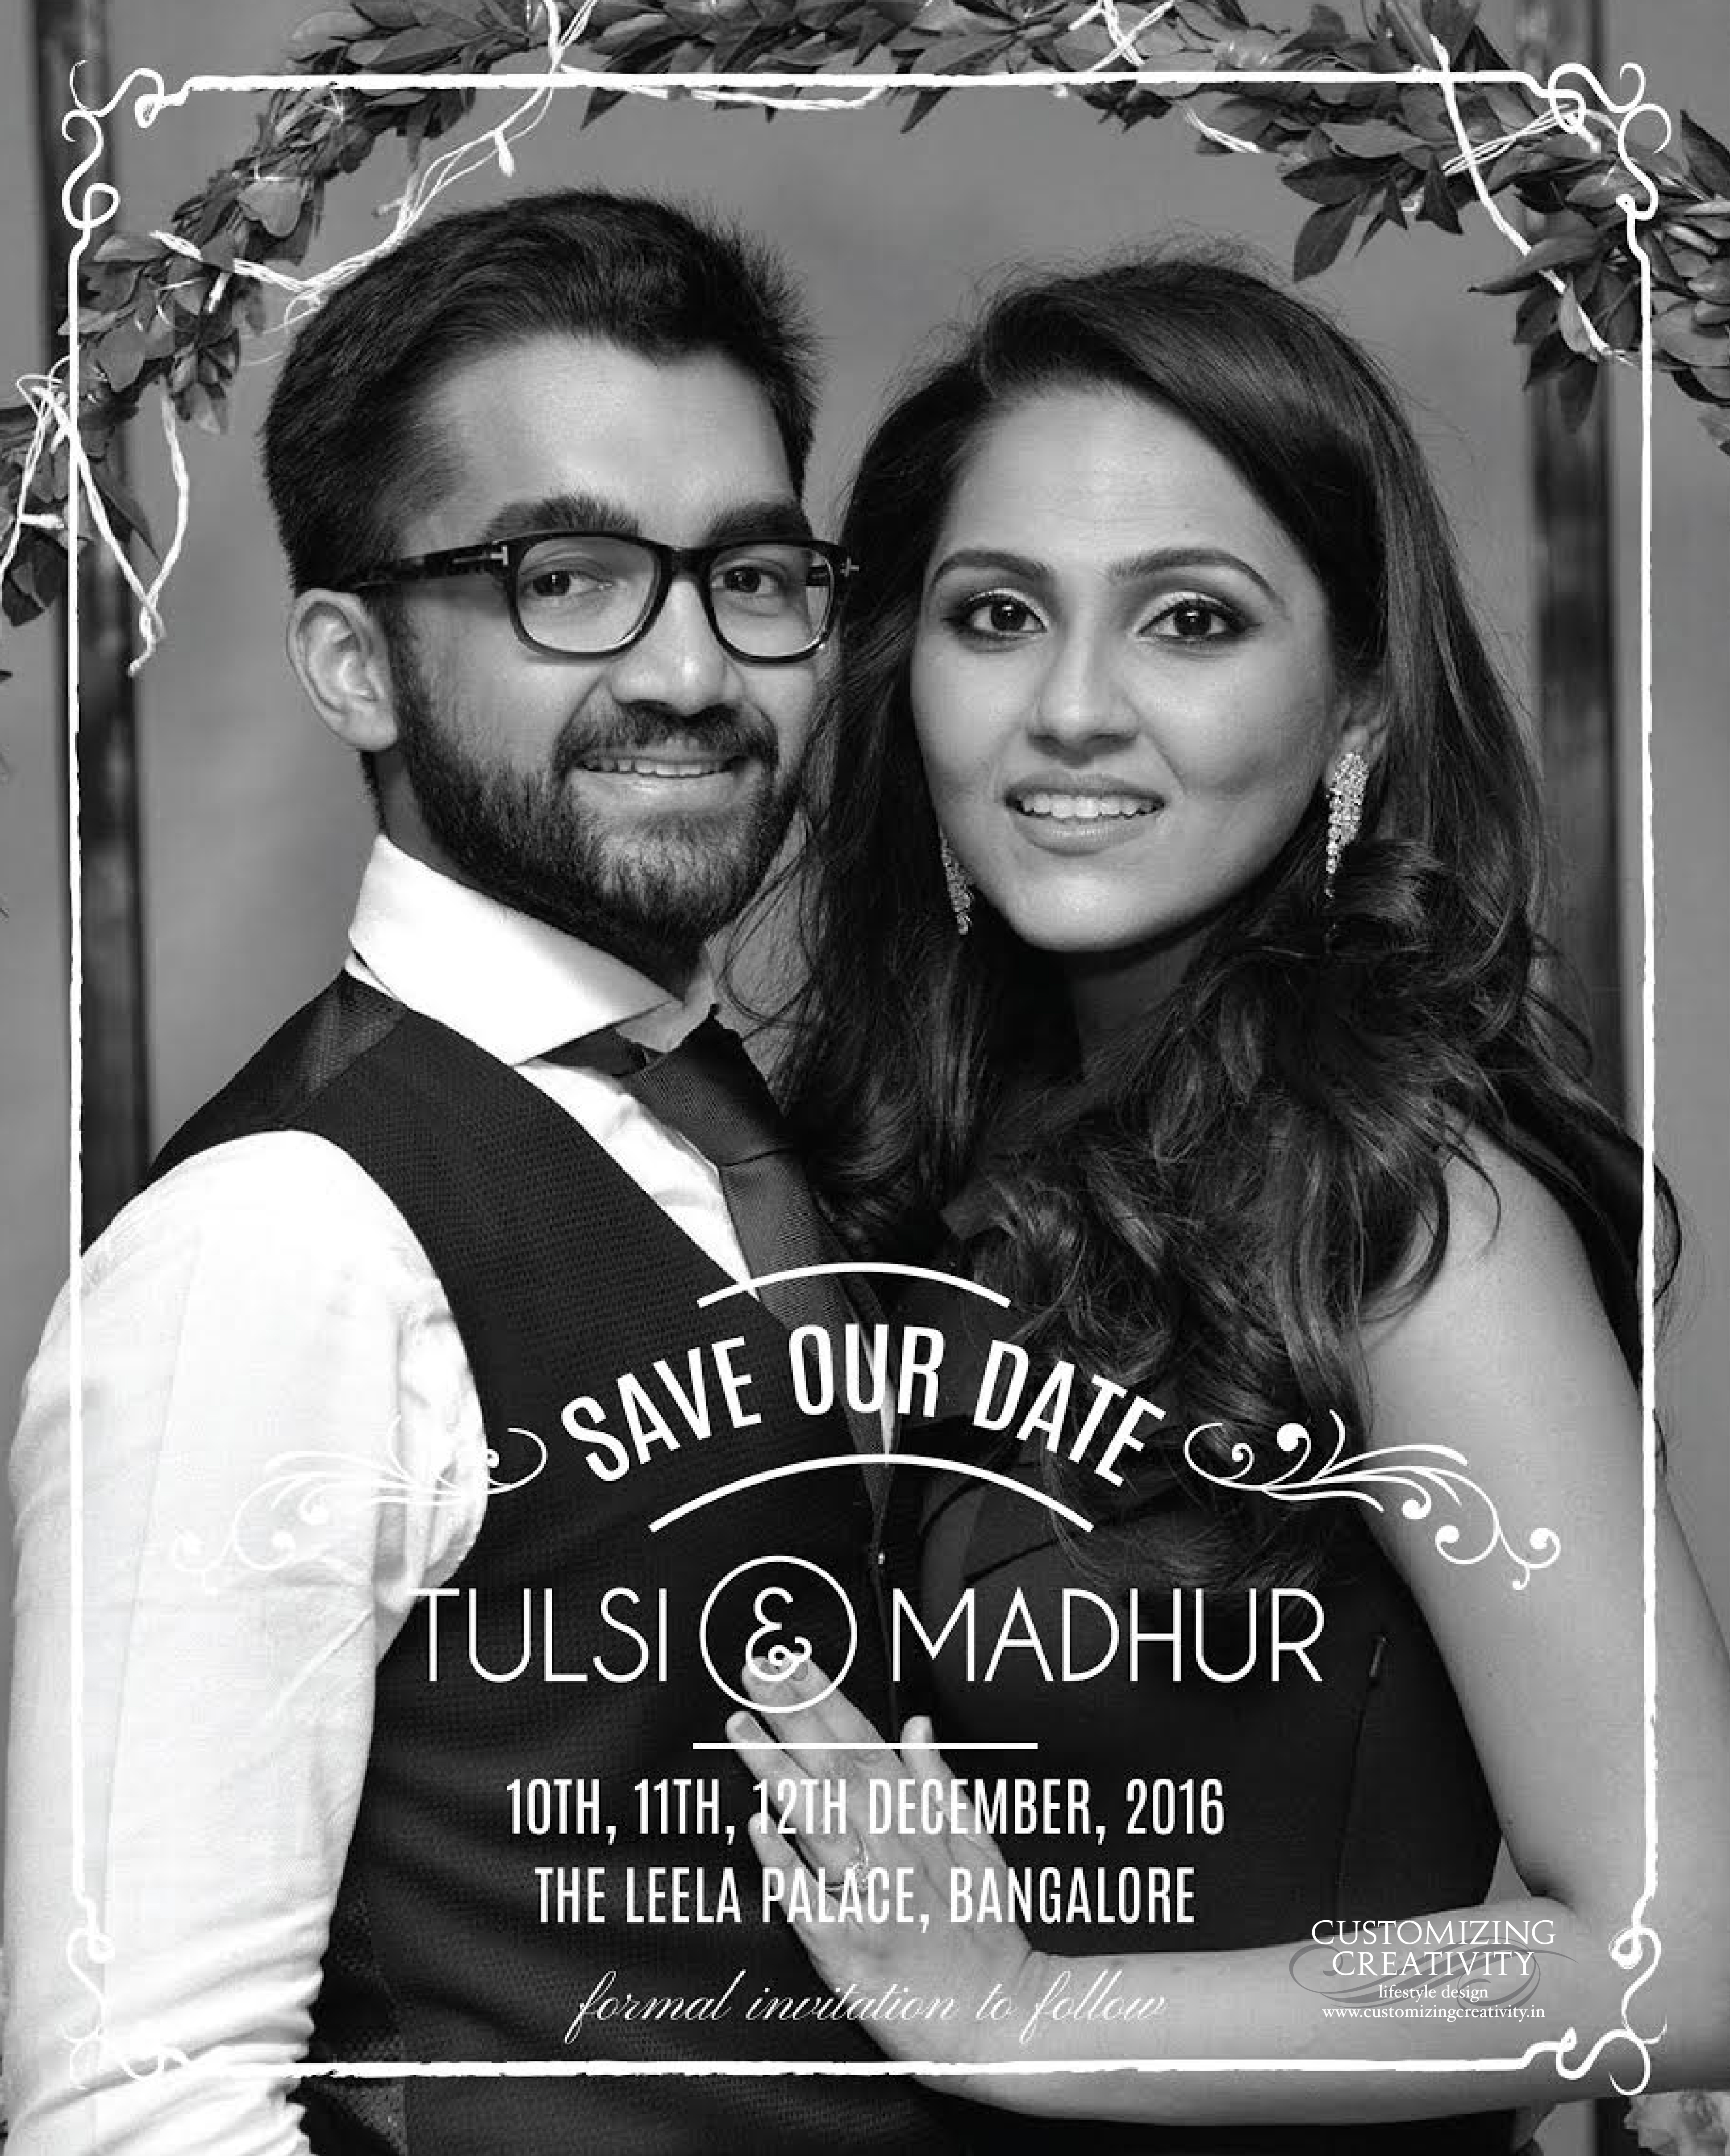
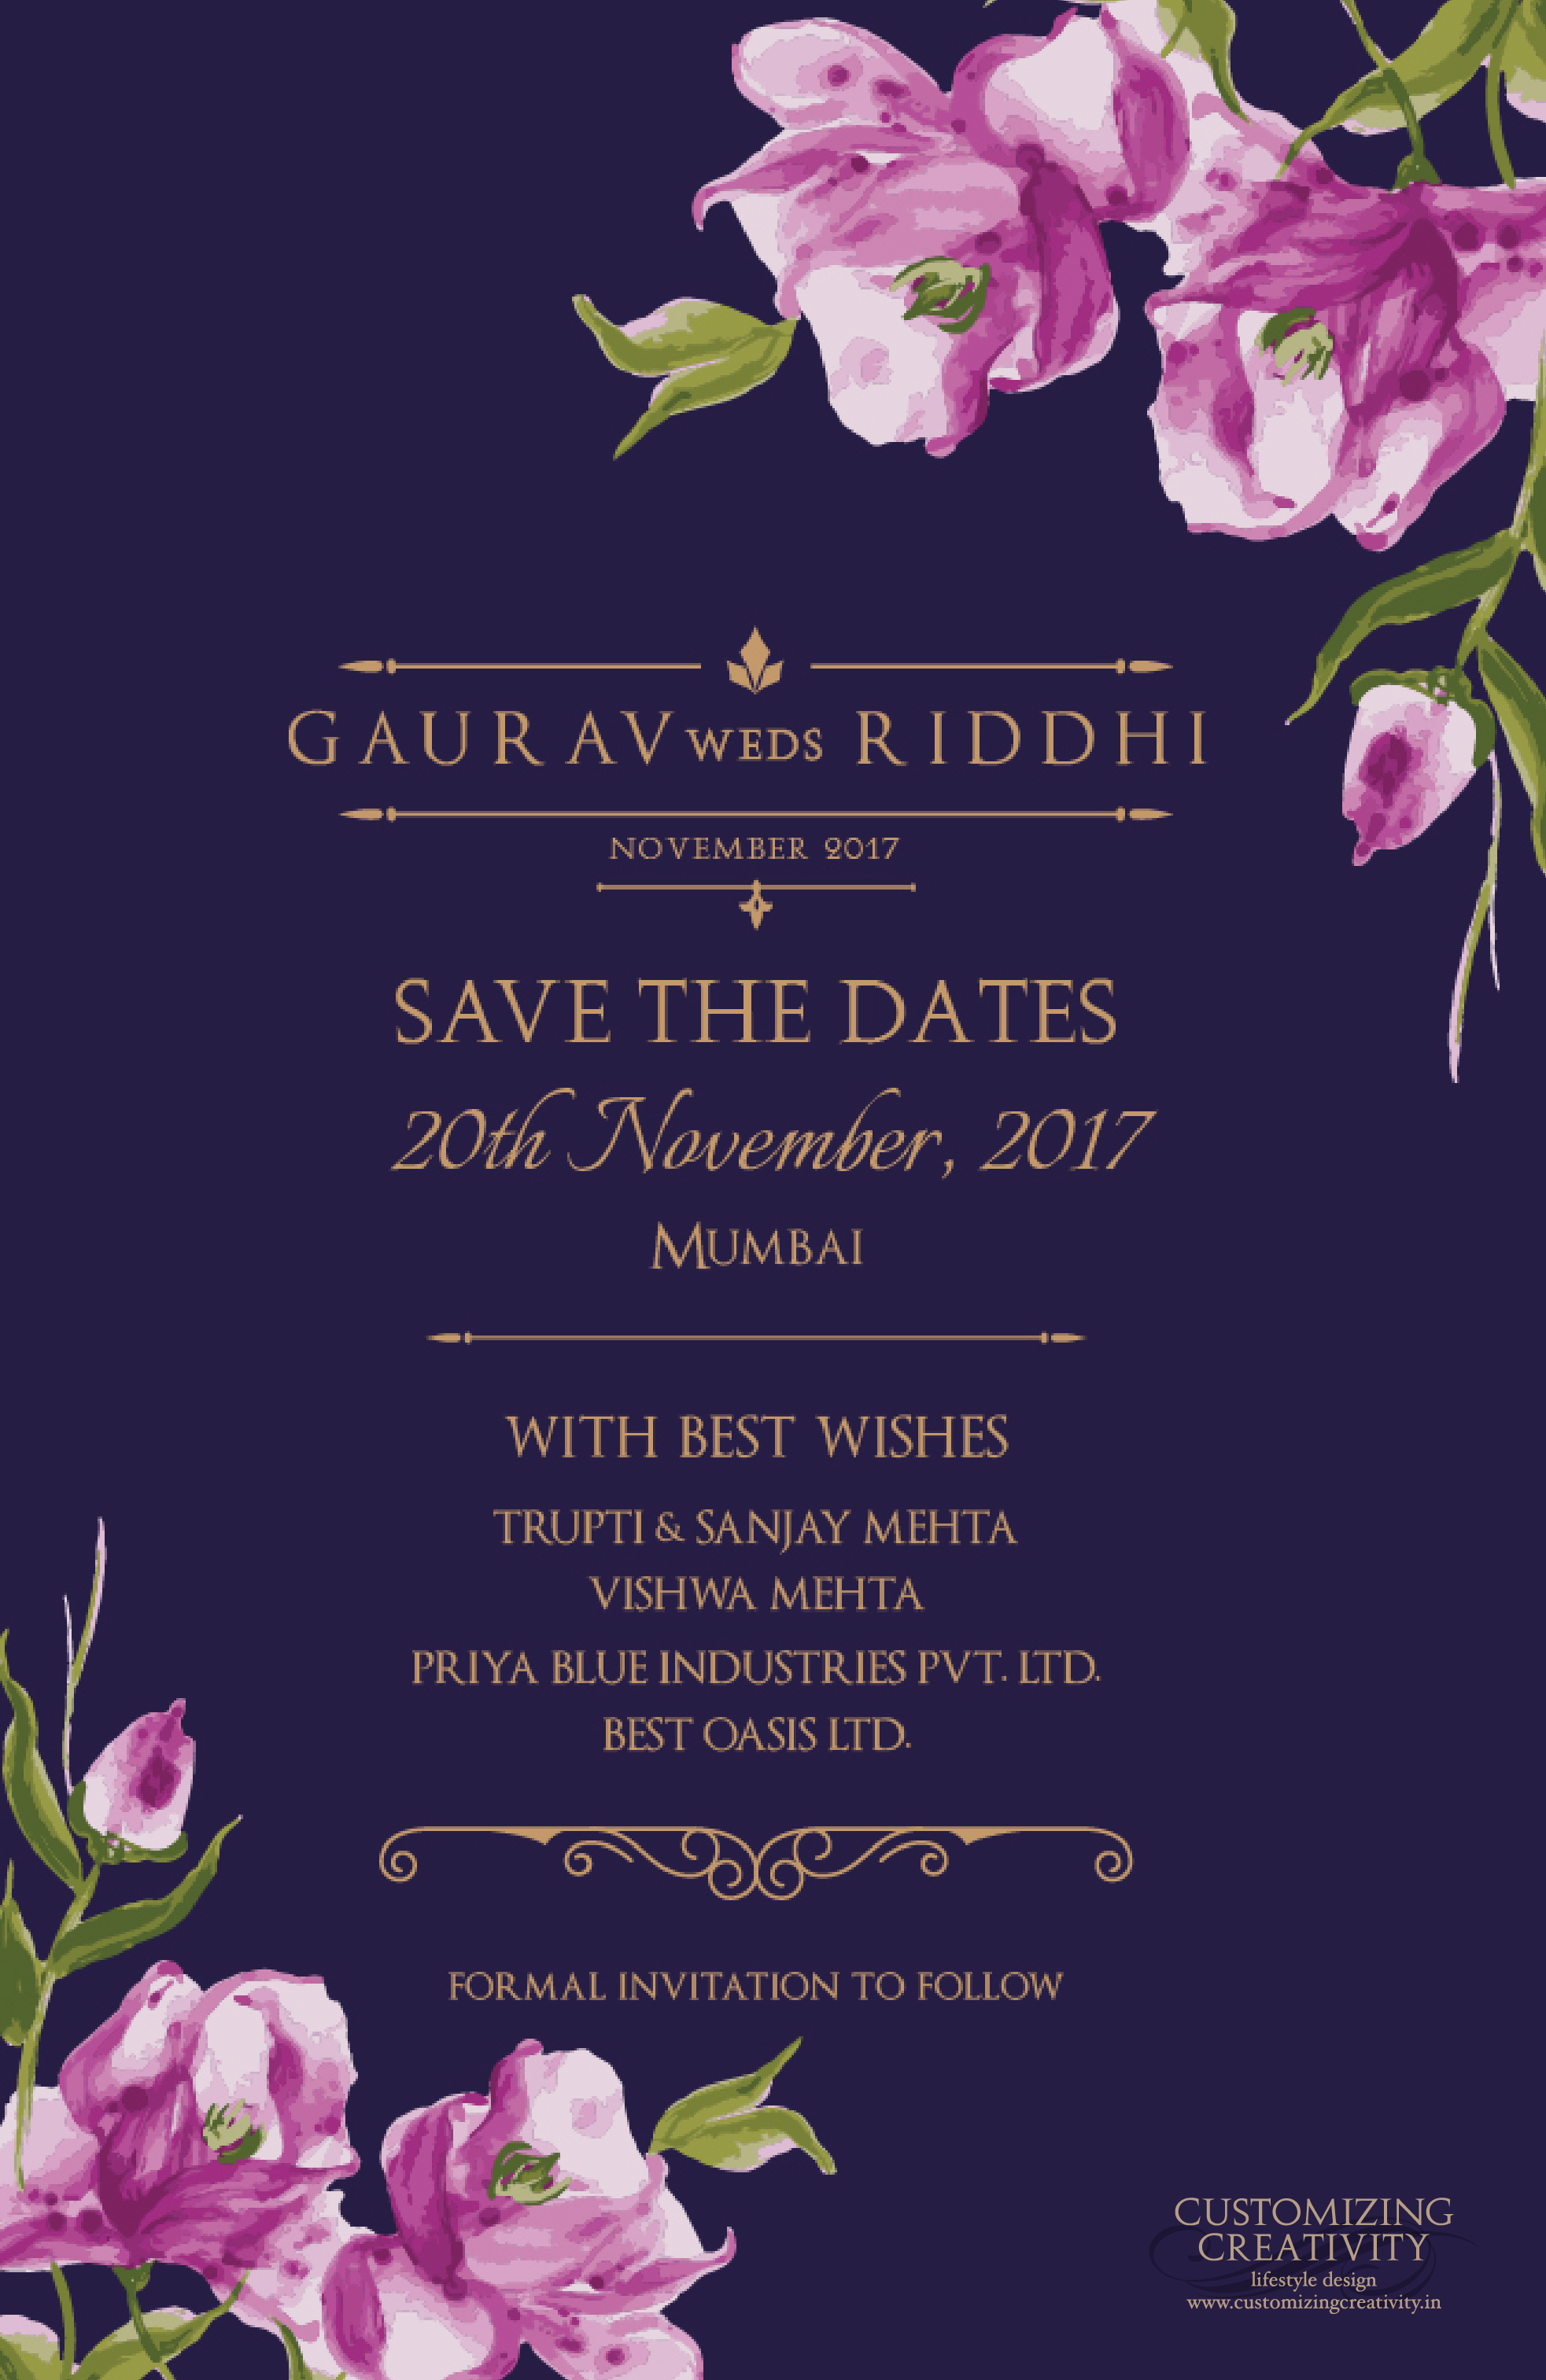
This format works really well for Save the dates / Engagement invitations / single events as this is great for cards that do not have too much information.


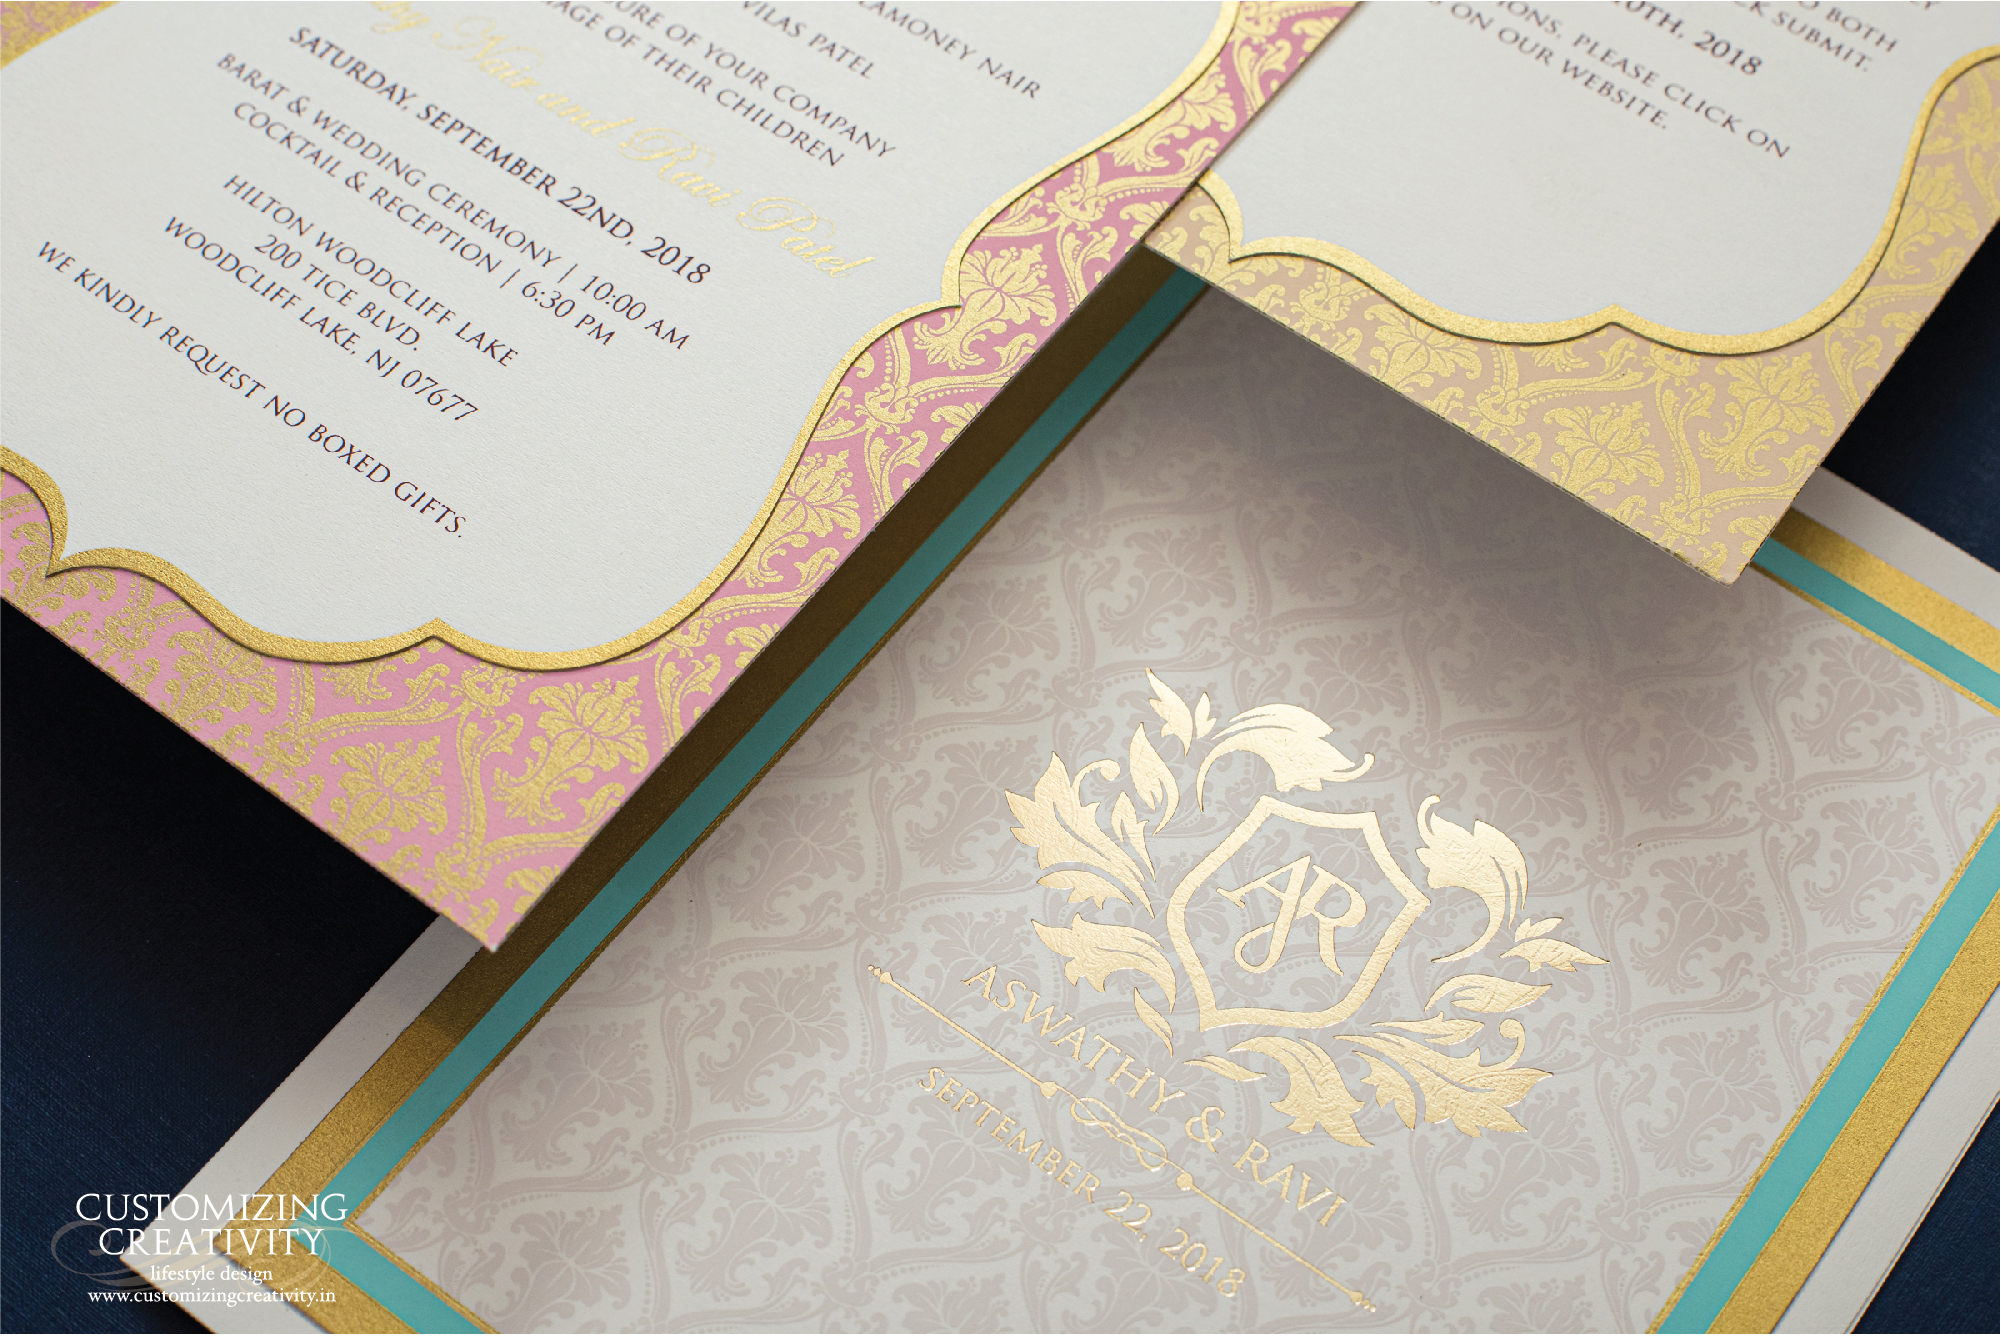
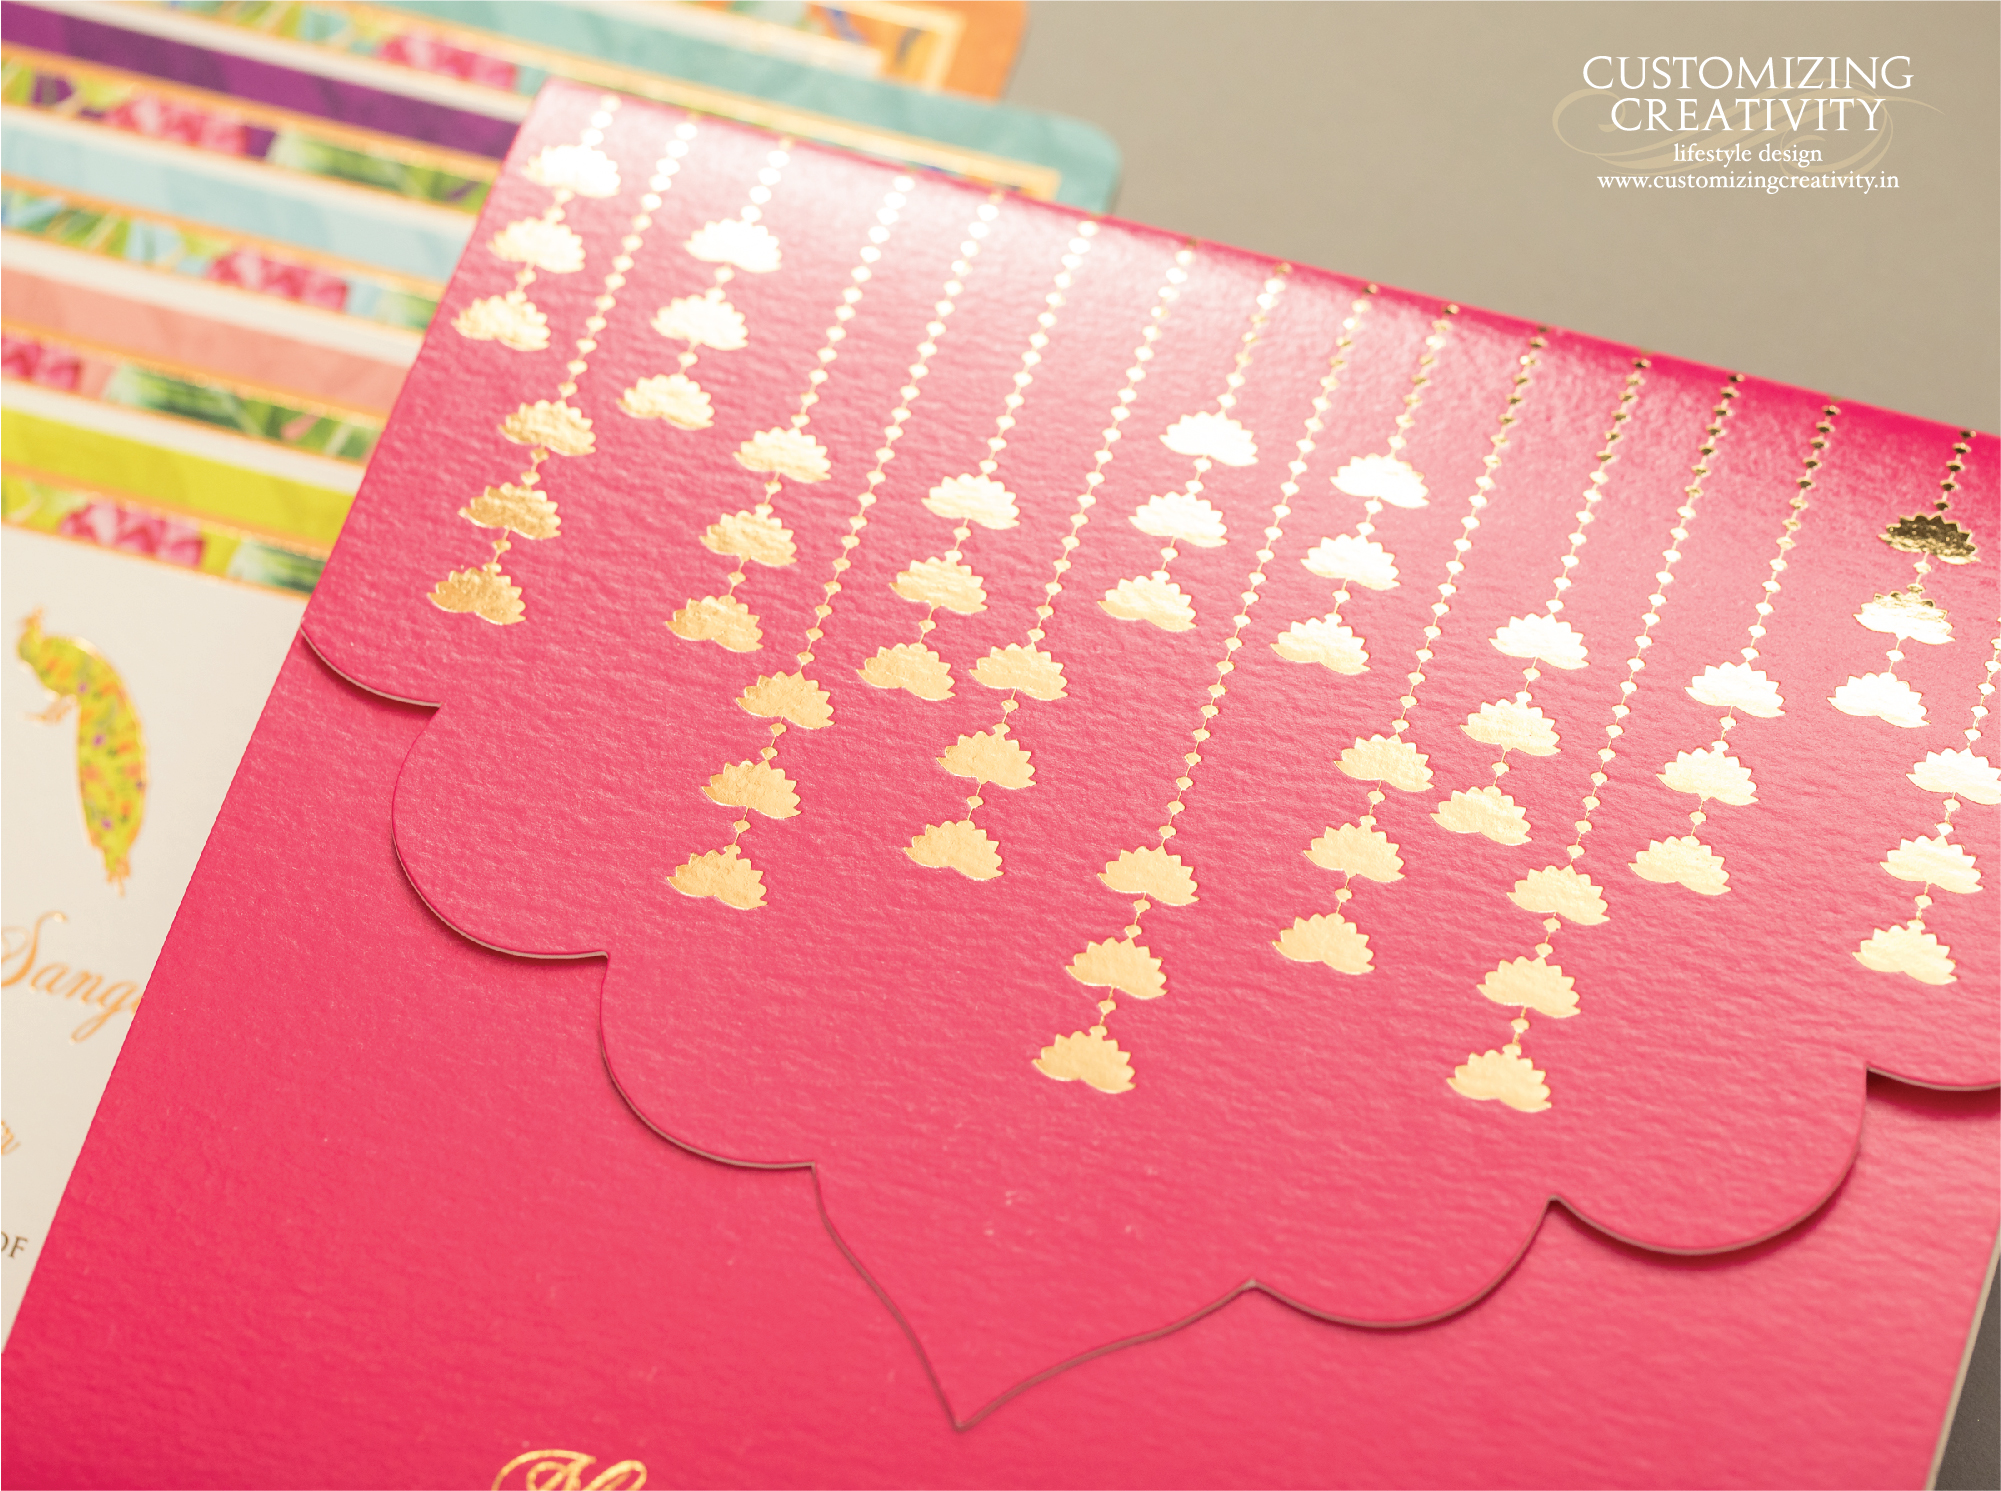
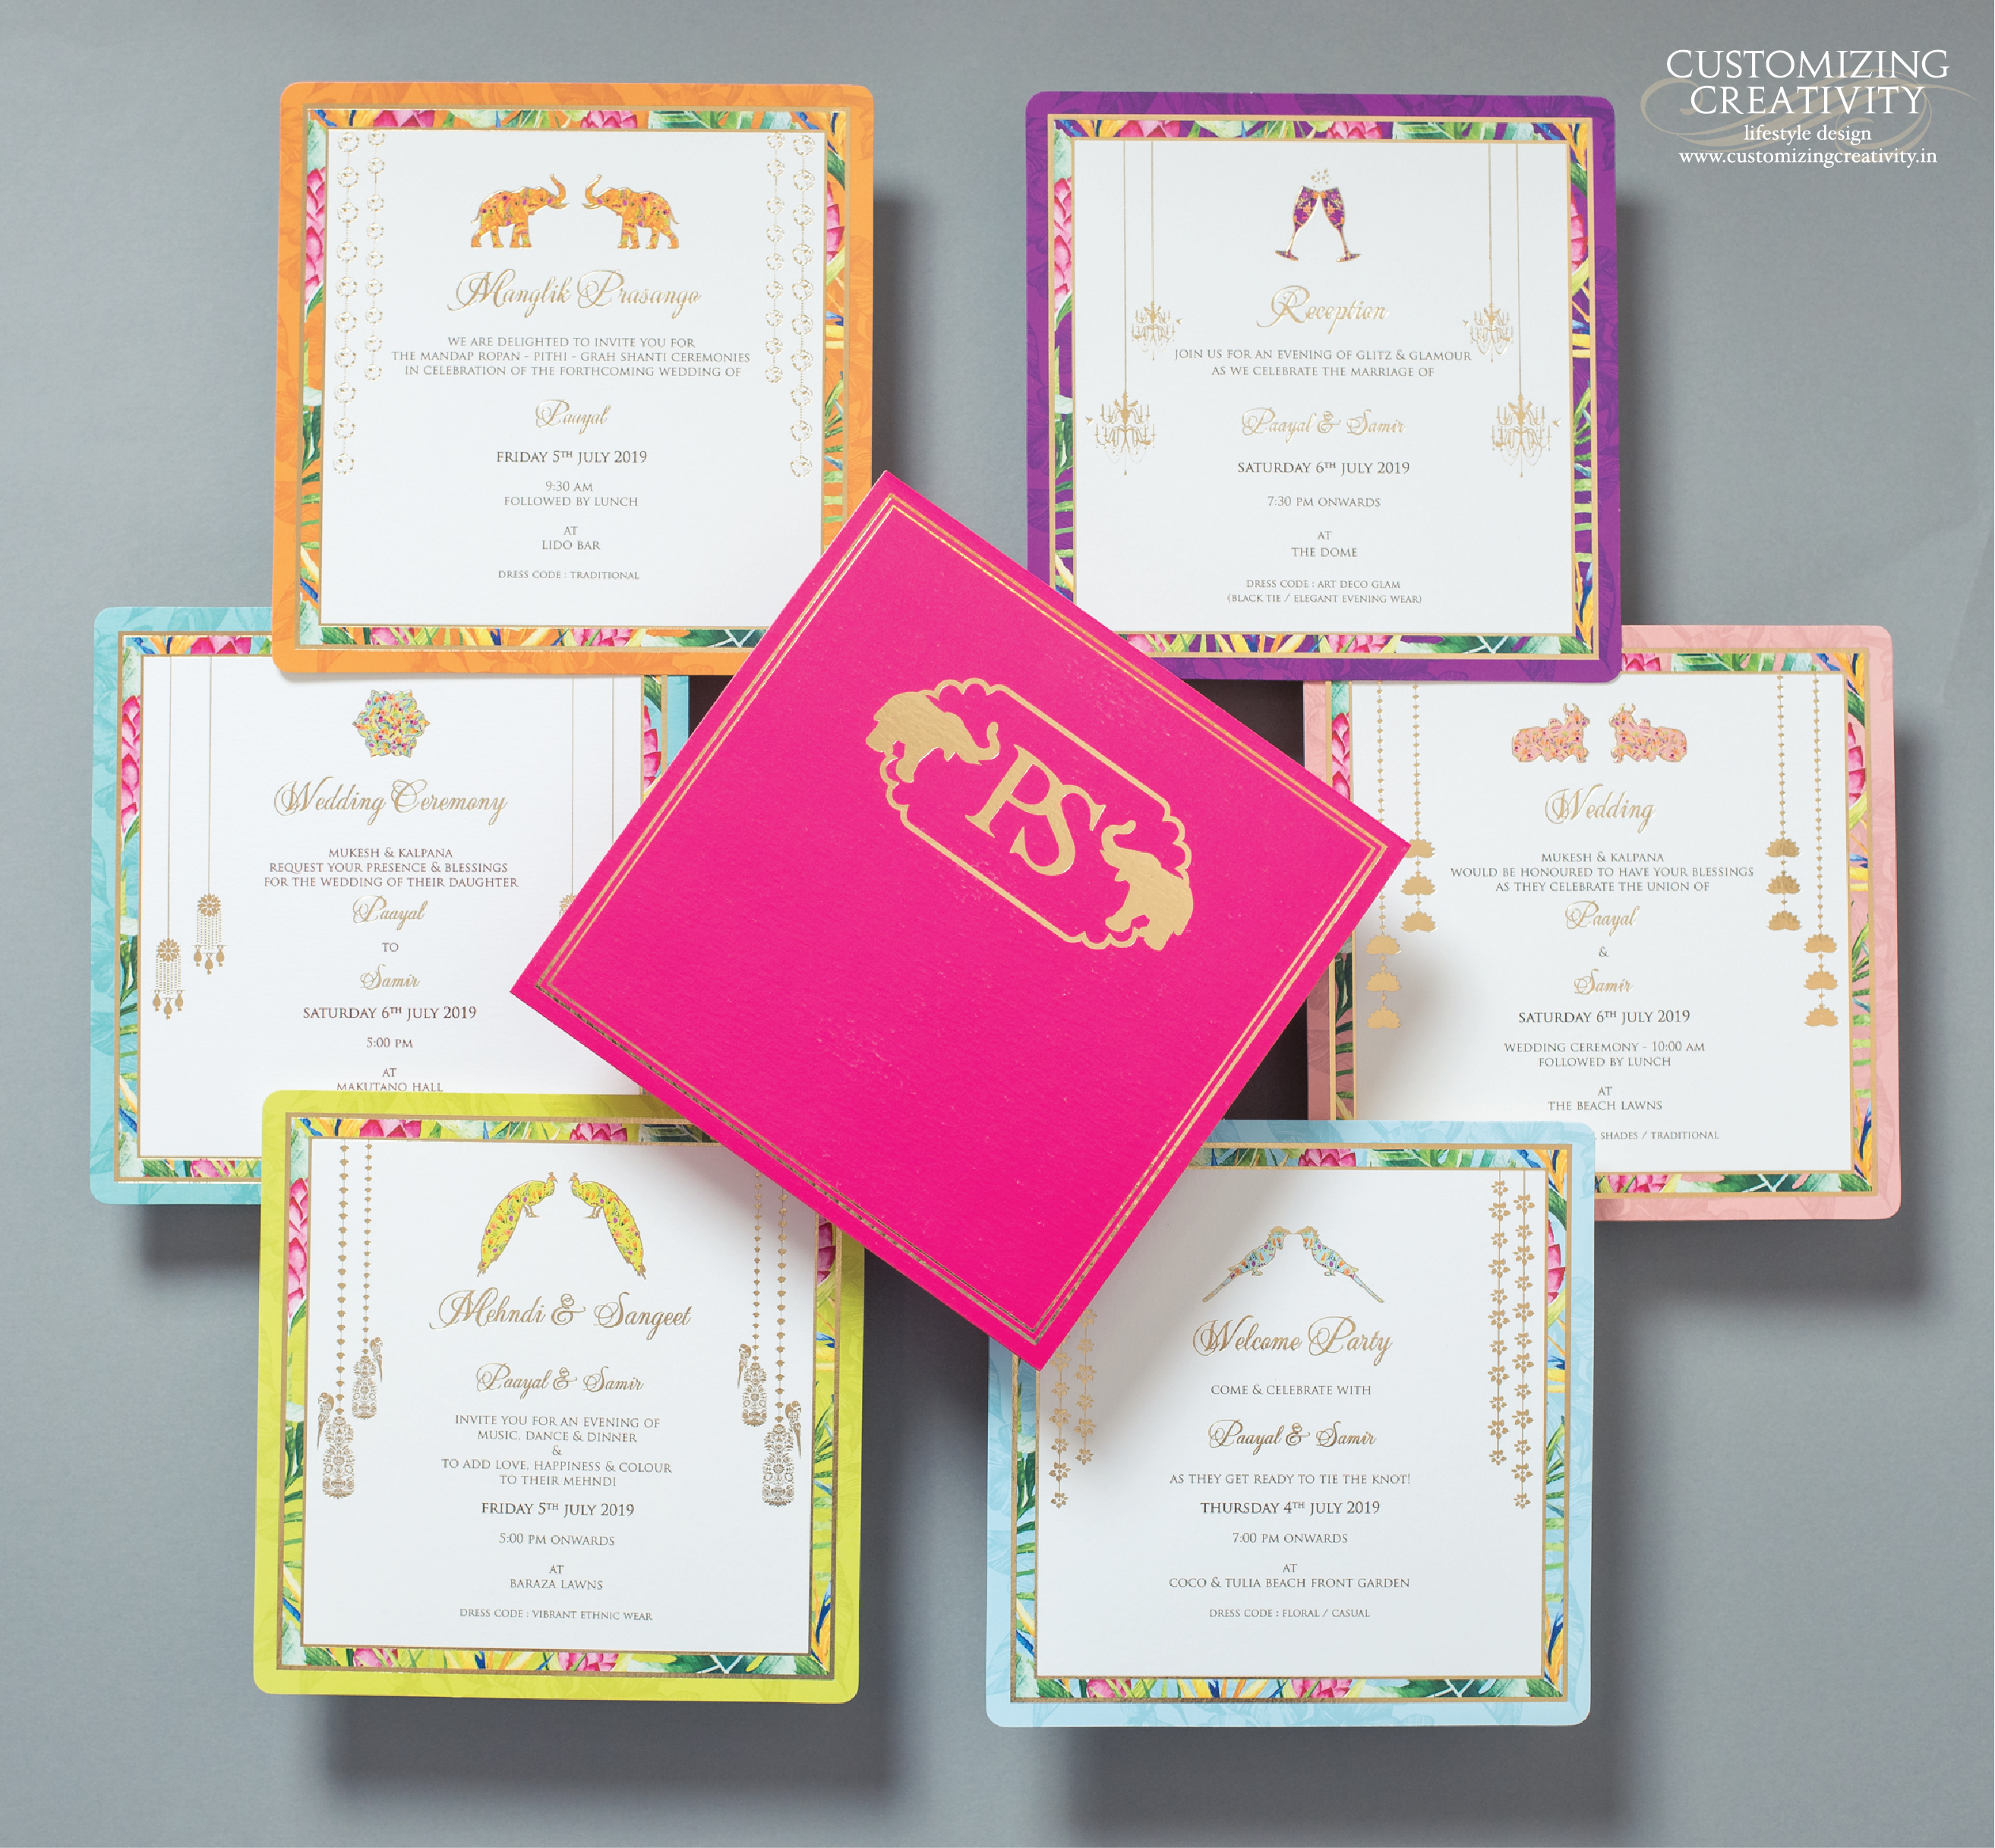
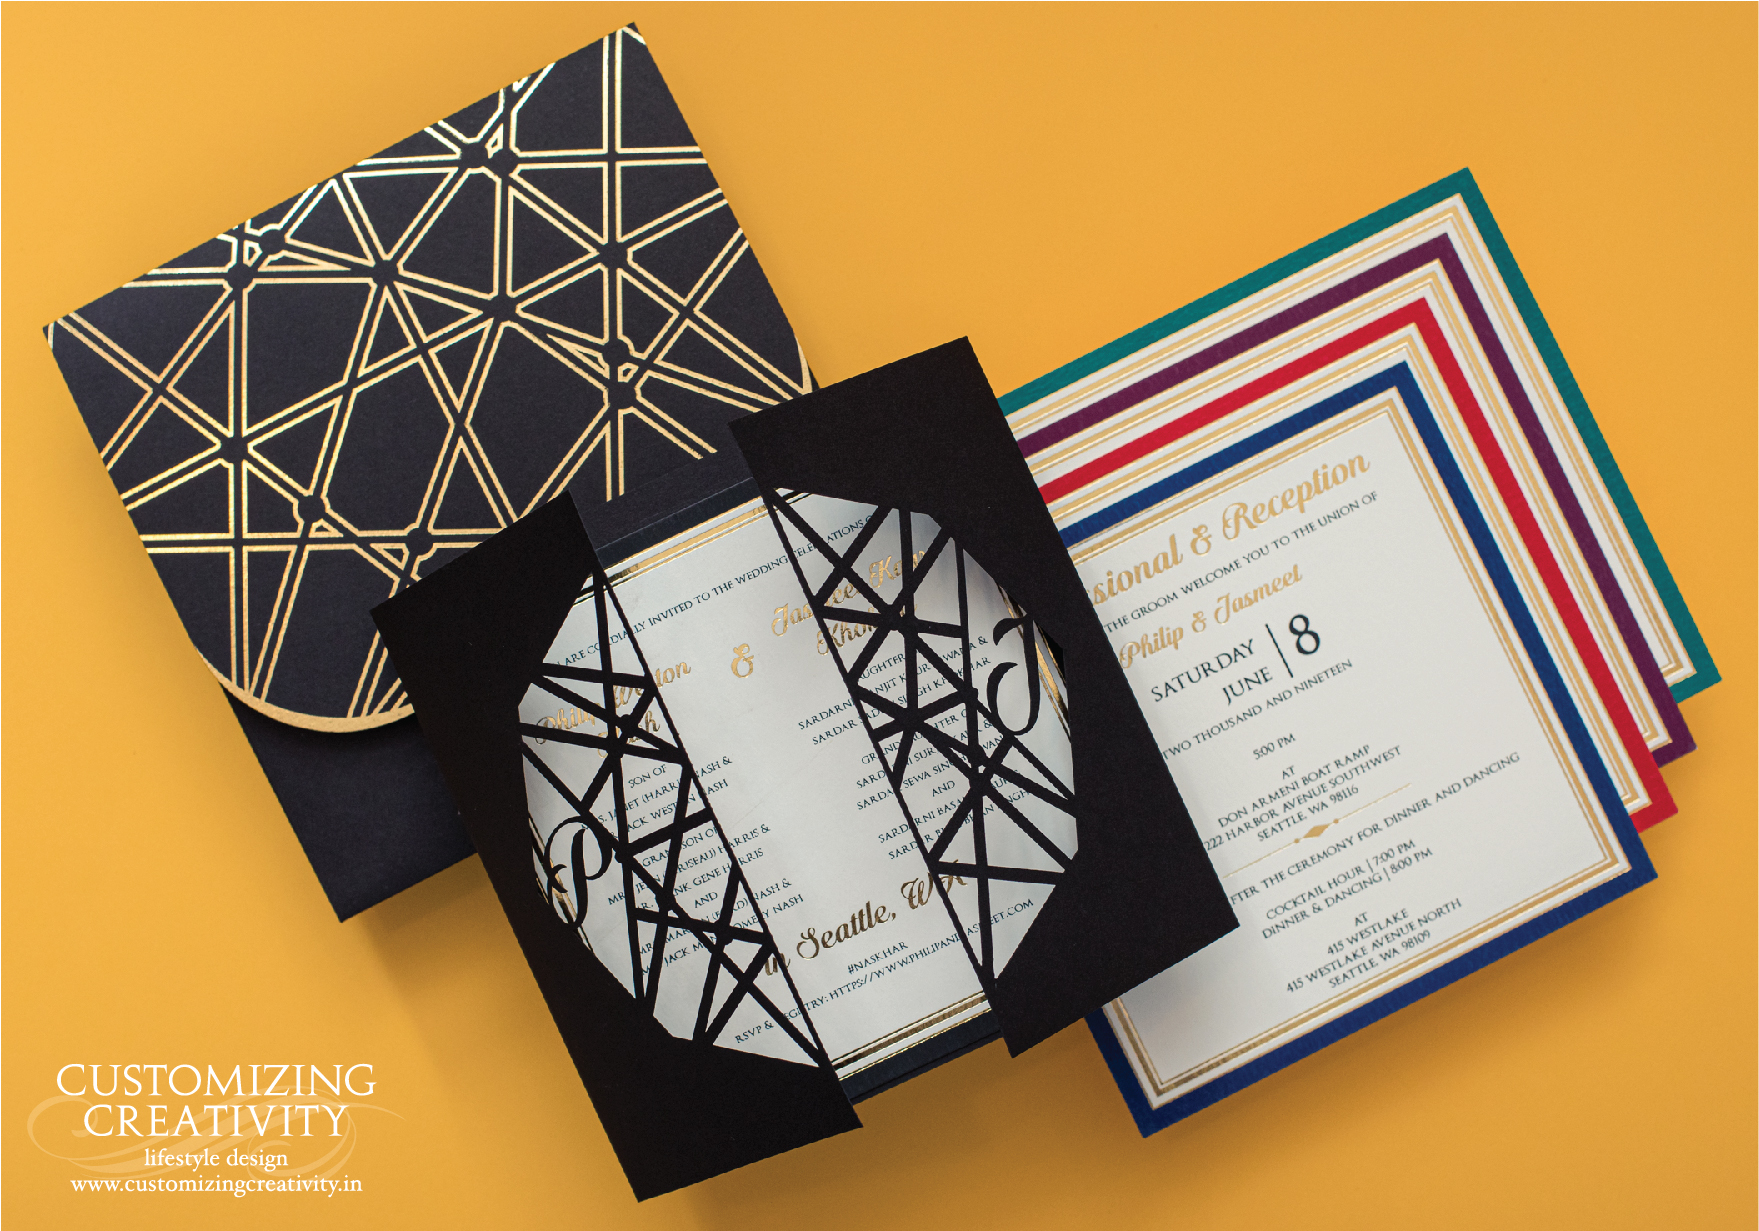
3) The pocket style (a twist to the classic envelope)

This is pretty much like an old school envelope, but with an expandable pocket, more like a clutch pouch.

It is great when you have multiple events, as it can hold the inserts well, but also does not look empty when your guest may be receiving only one insert.


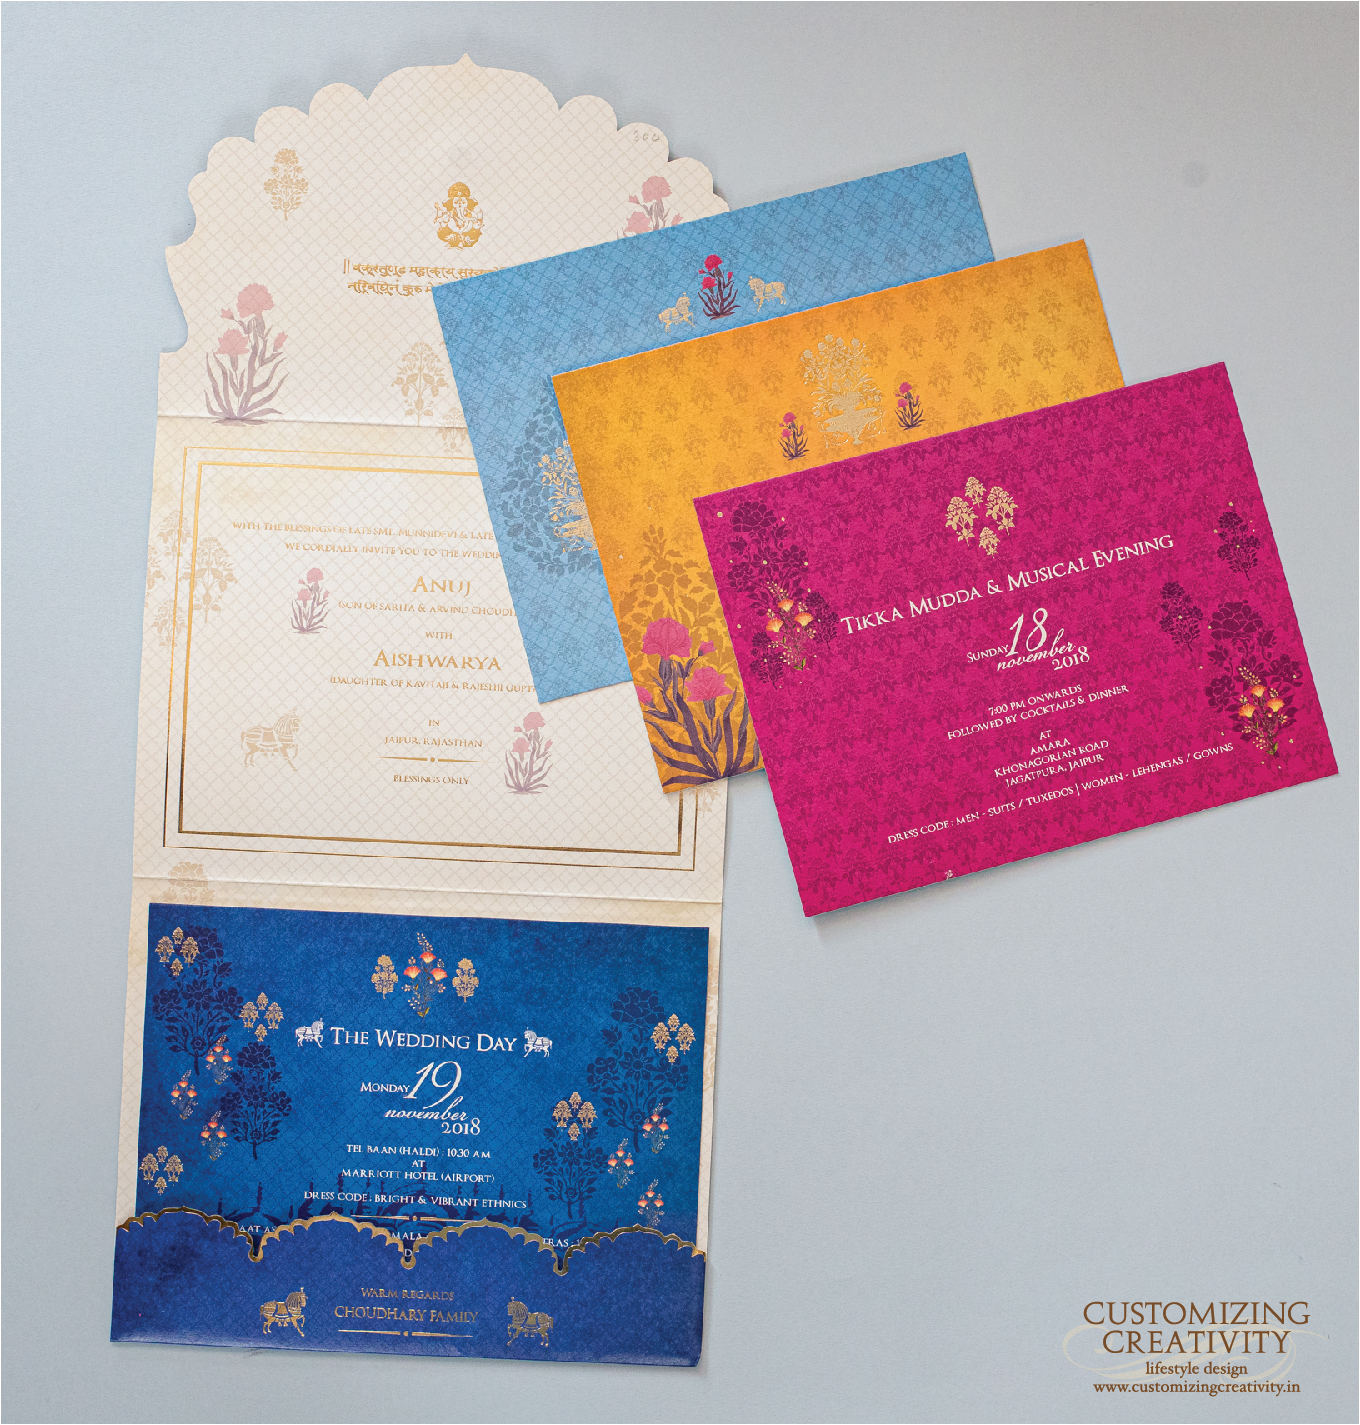
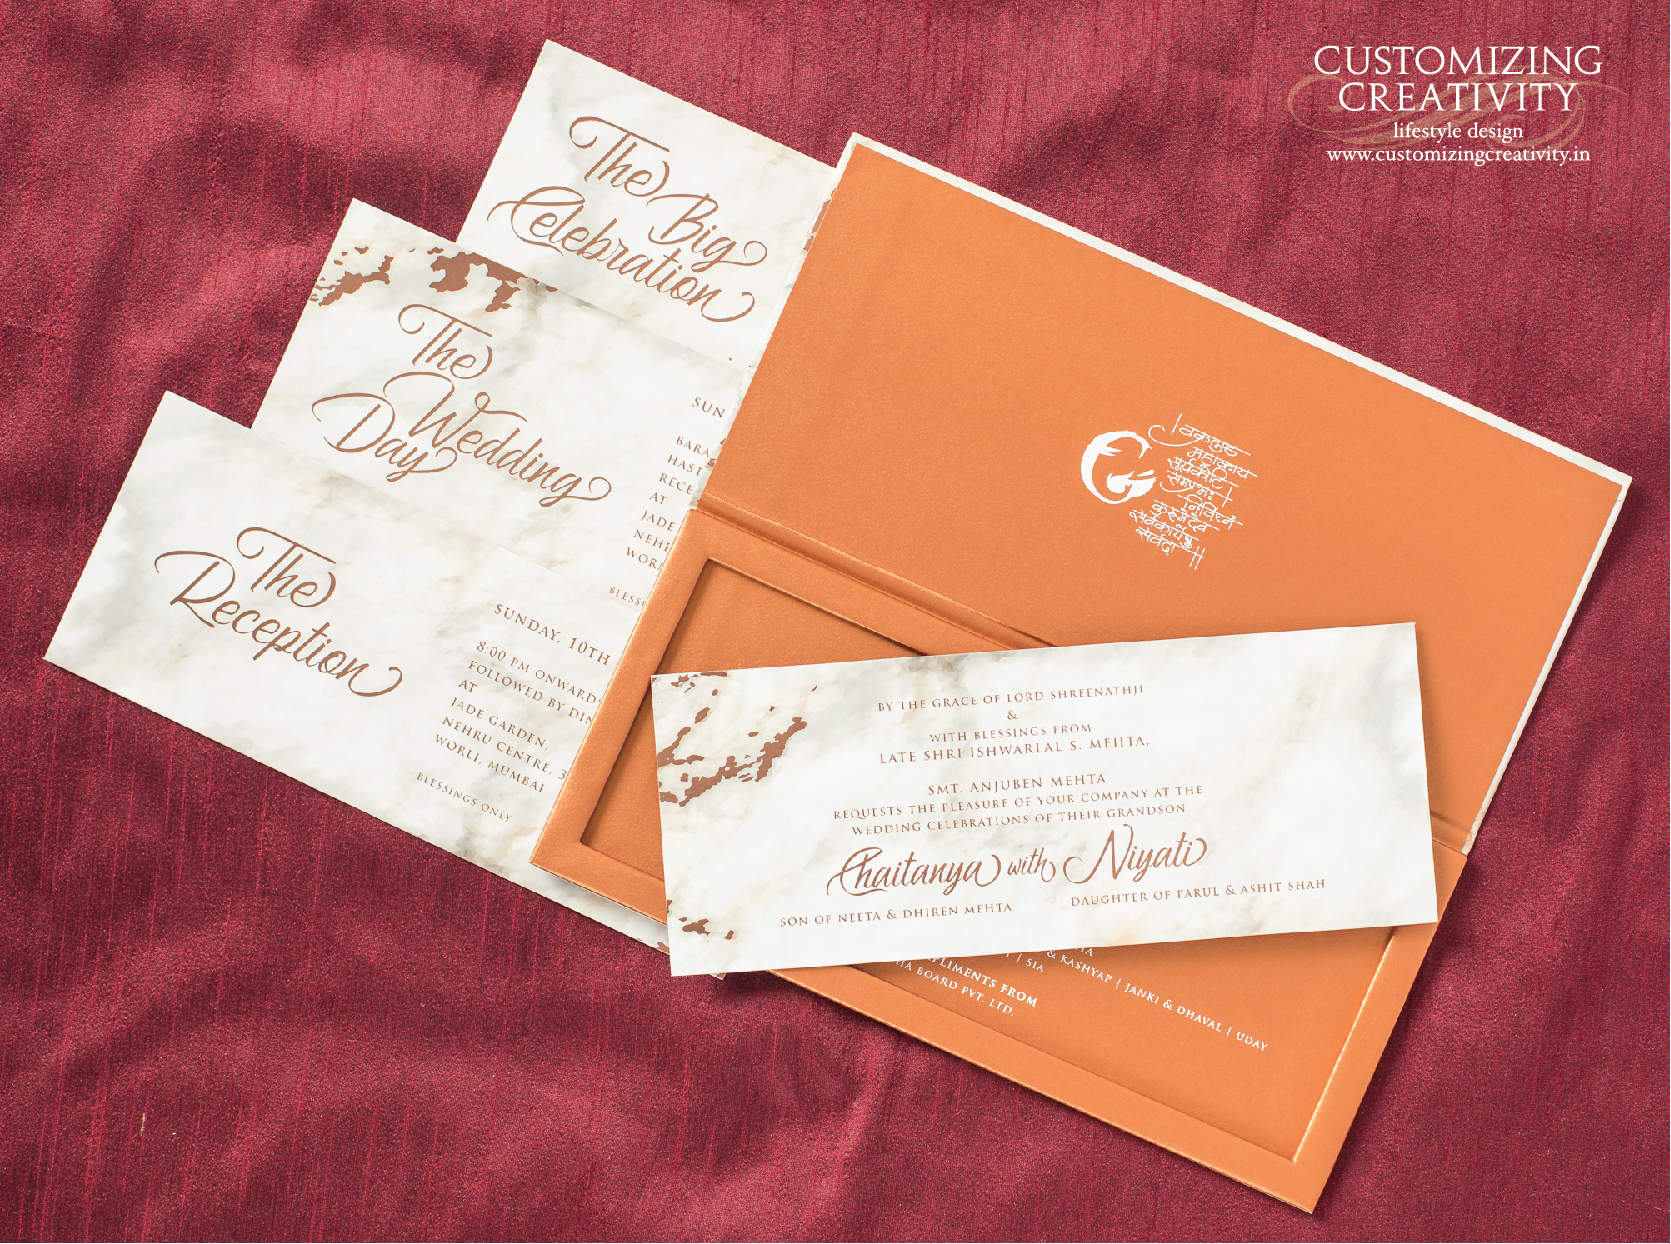
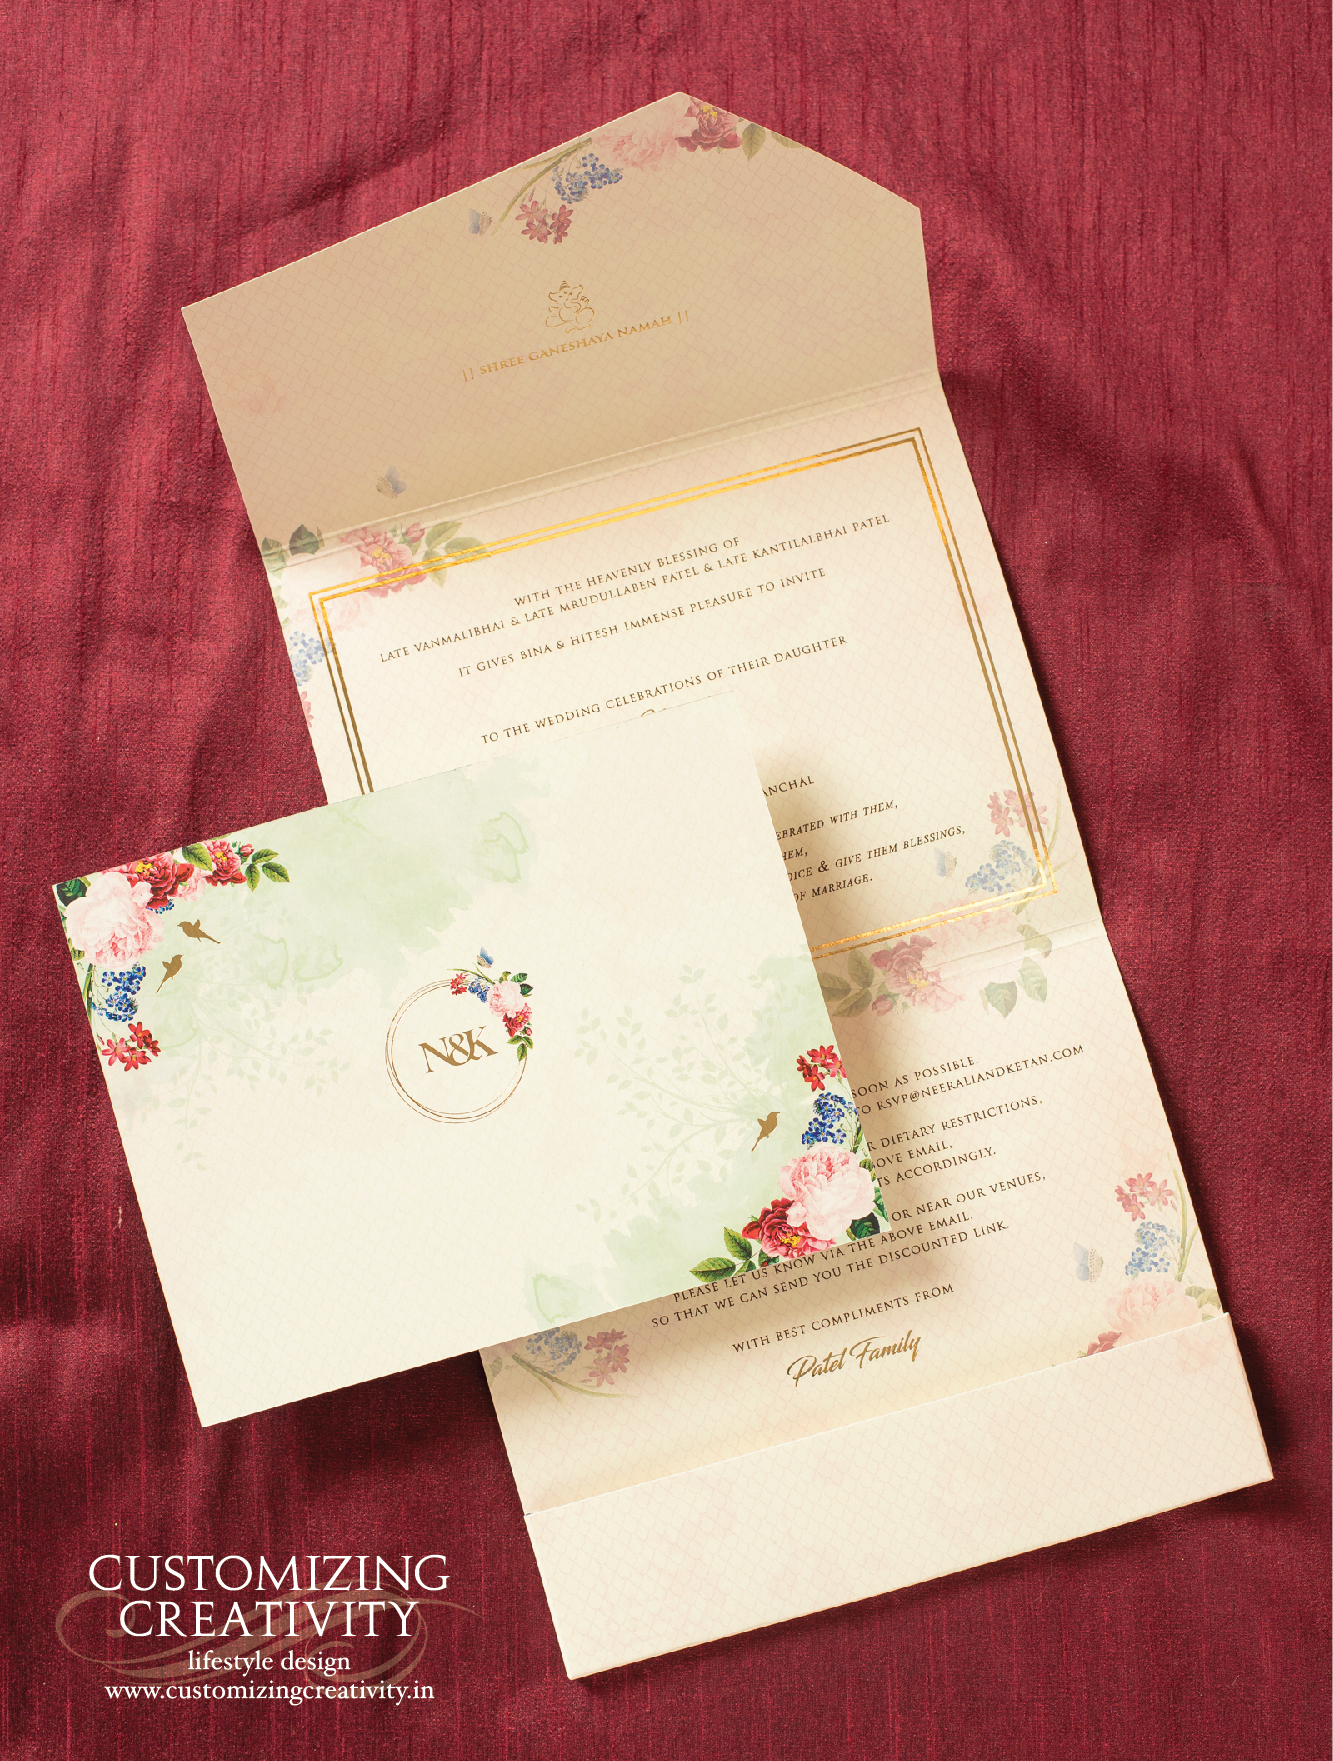
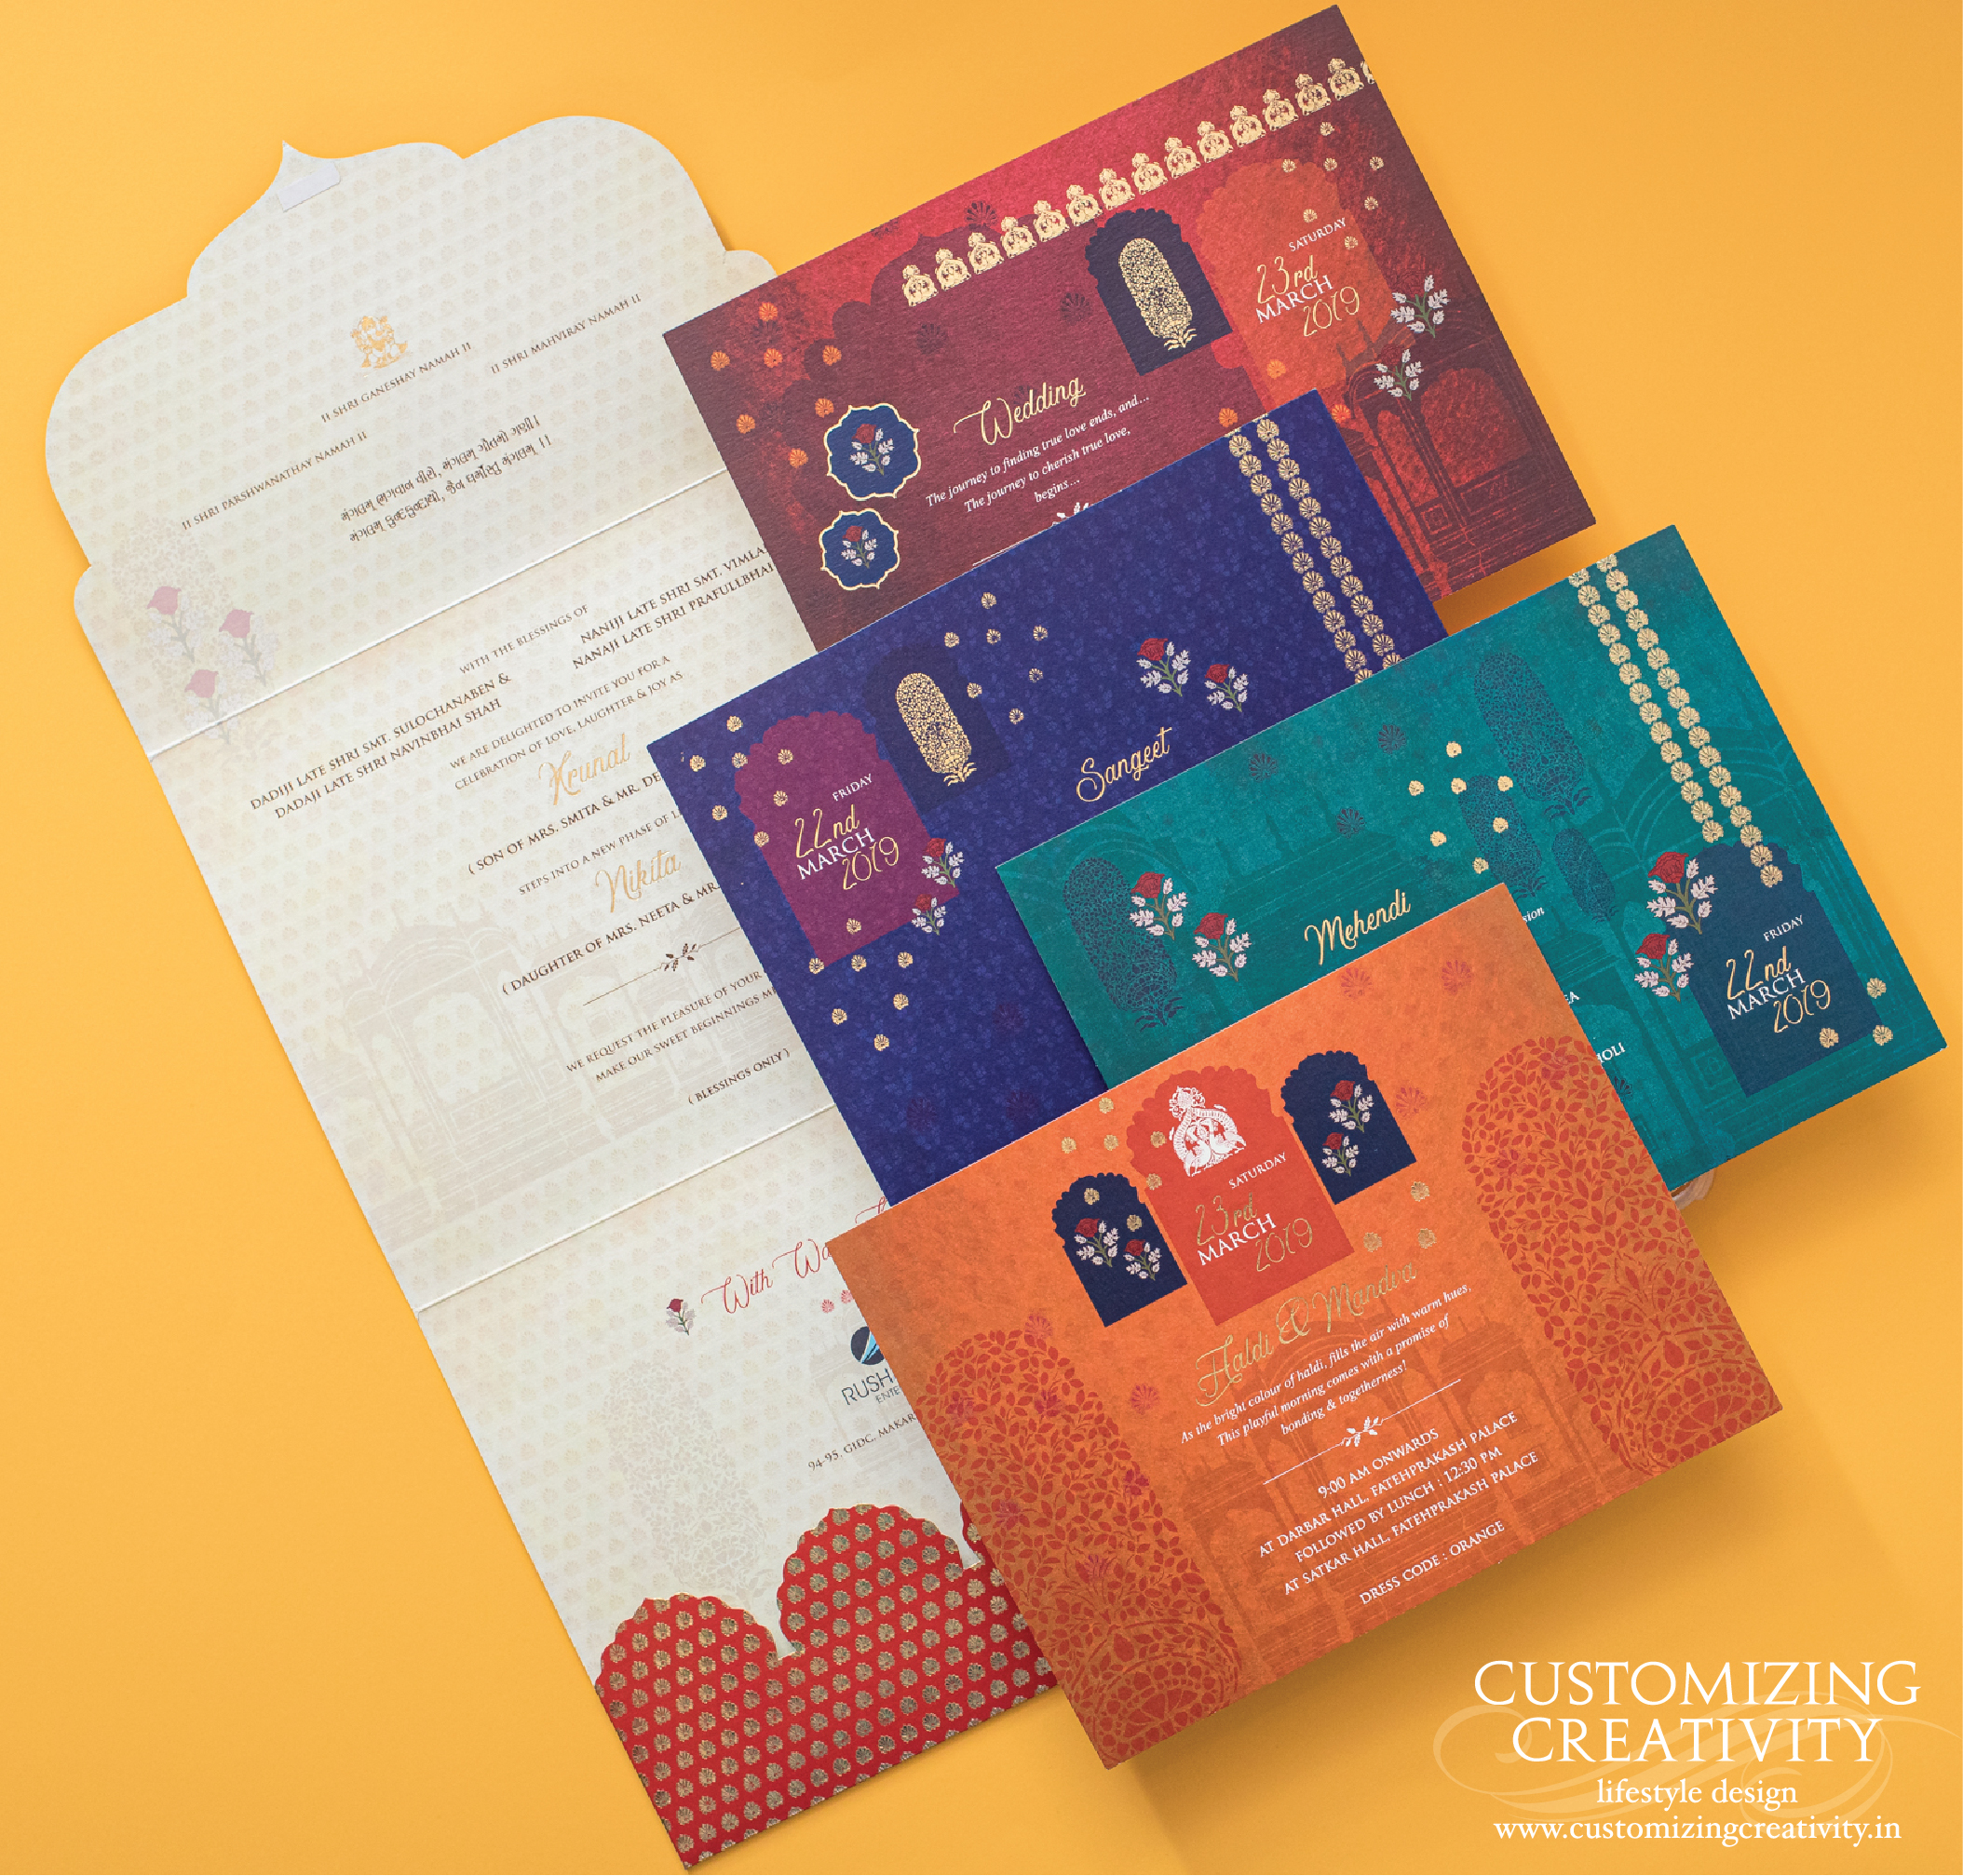
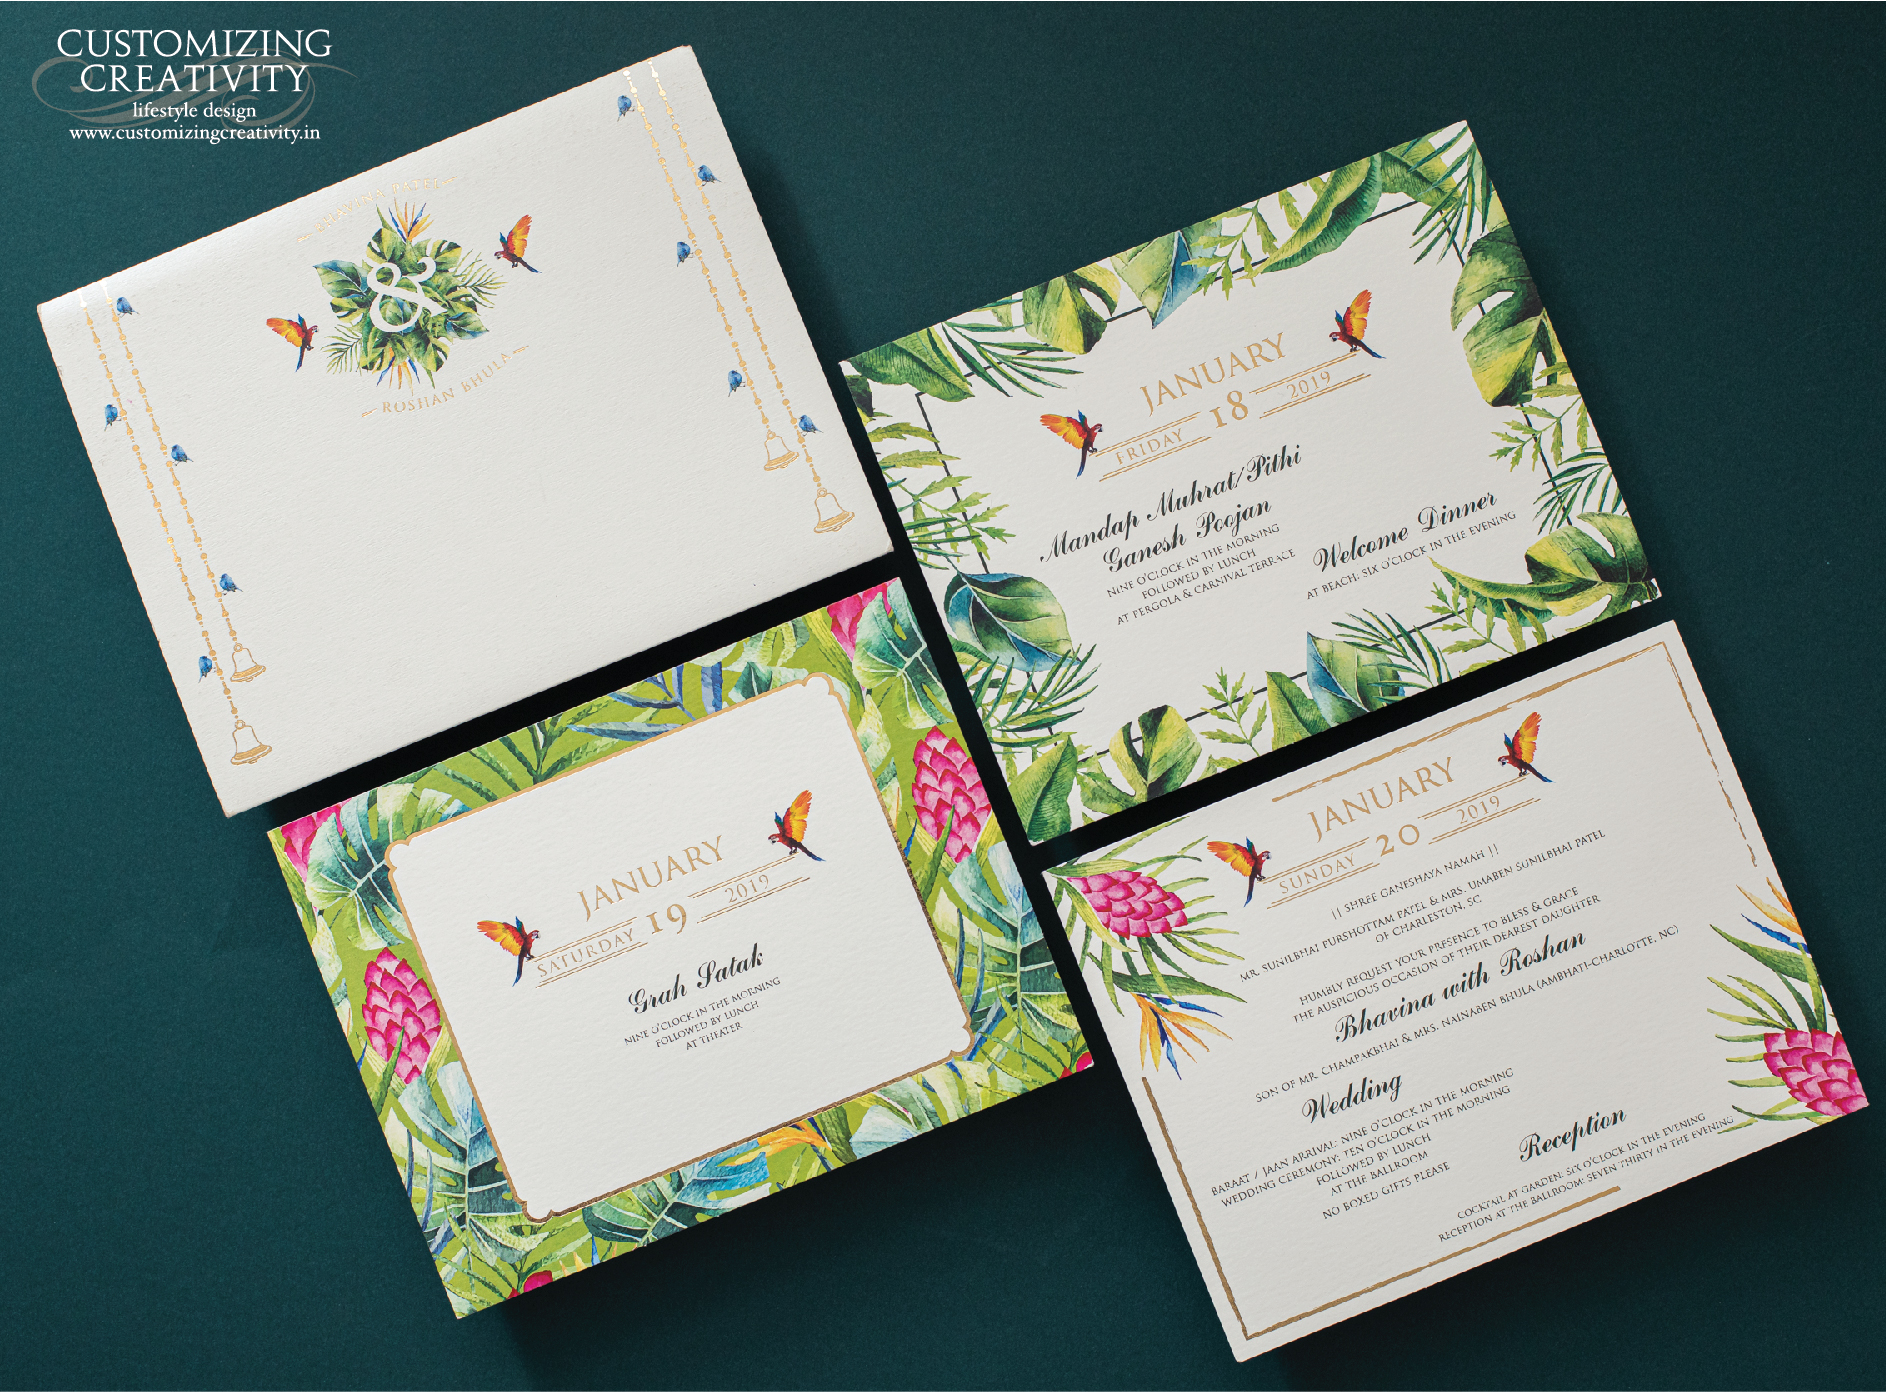
4) The envelope-cum-folder (convenient & compact)

This structure has been one of the most trending formats over the past 2-3 years!

This is actually a tri-fold envelope, which also acts as a holder for the inserts – as when this opens up, it has a pocket to keep them in place.

This uses lesser paper than the first format & is a compact version of the same!


5) The 4 fold opening (all about the drama)

This opening style, as the name suggests, opens from all 4 sides.

This structure does not have a separate folder to it, as the four fold itself acts as an envelope-cum-folder, thus minimizing use of paper!


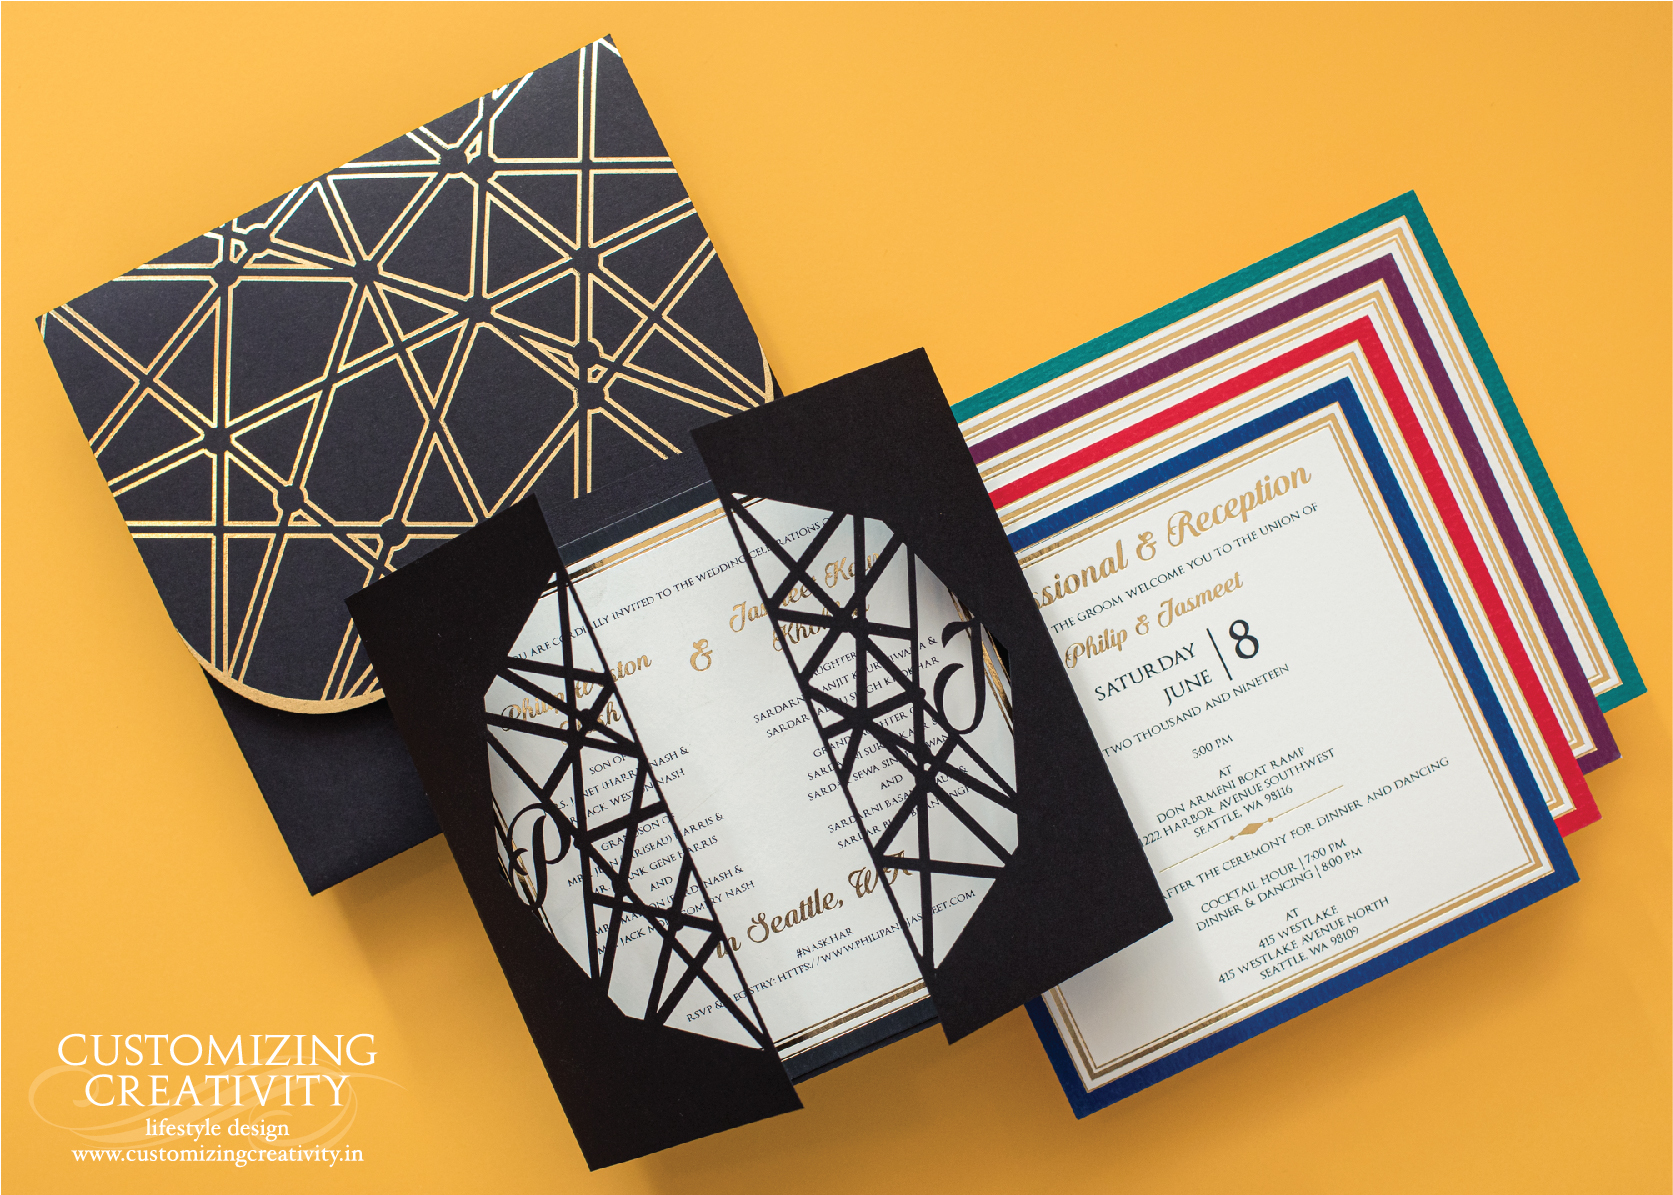
6) The gate fold (royalty at it’s best)

This style, essentially opens up from the centre, resembling a gate.
The gate fold is normally used as a replacement to the traditional folder that holds the inserts & hence it does need to go in an envelope.

The reason for this is that, incase you do not put it in an envelope, the inserts may fall out from the top end of the gate fold.


7) The origami folding (experimental & fun)

This is one of our favourites! As the name suggests, it has a quirky folded origami folder.

Though the folding can be a little cumbersome at times, it does make for an interesting & off-beat shape, making the card look really out-of-the-box.

We can create a host of shapes & folding types so make it look unique to your style!


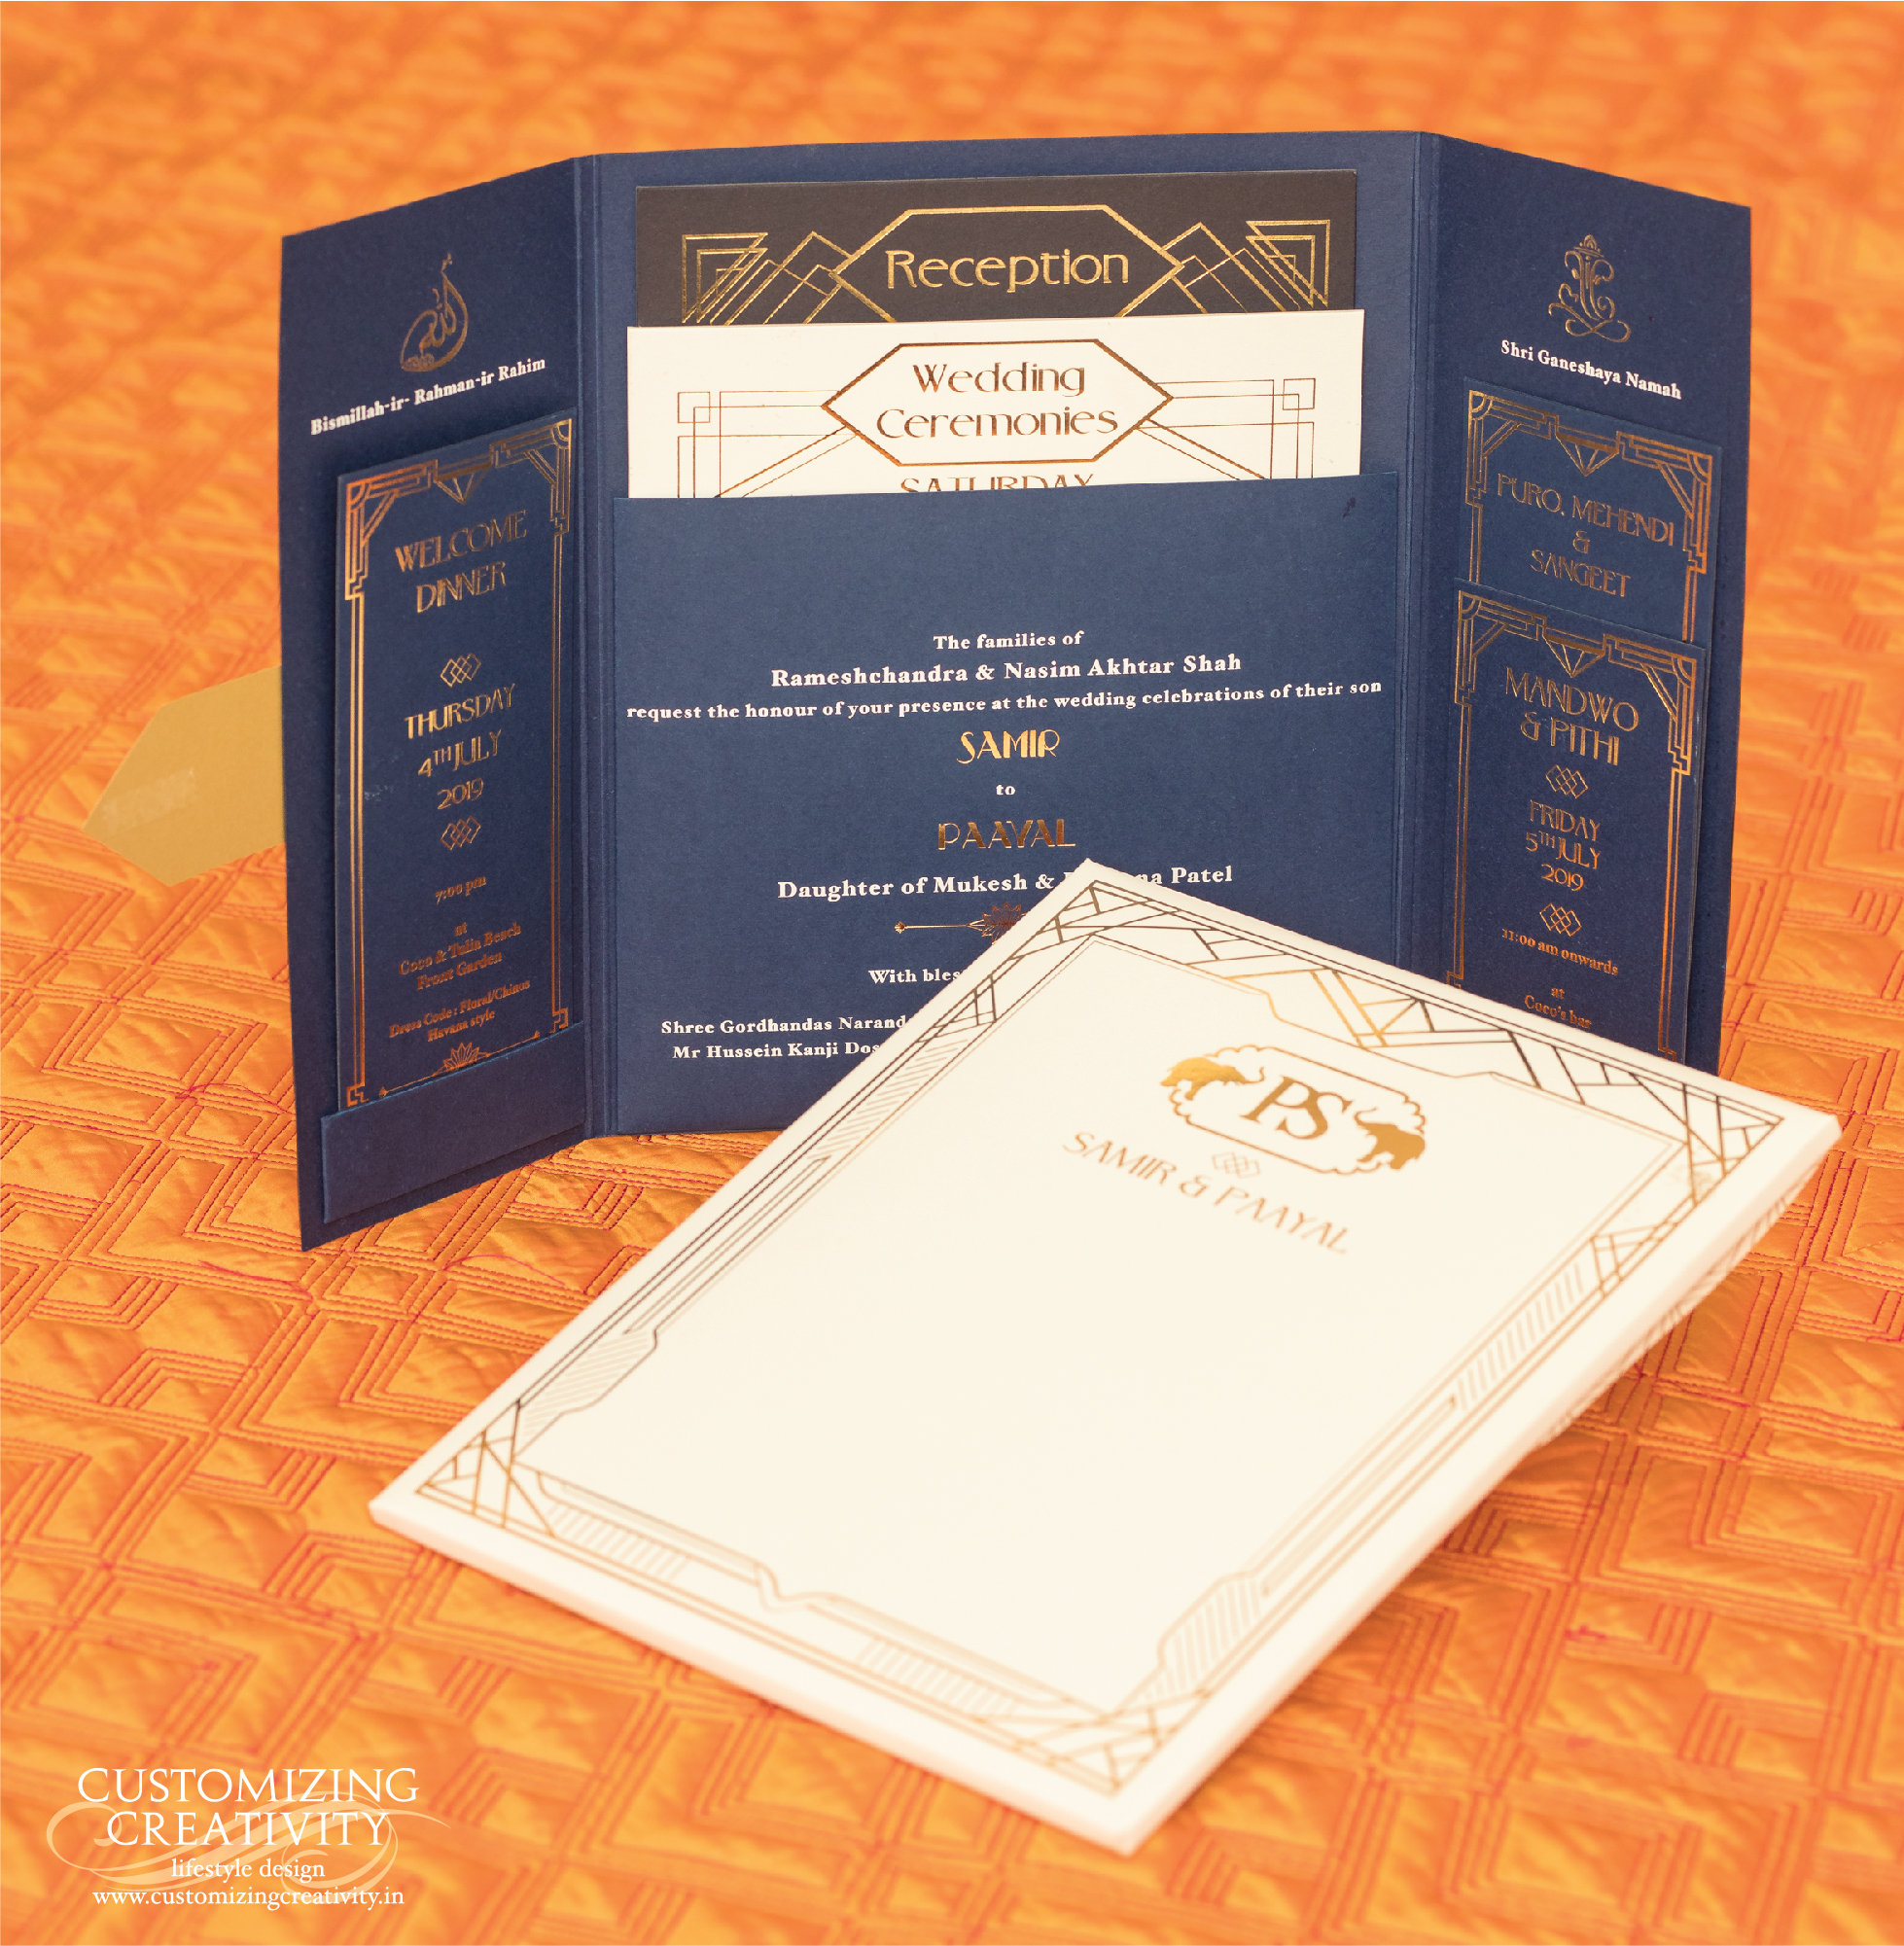
8) The book style (dreamy & vintage)

In this format, all your inserts are bound together in a book like structure, almost like a story book.
This is one of the most royal formats we use!

The only downside of the book style, is that, it does not give you the flexibility to make combinations of inserts, incase all your guests are not invited to each event / function.

And because of this, it is very popular with destination weddings, as every guest gets invited to every event, thus doing away with the management of multiple inserts.


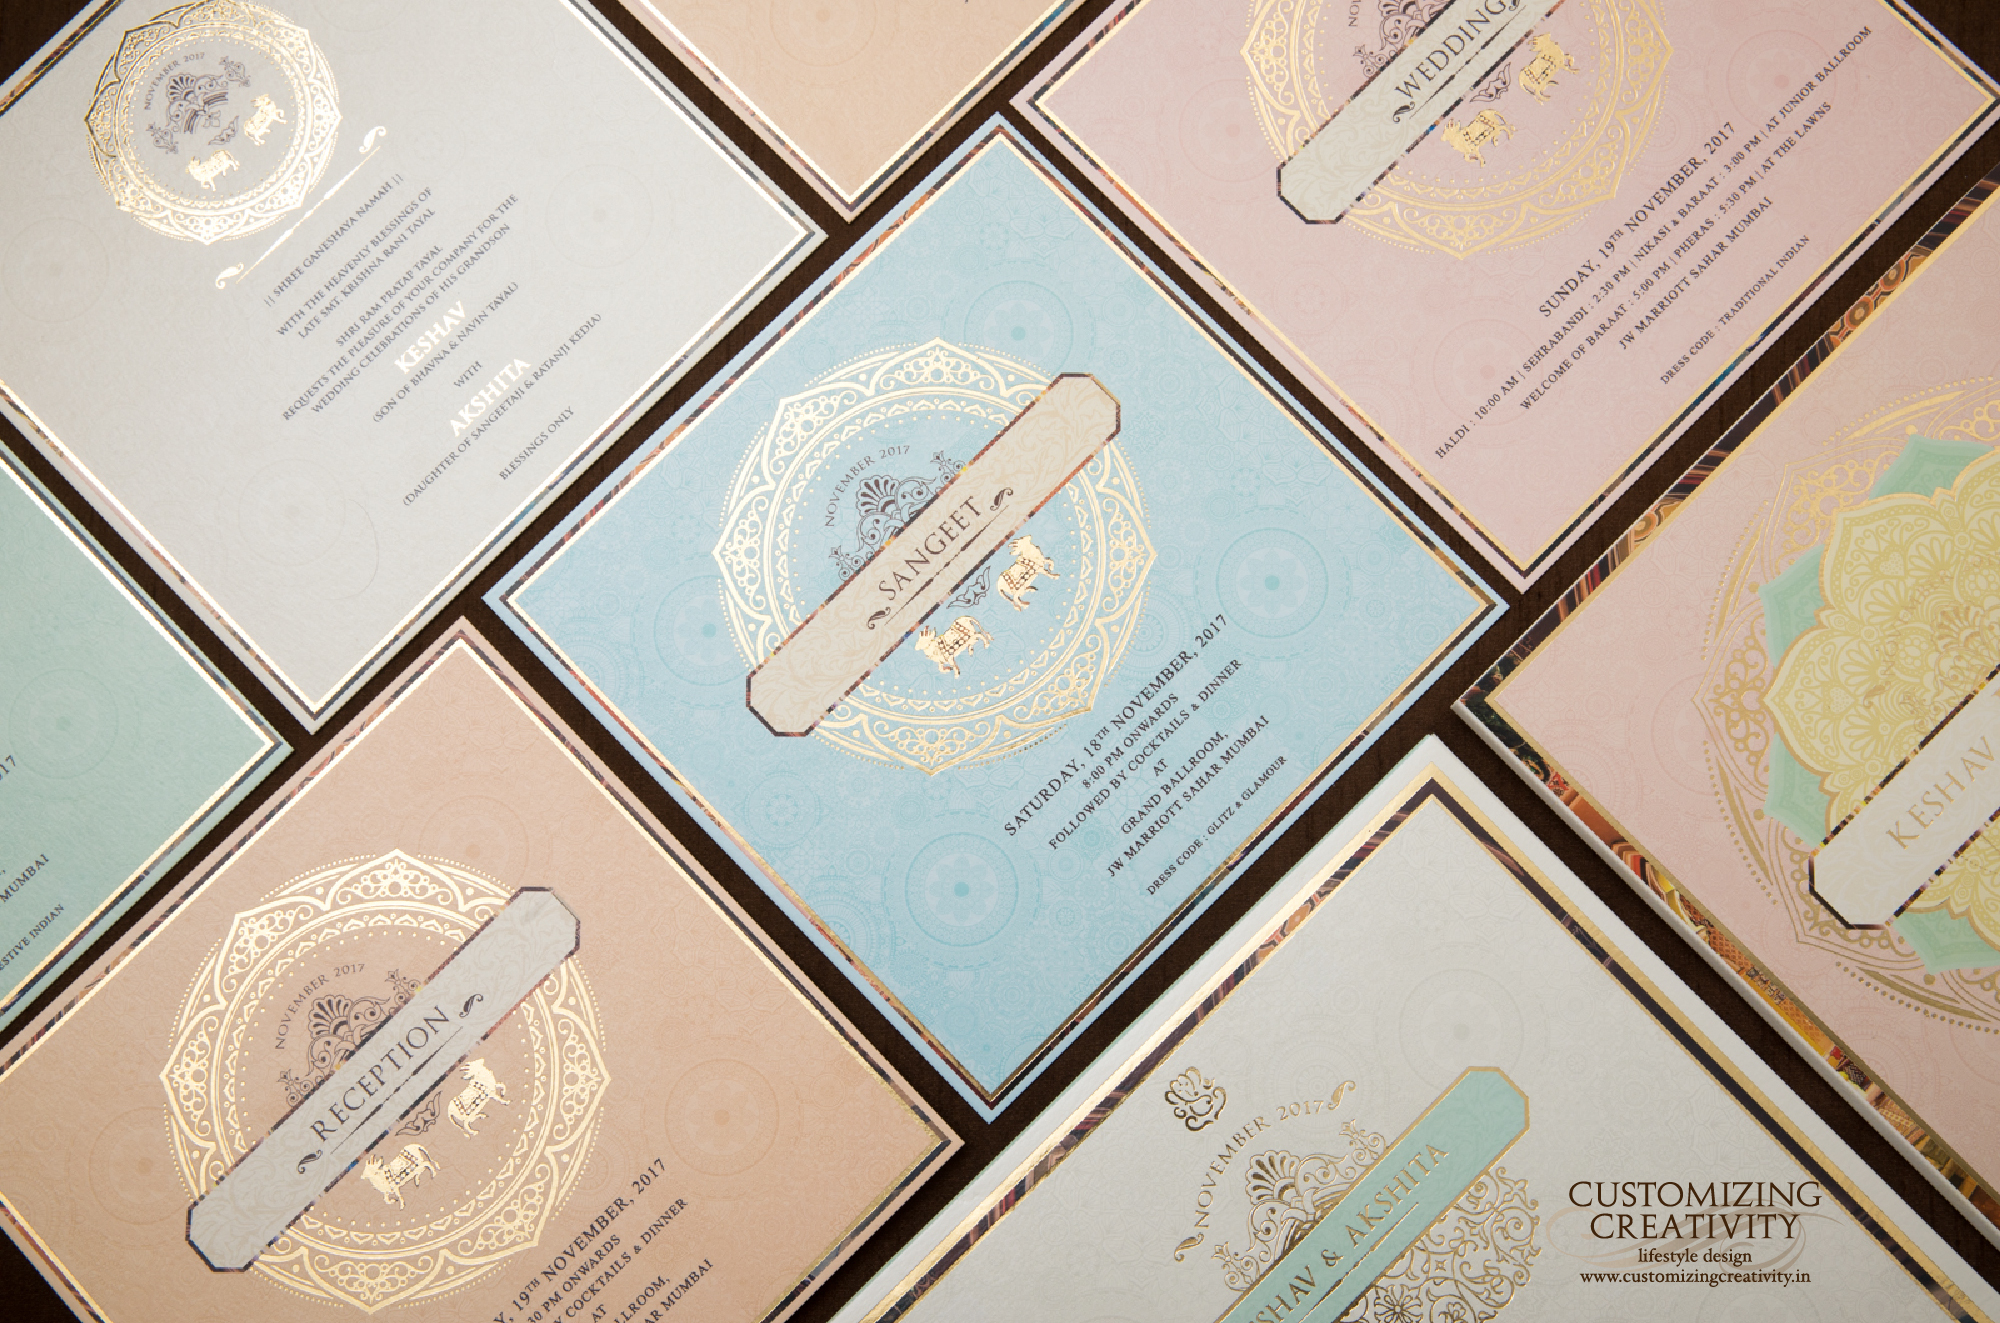
All of the above can have a spine to make it look like a box, a magnet, a wax seal, a monogram sticker, etc.

These variations make the card look interesting as well as fun.
But we are always looking to create new concepts & creative adaptions of the humble envelope!

Stay tuned for lots of new things coming up this wedding season!

#Protips :-

– The heavier the card, the more it will cost to courier or ship. So do keep that in mind while deciding on your format & paper thickness

– Make sure there is enough space to write your guest name & address on every envelope.

Should you have any feedback or want us to cover any particular topic, feel free to let us know!
We lovingly invite you to subscribe to our blog for upcoming articles & future blog posts.

For any further questions, we’re just an email away & we will try to help you resolve any queries you may have!

We can be reached on info@customizingcreativity.in

You can take a look at some of our latest work via these links :-
Website : www.customizingcreativity.in
Instagram handle : instagram.com/customizing_creativity
(don’t miss out on our IGTV series for further insight into this topic)
Facebook page : Facebook.com/dishamehtadesign

We’d love for you to #startyournewbeginningwithus

Until next time,
Disha & Harsh Munshaw
Customizing Creativity

Advertisement
August 13, 2019December 19, 2020 Customizing Creativity Tagged customized wedding cards, customized wedding invites, Indian wedding cards, Indian wedding invites, invitation cards, invitations, invite, personalized invitation cards, wedding announcement, wedding card design, wedding cards, Wedding Invitations, Wedding Invite design, wedding invites, wedding logo, Wedding monogram 1 Comment

5 factors that determine the cost of your wedding invitations and stationery!

Wedding Invitations
Wedding Invites, Wedding Invitations

Hey there!
Thank you so very much for being here with us today!
We’re so glad to see you reading this blog post which we have so lovingly put together for you! 🙂

You can go through our blog posts on various topics that will help you through the process of understanding every small detail that will make the entire process so much more easier for you.

Also do visit our ‘Etsy Shop‘ for DIY Save the dates, Invitations & Stationery Templates that are available for quick edits and instant downloads:

Please click here : https://www.etsy.com/in-en/shop/CustomizingDIY

We have listed them all down for you! 🙂

1) OUR TOP 5 FAQS TO CONSIDER BEFORE SETTING OUT TO DECIDING ON YOUR WEDDING MONOGRAM OR YOUR WEDDING LOGO

2) THINGS TO KEEP IN MIND BEFORE SENDING OUT YOUR SAVE THE DATE

3) THINGS TO KEEP IN MIND BEFORE APPROACHING YOUR INVITATION DESIGNER

4) HOW TO CREATE YOUR DESIGN BRIEF?

5) HOW TO CHOOSE THE RIGHT INVITATION DESIGNER FOR YOU?

6) ALL ABOUT WEDDING INVITATION AND STATIONERY TIMELINES

7) EVERYTHING YOU NEED TO KNOW ABOUT INVITATION PRINTING TECHNIQUES AND PROCESSES

So you may know exactly what you want in terms of design for your invitations, overall look & feel is clear & you may have even shortlisted your dream invitation designer!

Eventually, a lot of things boil down to the moolah!
It may be your “dream invitation” but you may still need to work around a realistic budget to make something beautiful just for you!

And today that is exactly what we’re going to be talking about!

All brides & grooms want everything! And why not?
But that doesn’t mean that we need to get into debt for our invitations!

There are a lot of factors that determine how much your invitation or stationery can cost.

Hence, we have put together a few insights that can help you get something you absolutely love, without breaking the bank!

Let’s begin!


Factor 1 : Your quantities

This one is super important for quoting.
Remember! For your Save the Dates or your invitations, you need to calculate your quantities based on the number of households you will be sending these, not as per your guest count.

For most Indian weddings, where we may have more than one event / function, we may also have a varying guest list – so even the number of inserts one may require for each event / function may vary & hence that may bring down or bring up your cost.

You may want to read through our blog post on what answers to have ready before meeting your invitation designer.


Factor 2 : Format of the invitation card

By this, what we mean is – the size, the layout, the opening style, the number of pieces in each set, etc.
A belly band, a four-fold envelope, a gate-fold jacket, an envelope-cum-folder, etc. – all of these are considered to be the formats of your invitation.
Also, a card with a box or a bag will surely cost more than one without – this is also considered as a format.

These above details determine the amount of paper (or any other material) to be used & the amount of printing to be done.

Hence it is a very very important part of the quote.

You can read through our blog post on how to create your design brief.


Factor 3 : Printing processes & techniques

Once your designs are ready, the printing processes you choose or the techniques that are required for that particular design have a big role to play in your costing!

Printing details like, the amount of foiling, embossing, letterpress, laminations, laser cutting, etc. are some of the most popular & widely used printing & post printing processes.

For example : An invitation with foiling is likely to cost much lesser than one which has a detailed laser cut design.

Read our blog post about various printing techniques used for invitations.


Factor 4 : Material of printing & its thickness

The base of your invitation could be paper, cardboard, fabric, wood, acrylic or any other material that forms the base of your printing.
This is again one of the main factors that the quote depends upon.

For example : An invitation printed on paper is likely to be more cost effective than one printed on wood or acrylic.

Not only the material, but also the thickness of the material affects the cost.

For example : A card that is 300 gsm stock paper versus a card which is 600 gsm stock paper will surely cost a lot lesser, without compromising your design on the front.


Factor 5 : Double side or Front & Back printing

This decision is mostly based on how much content you have and if it will fit best on one or two sides for each event.
Or it may not be the text, but you may want to have a design or artwork printed on the both sides of the card, which means double the printing – hence again, that could jump up your cost.

#Protips :-

– Decide on where to save & where to splurge on the printing, only once you have the design ready, so you have more clarity on which process will work best for it.

– Even if it is a little over your budget, printing techniques can make anything breathtakingly beautiful – it’s a really special touch. If it’s something you can swing, you definitely should.

You may have your heart set on something, and maybe you can’t get the same look or feel unless you’re going with foil, and while that is definitely pricier, we can find other things to cut down on.

Sometimes you have to make tough choices when it comes to your invitations & stationery, and it’s hard to know where to splurge and where to save.

Our goal is that, no matter what your budget, you should have beautiful invitations that perfectly reflect the mood of your event & your personal style!

Feel free to pick & choose what works best for you & your pocket – that’s always the bottom line!

Should you have any feedback or want us to cover any particular topic, feel free to let us know!
We lovingly invite you to subscribe to our blog for upcoming articles & future blog posts.

For any further questions, we’re just an email away & we will try to help you resolve any queries you may have!

We can be reached on info@customizingcreativity.in

You can take a look at some of our latest work via these links :-
Website : www.customizingcreativity.in
Instagram handle : instagram.com/customizing_creativity
(don’t miss out on our IGTV series for further insight into this topic)
Facebook page : Facebook.com/dishamehtadesign

We’d love for you to #startyournewbeginningwithus

Until next time,
Disha & Harsh Munshaw
Customizing Creativity

August 6, 2019May 6, 2020 Customizing Creativity Tagged customized wedding cards, customized wedding invites, Indian wedding cards, Indian wedding invites, invitation cards, invite, personalized invitation cards, wedding announcement, wedding card design, wedding cards, Wedding Invitations, Wedding Invite design, wedding invites, wedding logo, Wedding monogram Leave a comment

Everything you need to know about invitation printing techniques and processes

Wedding Invitations
Wedding Invites, Wedding cards, weddings, wedding, invites, invitation cards, indian wedding, wedding planning, wedding ideas, wedding inspiration

Hey!
We’re so glad to see you here again!
We love putting these posts together for all you lovely people & we’d like to thank you so very much for reading, enjoying & loving every bit of it! 🙂

Our goal is to educate and help you make decisions for your invitations (even if it’s not right then and there) with as little stress as possible & we sincerely hope that we’re being of service to you guys!

So, our topic for today is one of the most interesting & fun parts for your invitation design, and we’re really excited to give you all this information, that can help you!

The quality & types of printing details can totally make or break your look!
And in this post, we are going to go over the most commonly desired printing types for wedding stationery.

Hell yeah!! Printing processes can be pretty confusing.

We get a lot of questions about these differences, so we thought we would put together this handy guide for your reference. 

So, what is REALLY the difference between digital, letterpress, offset, foil, or any of the other options presented before you?

Let us help break it down for you in the most lay-man language, that is easy to understand.
Let’s get straight into it!

Also do visit our ‘Etsy Shop‘ for DIY Save the dates, Invitations & Stationery Templates that are available for quick edits and instant downloads:

Please click here : https://www.etsy.com/in-en/shop/CustomizingDIY


Screen Printing / Raise printing

Screen printing is a base printing technique whereby a mesh is used to transfer ink onto the material, except in areas made impermeable to the ink by a blocking stencil.

One color is printed at a time, so several screens can be used to produce a multicoloured image or design.
If the same artwork is printed over & over again multiple times, it gives a raised look & hence we would refer to it as raise printing, which is just a variation of screen printing.

Traditionally the process was called screen printing or silkscreen printing because silk was used in the process.

We normally would not recommend more than 3-4 colours for this process!
Screen printing, works really well for textured papers as well.

It is one of the most economical processes & works well for small as well as large quantities.

Works really well for : a matte look, keeping the texture of the paper intact, 2 tone patterns.

What you see in the below images is a solid colour along with gold printed on top of it.


Offset printing :

Offset printing is again a base printing technique where your inked image is transferred from a plate, to a rubber blanket, and then to your paper.
It allows for unlimited colours, and is perfect for when you want large sections of solid colour.

It does not disturb the surface of your paper, meaning your invitation will be flat and smooth. If you want a lot of colours in your design, and want the printing quality to be as high as possible, this is the option for you!

This process works well for a high quantity to avoid colour variations & also makes it cost effective.

Works really well for : layers of gradation, watercolours, ombre looks, florals , etc.


Digital printing :

Digital printing is the best option for those with lower quantities & again acts as a great base.

Digitally printed invitations are often printed using a colour laser printer, or an inkjet. The quality of the printer will be higher than what you can get at home, but the cost per piece is slightly more than offset printing, but it allows you the same level of flexibility that offset printing does.

That being said, you’d be surprised at what could be accomplished with choosing the right paper stocks, and we think it’s a great option for secondary cards – you can get all the bells and whistles on your invitation, and round out the suite with digitally printed cards.

Works really well for : layers of gradation, watercolours, ombre looks, florals, etc. but for a smaller quantity


Foiling :

Foil stamping is perfect for those who want to add a little bling to their invitations!
A heated die is stamped onto the metallic foil, making it adhere to your paper, leaving a shiny, solid impression.

Foil can be added over & above any of the printing methods discussed above – whether it is screen, offset or digital – foiling sits really well on all.

There are some beautiful metallic foil colours, for e.g. – rose gold, silver, bronze, pinks, blues!

It is one of the most popular process for invitations as it adds all the lovely festive vibe to the prints.
We are absolutely obsessed with foils & we use it in almost every card.

Works really well for : adding glitter / bling, to highlight details, festive look


Letterpress :

Letterpress is a printing technique dating back to the 1400s.
A print is made by ‘pressing’ an inked plate into paper, creating a deep impression in the paper, and providing a textured and classic feel for your wedding invitations.

We believe that letterpress adds a level and quality of craftsmanship that is hard to replicate, and once you hold a letterpress invitation in your hand, you’ll see what we’re talking about.

If you want your invitations to include gradients, photos, or designs with more than three colors, letterpress is not for you.

If you love texture & want something that feels very special, and have a limited color palette, you should consider letterpress printing.

Works really well for : textured papers, 3-dimensional feel, clean fonts


Embossing or de-bossing :

Have you ever run your hand over a print that has bumps and it almost pushed into or over the paper?

You almost can’t help but touch them; the raised relief is as appealing to your eye as it is to your fingertips.
Embossing has a similar effect. Embossing (and its opposite, debossing) are two techniques used to either impress or depress the design into paper.

These popular print effects are ideal for giving your print piece a fresh, contemporary look — and when combined with other base print techniques & effects like foil stamping, embossed designs can transform a great piece to a luxury one.

Works really well for : seamless patterns, highlighting motifs, 3-dimensional look

#Protips :

– Get an idea of all the kinds of printing your designer can offer, & try to mix & match them to add your personal style.

– Some designs do not need to much of printing detail. If so, try to keep it simple.

– Handmade papers / Seed papers do not make for great printing bases for all printing types. If you are using those papers, be sure to stick to 1-2 colour printing as the inks may blotch due to the nature of those papers.


There are many more printing methods like laser cutting, electro-plating, UV printing, etc., but the ones discussed above are most popular with our brides & grooms!

Hopefully this helps you get a better understanding of the various printing types out there.
You can mix & match printing types or keep it cohesive throughout all your functions & events.

If you need help choosing, the designer should be able to guide your decision and pick the best fit for your style & vision.

We know you don’t live in the same printing world as we do & it’s our job to help you figure out what you’re looking for with as little stress as possible.

The best part of hiring a custom stationer is that they are able to talk through it with you – so use them! 😃
We love it and will never steer you wrong. ❤️

Do you have any questions about other printing methodologies?
If so, leave us a comment, and we’ll do our best to answer your question!

Should you have any feedback or want us to cover any particular topic, feel free to let us know!
We lovingly invite you to subscribe to our blog for upcoming articles & future blog posts.

For any further questions, we’re just an email away & we will try to help you resolve any queries you may have!

We can be reached on info@customizingcreativity.in

You can take a look at some of our latest work via these links :-
Website : www.customizingcreativity.in
Instagram handle : instagram.com/customizing_creativity
(don’t miss out on our IGTV series for further insight into this topic)
Facebook page : Facebook.com/dishamehtadesign

We’d love for you to #startyournewbeginningwithus

Until next time,
Disha & Harsh Munshaw
Customizing Creativity

July 30, 2019May 6, 2020 Customizing Creativity Tagged customized wedding cards, customized wedding invites, Indian wedding cards, Indian wedding invites, invitation cards, invite, personalized invitation cards, wedding announcement, wedding card design, wedding cards, Wedding Invitations, Wedding Invite design, wedding invites, wedding logo, Wedding monogram 2 Comments

All about Wedding Invitation and Stationery timelines

Wedding Invitations
Wedding Invitation cards, wedding invites, save the date, wedding logos, Indian wedding invites, Indian wedding cards

Hey, thank you so much for being here with us today!

We couldn’t be happier to see you here with us each time, soaking up all this information & the details we delve in always!

We would sincerely like to thank you for your constant love & support!

So,
Are you unsure about when to order your wedding invitations & stationery?
or
When should your wedding invitations be mailed out?
or perhaps
Are you wondering on the ideal time to send out your thank you cards?

Worry not, as we have got all these questions covered for you here today!

We are always questioned on how many “months” in advance should the process begin, or how many “weeks” post the wedding shall we send out the thank you cards?

But we completely know & understand that these “ideal months” or “ideal weeks” may not work for every couple, especially with Indian weddings, where dates are sometimes fixed as close to 2 months prior to the actual wedding day! Yes guys, this does happen very often!

So today we’re going to take you through a stepwise flow where we have included for you a 11 steps sequential outline on what to begin with first & what to end with.

So let’s begin!

Also do visit our ‘Etsy Shop‘ for DIY Save the dates, Invitations & Stationery Templates that are available for quick edits and instant downloads:

Please click here : https://www.etsy.com/in-en/shop/CustomizingDIY


Step 1 : Get basic clarity on what you want to achieve for the overall look & feel

Having a bit of a vision or a mood board will save you the hassle of the back & forth, especially if you don’t have much time on hand.
Even if you do have the time, having a design brief makes things a lot easier for you as well as for the designer.

For further information on this, read our blog post on how to create your design brief.

Wedding Invitation cards, wedding invites, save the date, wedding logos, Indian wedding invites, Indian wedding cards


Step 2 : Meet your designer & get going with ideas & designs


Now that you know what you want to achieve in terms of overall look & feel, meeting the designer can get the ball rolling for you in terms of ideation & getting to know the designer’s thoughts as per your brief.

For further information on this, you may want to go through our blog posts on what answers to have ready before you meet your invitation designer & how to meet your dream invitation designer.

Wedding Invitation cards, wedding invites, save the date, wedding logos, Indian wedding invites, Indian wedding cards


Step 3 : Get cracking with the Save the Date & Wedding Monogram / Logo

As soon as you have decided the right invitation designer for you, begin working on the Save the Date or the Wedding monogram / logo if you need it.

This would ideally be your first step into putting ideas to paper & getting visuals & artworks on what the whole idea is shaping up like!

Read more about Save the Dates & Wedding monograms in our blog posts


Step 4 : Make your guest list

While your Save the Date & Wedding logo designs are underway, the best thing for you to do is to simultaneously work on your function-wise invitation guest-list.

This will not only prep you up on the number of invitations you need to print, but will guide you how many guests you need to courier or ship or e-mail invites to.

Once you have sent out your Save the Dates, your guests are likely to RSVP you & your list can further get crystallised.


Step 5 : Conceptualise your invitation cards

This is no doubt, the most stressful part for you & the families, but surely the most satisfying exercise at the end of the process!

Out of the box ideas, detailed sketches, going through various design options, paper textures, learning about all the printing techniques – it is all maybe overwhelming but also super exciting!

In tandem with your invitation designer begin working on designs & concepts and leave the creative thinking to the designer!

But in the process, make sure to work backwards on the timelines & as per when would you like to begin sending the cards out.


Step 6 : Start collecting addresses for emailing & mailing

While your cards are in process, you can make use of the time to collect e-mail addresses for the e-invitations & postal addresses for those cards that you are going to be shipping or couriering out – you are eventually going to need them for calligraphy or the address labels.

You may also need to make a separate calligraphy list, as you may choose not to get calligraphy done on every envelope! And that’s ok!

Also ensure, that you have address labels sorted along with the cards so you don’t have to waste time once the cards arrive.


Step 7: Wedding Card delivery!

Yayyy!! Ofcourse you’re totally excited!

There is absolutely no doubt that this is the most exciting & fun part of the whole process!
But soak it & then calm down!

Once your cards arrive there maybe some work you got to do.
For example, assembling of the cards, the calligraphy, revisiting your guest list, etc.- this is the best time to rope in some help from your family or friends & adds an even more of a personal touch to the whole process!


Step 8 : Get set go!
It’s time for the cards to go out!

Whatever your mode of sending maybe (mailing / shipping / hand delivery) – begin doing so as per your set timeline.
This is normally when the chunk of your work gets done & you can relax for a bit once you have sent out the cards.

Oh and wait! Get ready to receive some amazing compliments on your beautiful cards!


Step 9 : Reminders before your BIG DAY

Now that your cards have gone out, you should ideally get going with the rest of the stationery!

We highly recommend, that closer to your functions you should send out a reminder of sorts ( the same look & feel of the overall design should continue) or a brief letter about some vital information on the weather, to-do’s, accommodation, etc. that may not have been included in the main invitation card.

This can be done about 2 – 3 weeks prior to your events beginning.

It will not only serve as a recall, but will also get your guests looking forward to your functions!


Step 10 : Wedding Stationery

By wedding stationery we mean all the items that you may need at your events – welcome letters, itineraries, menu cards, gift bags, etc.

Just because this is required just before the wedding starts, do not wait till the end minute. The stationery requires you to be relaxed as it needs proof reading, to ensure that there are no errors.

Plan this in advance, as closer to your dates, you’re going to be super busy with last minute errands & may not leave you with enough time to look into the details of the stationery.


Step 11 : Sending out your thank you cards

Sending a cute thank you note post the wedding, is a beautiful gesture you can do for all your guests to truly thank them & let them know how much you loved having them on your big day – but there is absolutely no rush for this!

All your guests do understand that after one of the biggest events of your life, you are going to take time to get back to routine.

Once you are back from your honeymoon & are settling in, you can begin sending out your thank you cards.

#Protips :

– Be sure to include physical or digital RSVP cards/information in the main invitation set if you require them.

– Do not forget to add salutations to each name while making your guest list, as that will determine how their names will be printed on your address label or calligraphed on the envelope.

– Get your Thank you cards printed along with your main wedding cards, so you don’t have to worry about that post the wedding.

Our constant endeavour is to ensure that we’re easing out the whole wedding invitations & stationery process, so that it is all a breeze for YOU – we sincerely hope we’re being of help & are being able to guide you’ll in a way that you can enjoy every bit of it!

There is no right or wrong way of doing this, just do what you feel is right & don’t become a bridezilla over these things 🙂
Don’t rush it , take it easy & enjoy the process!

Should you have any feedback or want us to cover any particular topic, feel free to leave your comments below.
We lovingly invite you to subscribe to our blog for upcoming articles & future blog posts.

For any further questions, we’re just an email away & we will try to help you resolve any queries you may have!

We can be reached on info@customizingcreativity.in

You can take a look at some of our latest work via these links :-
Website : www.customizingcreativity.in
Instagram handle : instagram.com/customizing_creativity
(don’t miss out on our IGTV series for further insight into this topic)
Facebook page : Facebook.com/dishamehtadesign

We’d love for you to #startyournewbeginningwithus

Until next time,
Disha & Harsh Munshaw
Customizing Creativity

July 19, 2019May 6, 2020 Customizing Creativity Tagged customized wedding cards, customized wedding invites, Indian wedding cards, Indian wedding invites, invitation cards, invite, personalized invitation cards, wedding announcement, wedding card design, wedding cards, Wedding Invitations, Wedding Invite design, wedding invites, wedding logo, Wedding monogram 1 Comment

How to create your design brief?

Wedding Invitations
Wedding Invitation cards, wedding invites, save the date, wedding logos, Indian wedding invites, Indian wedding cards


With over a decade of experience in creating bespoke invitations, we have worked with over a 1000 families across the globe – with various cultures, backgrounds & age groups.

With this ocean of experience with us, every week, we curate for you, valuable information you may need to help you create your dream invitation!

We have always aimed at bringing you’ll insights to make your invitation process simpler & easier only for you!

Like always, we’d like to thank you’ll from the bottom of our hearts for being here with us today!

What we’re going to talk about in this blog post, is a very important part before you begin the designing process – & that is how to create your design brief?
What we mean by this, is essentially the look & feel, the vision, the mood board & the aesthetics you’d like to reflect in the overall design.

Having a little bit of clarity on the above helps you as well as the invitation designer to channelise the process, especially if your card needs customisation from scratch!

Once you’ve figured out the technical bit – your numbers, your quantities, your guest list, etc. – it is at this stage we feel, where a lot of families, brides & grooms tend to get a bit stuck.

So today we’re going to take you through some steps / guidelines that can help you create an outline design brief.

Also do visit our ‘Etsy Shop‘ for DIY Save the dates, Invitations & Stationery Templates that are available for quick edits and instant downloads:

Please click here : https://www.etsy.com/in-en/shop/CustomizingDIY


1) What is the overall look & feel you’d like to achieve for your invitation & wedding stationery?

Visualise the vibe! You may want to reflect a casual / formal / fun / quirky / royal feel.
This would also depend on the overall mood of the wedding.

While concluding on this, you may want to keep your destination / venue in mind too as that too could be used as a design inspiration.

See some examples below :-

  • This invitation is royally themed around the destination of the wedding, Udaipur, Rajasthan, which took place at a palace and that is where the design inspiration came from.
  • This tropical vibe was for a wedding in Cancun, Mexico.


2) Do you have a specific colour palette for your functions?

The colour palette you choose for each event (or it can be a common one that can be carried throughout the wedding), will set the mood for your invitation.

You can brain storm with your wedding planner or decor consultant to work around it & you can give this input as a part of your brief to tie it in with your wedding card.

See an example below :-

  • This is an example of a pastel colour palette


3) What are the things that are absolutely YOU?

Look around you!

What are the things that inspire you?
Things that tell your story as a couple?
What reflects your personalities?

It could be an experience, your favourite cafe, the city you’ll met in, your favourite travels, etc. Try using these elements that define you for an extremely customised look.

By doing this, you’ll not only tell your story to your guests, but also create something really close to your heart that you can admire for the rest of your life!


4) What are the things you don’t want at all?

At times, it maybe be difficult for you to spell out what you exactly want, as you may like a lot of things & it can get confusing!
But you can use the elimination process & figure things that you don’t particularly love – it could be a colour, a font, an element you don’t like very much!

Sometime it is simpler to point out things that you are not fond instead of things you are fond of!

This makes it easier for you & the designer to stay away from these things & use other ideas that you may like.


5) Create a moodboard

By this, we don’t necessarily mean having images of other cards – it could be an inspiration of decor ideas, a home ware store you love, a fashion designer you like, a piece of art that inspires you, a print you spotted on your travel, a scene from your favourite movie – it could be just about ANYTHING that you can add in as your design brief.

It’s just enough so that the designer can gauge what you like – it is the designer’s job to see what best can be used from that as a design inspiration for your stationery.

See examples below :-


The more you see, the more you’ll know what you like & what you don’t.
Pinterest serves as a great inspiration tool.
You can take cues to help you create your mood board & understand how other brides & grooms have themed their wedding decor & colours.

So this should be pretty much the information you should have for your design brief – it is really a great spot for you to visualise the overall look & feel.

But yes, we definitely recommend not to be too fixated with what you have in mind, as it may curb & restrict the vision of the creator.

#Protips

– Don’t get into too much detail of the brief, it will hamper the freshness & surprise element from the designer.

– Sometimes, having no clue on what you want, may also be a great approach – the final outcome will pleasantly surprise you.

We sincerely hope we are being of service & of enough help so that you can have a wonderful experience during the whole process!

Should you have any feedback or want us to cover any particular topic, feel free to leave your comments below.
We lovingly invite you to subscribe to our blog for upcoming articles & future blog posts.

For any further questions, we’re just an email away & we will try to help you resolve any queries you may have!

We can be reached on info@customizingcreativity.in

You can take a look at some of our latest work via these links :-
Website : www.customizingcreativity.in
Instagram handle : instagram.com/customizing_creativity
(don’t miss out on our IGTV series for further insight into this topic)
Facebook page : Facebook.com/dishamehtadesign

We’d love for you to #startyournewbeginningwithus

Until next time,
Disha & Harsh Munshaw
Customizing Creativity

July 1, 2019May 6, 2020 Customizing Creativity Tagged customized wedding cards, customized wedding invites, Design, Indian wedding cards, Indian wedding invites, invitation cards, invite, personalized invitation cards, wedding announcement, wedding cards, Wedding Invitations, wedding invites, wedding logo, Wedding monogram 4 Comments

Things to keep in mind before sending out your Save the Date

Save the date
Wedding Invitation
Save the date
Wedding Invite design

Hello dear!

We’re so grateful for all your love & likes! We couldn’t be happier that you’re here with us today! 🙂

Every bride & groom these days, do send out a Save the Date for their wedding!
It’s almost like a “MUST DO” given today’s social commitments!

But you may wonder – Where do I begin?

You may have loads of questions / doubts! We too, very often get asked some of these!

– How early should I send them out?
– What information do I need to put on them?
– Do I need to have my wedding logo on it?

So on & so forth…

If you’re in a similar fix, then this blog post is here to answer all those questions… & not only that – we also draw your attention to some areas, where brides & grooms tend to miss out on!

Nonetheless, because there is a so-called ‘etiquette’ expected, it does NOT mean that you need to do things in that same way.

So, please take the below as a guide for NOT the only way to do things.

Also do visit our ‘Etsy Shop‘ for DIY Save the dates, Invitations & Stationery Templates that are available for quick edits and instant downloads:

Please click here : https://www.etsy.com/in-en/shop/CustomizingDIY

Ok, here we go…

1) Sending them too early or too late

Most of the times, once the dates or venues are confirmed, couples are always in a rush to send their Save the Date. And this is very natural!

Whether you’re sending printed copies or E-versions, it is of crucial importance to get the timing right – especially if your wedding date is a very auspicious / popular one, with too many weddings taking place in and around the same day.

8-10 months prior to the wedding date is perfect for a home city wedding.

10-12 months in prior is ideal for destination weddings.

If you send it way too much in advance, your guests may tend to forget your dates.

Sending out your Save the Date way too late, will lose its charm – there are high chances that some of your guests may have already committed to other travels or weddings.

Advertisements

2) Waiting to decide your wedding monogram / logo

Like we mentioned above, most families want to send out the Save the Date as soon as the dates & venues are confirmed.

The downside of this is that, you may not have enough time to think through or look at enough options for the wedding monogram / logo – at this point in time, all you want to ideally do is, get the Save the Date out!

There is no rule or compulsion that your logo or monogram HAS to come in your Save the Date. Even without it, the design can look really pretty & complete.

Take a look at the example below :

Save the date
wedding invite

The monogram or logo can totally wait until you are super happy with it – & it can be the BIG REVEAL in your wedding card.

You can also read our detailed article on 5 questions to ask yourself before deciding on your Wedding Monogram or Wedding Logo

3) Overthinking your design

Who would not love to match everything from their Save the Date, to their wedding card, to their stationery – for it to all look amazingly coordinated & cohesive?

Although, in hope of the above, if you spend too much sweat on design nitty-gritties or in foreseeing how it will look in the cards & stationery – you’re in for waste of precious time!

It doesn’t mean that you send out something incomplete / amateur & of course it should be something you love – all that we’re trying to say is that don’t overthink it & spend oodles of time by making edits to it!

Instead, you can be creative & quick to use something that you may already have on hand :
– Show of your photographs.
– Make a cute video created on your story.
– A timeline with fun-facts about you guys.
– Create a fun game / engaging puzzle to make it interactive.

Basically, do something quirky & catchy, as you may not be able to do in the “formal” wedding invitation. Make it ALL ABOUT YOU!

Take a look at the example below :

Save the date
Wedding invite

The above options can really make your Save the Date stand out! Oh, and be sure to score full points for your out-of-the-box idea!

4) Giving too much information

If you go through our previous blog post  & our IGTV series, we talk about the kind of information that needs to go on a Save the Date.

We’re summarizing it for you below :

1) Wedding monogram / logo (only if you are 100% sure about it).
2) The couple’s names.
3) The location of the wedding : the name of the city is good enough.
4) The date(s) of the wedding.
5) RSVP detail(s) : number / email address / website / date of RSVP.
6) Hashtag (only if you are 100% sure about it).
7) Parents’ names / family name.
8) Footer : formal invitation to follow
.

You don’t need to mention all of the above information, (you can pick what suits you most) as long as the matter is crisp, neat & in a bullet point like format, just enough to get the message across – it should be perfect!

Take a look at the example below :

Save the date
wedding invite

Information that can be skipped :

– Flowery language
– Hotel / venue details
– Name of the functions
– Timings
– Dress Code
– Family tree
– Company details

All of these are to be kept for the main wedding invitation.

As you can see in all the Save the Date examples above, the couple has chosen to give the information that works for them. Do not hesitate to pick & choose as per your requirement.

5) Being unclear about your function-wise guest list

This point is very important, as a lot of us tend to go haywire here – specially the older generation! The parents or grandparents are always super excited about sending out (forwarding) the Save the Date to everyone in their contact list, without making a function-wise guest list (ouch!).

In most Indian / South Asian weddings, there are chances that you likely have multiple functions & it is not necessary that all your guests will be invited to each & every one of them.

You will, most probably, have minimum guests for your intimate affairs.
The number of attendees gradually increases depending on the fan-fare of the event.
Your maximum attendees are likely to be invited for your biggest event, i.e. – maybe the Wedding or the Reception.
This happens mainly in home city weddings with a large numbers of invitees.

Yes, when it comes to destination weddings, all your guests, most likely, will be attending every function!

Irrespective of the above, when it comes to sending out your E-Save the Date, ensure that you have separate artworks created with different dates & combinations so you can easily mail it / forward it out as per your pre-prepared guest list.

If you are sending physically printed Save the Dates, you should ideally send it out to only those who are invited to every event (you need not make prints with separate dates, as that might cost you a fortune). You can choose to send the E-copies to those who are invited only for a part of the events.

Also, it can look really bad on your part or the family’s part, if you send a Save the Date to a guest for a particular function & then not follow it up with the main wedding card!

Advertisements

6) Sending your Save the Date in holiday season

Well, we live in an age of junk mails & bulk forwards, especially during the festive season! Mail boxes, e-mail inboxes, messaging app groups & cell-phones are spammed with all sorts of greetings & to be honest absolutely no one is interested in looking at them – let alone replying to them!

There is no way your Save the Date (irrespective of whether it is a hard copy or an E-invite) will stand out in this chaos & for all you know it might get trashed / marked as junk! It can go unnoticed by many of your guests & the whole exercise might be futile!

Be it Diwali, Ganpati, Navratri, Easter, Thanksgiving, Christmas, New Year’s – as much as you might want your guests to receive your Save the Date on an auspicious day, all your effort may go in vain!

Oh and, if you’re expecting an RSVP! Phew…. ‘Tis holiday time people!

7) Not having a message in the body copy of the artwork / image.

This mainly applies to those who are sending out E-Save the Dates.

If you are likely to forward the artwork via e-mail or a messaging app, please ensure to write a little bit about what the message contains – this is irrespective of whether you are sending it out personally or on a group.

For example :

Dear friends & family,
We’re so glad to announce our wedding dates! We look forward to seeing you at the celebrations!

OR

Dear XYZ,
We cordially invite you & request you to Save the Date for the wedding of A & B!
We look forward to welcoming you at the festivities!

This will alert the receiver that it is not a generic forwarded message or image, & will take the effort to open it up.

8) Sending it in a format that does not open on all devices

This is applicable for E-versions only.

Whether you are sending a still image, a video, a GIF be sure to have the file in a format that can be viewed on all kinds of devices.

Also keep in mind, one that is not too heavy in MBs for it to load on cell-phones or e-mails.

This is one of the main reasons, why some Save the Dates do go unnoticed.

#Protips for E-verions :

– Do make sure to use legible fonts so the guests need not zoom in too much to view the details.

– We highly recommend you use a vertical orientation if the artwork allows it – it looks great on cell-phones as well as on e-mails, & also allows enough breathing space for the design.

– If you are using photographs, refrain from using low-resolution images or ones that are clicked from a phone. It can look pixelated / blurred & that’s the last thing you want!

– Keep in mind the date by which you’d like your guests to RSVP you, & back calculate with enough buffer time.

#Protips for physical copies :

– If you are using photographs, refrain from using low-resolution images or ones that are clicked from a phone. It can look pixelated / blurred & that’s the last thing you want!

– Keep in mind the date by which you’d like your guests to RSVP you, & back calculate with enough buffer time.


– Ensure that your envelope has a return address printed, so that your RSVP can come back to you correctly.

The above mentioned guidelines are mere indications of what we feel works best!

As you can tell, we don’t believe that there’s only one right way of doing things. We’ve attempted to address common short-falls, but please feel free, to disregard it all.
We’re all for doing YOUR WEDDING, YOUR WAY!

While the whole invitation process can be quite daunting, our constant endeavour is to always ensure that we can make it extremely easy & comfortable for all of you.
And this is our way of doing our bit!

We hope we have been helpful & informative!

Should you have any feedback or want us to cover any particular topic, feel free to leave your comments below.
We lovingly invite you to subscribe to our blog for upcoming articles & future blog posts.

For any further questions, we’re just an email away & we will try to help you resolve any queries you may have!

We can be reached on info@customizingcreativity.in

You can take a look at some of our latest work via these links :-
Website : www.customizingcreativity.in
Instagram handle : instagram.com/customizing_creativity (don’t miss out on our IGTV series for further insight into this topic)
Facebook page : Facebook.com/dishamehtadesign

We’d love for you to #startyournewbeginningwithus

Until next time,
Disha & Harsh Munshaw
Customizing Creativity

June 14, 2019May 6, 2020 Customizing Creativity Tagged Indian wedding cards, Indian wedding invites, invitation cards, invite, Save the date, wedding announcement, wedding cards, Wedding Invitations, wedding invites, wedding logo, Wedding monogram 3 Comments

Our top 5 FAQs to consider before setting out to deciding on your wedding monogram or your wedding logo

Wedding Monograms & Logos

First & foremost, we would like to extend a big big THANK YOU for always being with us – this is our very first blog post & we couldn’t be happier that you are here as we embark on this journey! We’re super excited!

Customizing Creativity is in it’s 10th year & this definitely would not have happened without your endless love & rock-solid support!
We truly & humbly appreciate each & every bit of it!

Coming to the point – We know you are reading this to make your wedding monogram & logo one that you are going to love & live with for the rest of your life!

So let’s dive right in!

To begin with, let us give you an idea on what is the basic difference between
a wedding monogram v/s a wedding logo!

Yes! There is a difference!

Read on further to know what we mean so you can ace your lingo even before you get to it!

Also do visit our ‘Etsy Shop‘ for DIY Invitations & Stationery Templates that are available for quick edits and instant downloads:

Please click here : https://www.etsy.com/in-en/shop/CustomizingDIY

WEDDING MONOGRAM

When we say monogram, it is essentially the initials of the couple in a stylised, intertwined, cursive, classic or simplistic manner.

You can go through the examples below :

WEDDING LOGO

When we say wedding logo, it means the entire look or “the brand” or “the identity” created for the couple along with all the paraphernalia i.e. the couple’s name, a design element around it, a crest, maybe the date / month / year of the wedding or sometimes even the destination. Your hashtag could be a fun thing to add in too. Ofcourse, your monogram can very much be a part of it as well!

You can go through the examples below :

Sometimes a couple may not choose to have a monogram at all as a part of their wedding logo, but can still choose to go ahead with the other elements & it still looks complete.

You can go through the examples below :

Whereas at times, just the initials along with a bit of a design element around it, could just do the trick!

You can go through the examples below :

You need not have something really elaborate or ornate – a simple one can be just right, as long as you love it!

There have been times when couples just cannot make up their minds on what they want or are simply very confused!

Fret not! It’s absolutely normal – you are not the only one!

Hence, we’re here to help 🙂

You may ask – Why do we need to have a monogram or a logo at all?

This is a very basic question we come across each time & a very valid one too!

It’s really simple!

Creating an identity along with all or any of the above elements makes it really seamless & extremely easy for your guests to identify with your wedding festivities – all the more when they will see it being repeated in each & every correspondence starting from the save the date, the wedding cards, the emails, the reminders & even the rest of the stationery!

We get asked so many questions on this topic every now & then & so we have shortlisted our top 5 for you!

Before deciding on what you like, you may want to consider asking yourself these FAQs to make things easier for you!

1) Do I like the idea of having initials?

Some couples love the idea of their initials designed in an artistic manner & one that will be with them for the rest of their lives, while there are some who absolutely abhor the whole concept of it & are very anti-monogram!

For starters, identify which category you fall in.

2) If I do, do our initials go well together or sound funny together?

At times, even after looking at n-number of options, the initials aesthetically just don’t seem to gel well together! And that’s ok! You don’t have to force yourself to like something!

Sometimes, even if you may want a monogram, it can just look or sound odd.

For example : S & U, P & O, I & T

3) What if I don’t want initials at all?

If you totally detest the idea of a monogram, that’s absolutely fine!

Sometimes a couple may not choose to have a monogram at all as a part of their wedding logo, but can still choose to have ornate elements around & it looks equally beautiful & complete. You can take a look at the images above to get a better idea.

4) Will I be making any wedding stationery that will require the monogram / logo to be continued?

The whole idea of putting time & effort in creating a monogram or a logo is so that you can try and use it as much as possible in the rest of your stationery as well – luggage tags, menu cards, seating chart, gift bags, thank you tags, itineraries, key cards, ribbons, tissues, coasters, etc. – it can be never ending!

If you are eventually going to need some of these collaterals, you should definitely create an identity so that it makes life a lot easier logistically & is also helpful identification for all your guests, venues & vendors.

In this case, make sure your logo is readable in all sizes & one that can be smoothly adapted in all printable versions!

If the bride & the groom choose to have different logos, (yes, that also happens quite often) come to a consensus amongst yourselves as to whose logo will be used on the stationery.

5) Where else am I going to use the monogram / logo in my wedding?

This is the best part of having a monogram / logo – it is one of the most versatile elements that can be carried forward!

You can use it pretty much everywhere – in your décor, gifting, florals, backdrops, cutouts, stage setups, laser lights, the list can go on!

If you intend to do so, please see to it that the logo is bold enough (not too curvy or delicate) so that it is easy to read from afar.

#ProTip : Please! Please! Please make sure to get the open file of the monogram / logo artwork as well as the font files from your designer in formats (Cdr / Ai / PDF / PSD / PNG) that are easy to use & easy to edit in size & colour so that none of your vendors complain about it being too pixelated / too small / too thin. A distorted / blurred logo or a mismatched font is the last thing you want to use!

We hope we’ve been informative enough, helpful enough & insightful enough!

For any further questions, we’re just an email away & we will try to help you resolve any queries you may have!

We can be reached on info@customizingcreativity.in

You can take a look at some of our latest work via these links :-
Website : www.customizingcreativity.in
Instagram handle : instagram.com/customizing_creativity (don’t miss out on our IGTV series for further insight into this topic)
Facebook page : Facebook.com/dishamehtadesign

#startyournewbeginningwithus

Until next time,
Disha & Harsh Munshaw
Customizing Creativity

June 6, 2019May 6, 2020 Customizing Creativity Tagged Indian wedding cards, Indian wedding invites, invitation cards, wedding cards, Wedding Invitations, wedding invites, wedding logo, Wedding monogram 4 Comments
Widgets

Recent Posts

  • Wedding invitation wordings decoded!!
  • Free Wedding Postponement announcement
  • Quarantined bride-to-be / groom-to-be? Here are the things you can get done for your invitations!
  • A glossary of all the MUST KNOW invitation lingo!
  • Know everything about various formats and structures for your invitations!

Recent Comments

Dee on Free Wedding Postponement…
Nikki Kothari on Wedding invitation wordings…
Sakshi Jogani on Quarantined bride-to-be / groo…
Payal on Wedding invitation wordings…
Aditi on Wedding invitation wordings…

Archives

  • May 2020
  • April 2020
  • November 2019
  • August 2019
  • July 2019
  • June 2019

Categories

  • Save the date
  • Wedding Invitations
  • Wedding Monograms & Logos

Follow Us

  • Instagram
Website Built with WordPress.com.
  • Follow Following
    • Customizing Creativity Blog
    • Already have a WordPress.com account? Log in now.
    • Customizing Creativity Blog
    • Customize
    • Follow Following
    • Sign up
    • Log in
    • Report this content
    • View site in Reader
    • Manage subscriptions
    • Collapse this bar
 

Loading Comments...